Not even two years on a mountain bike and the sport has already infused itself into my life. My first build was a trail “P1” carbon frame from the Chinese manufacturer, iCan and I have had nothing but good things to say about the frame and the build. Before I knew it, I had myself a Nukeproof Dissent 297 (mullet) downhill bike… which, retrospectively, was a purchase that likely happened prematurely now that I’ve already been injured a handful of times riding the DH parks… beyond my skill level… at least that’s what my ego is telling me. Crash 1.0 ended in a very badly sprained ankle (I did keep riding after taping it up but it took months to fully heal). Crash 2.0 netted a grade-2 separated shoulder on the last outing of the 2022 season. Crash 3.0, on day one of the following season and the first downhill ride after crash 2.0, landed me in the ER with six breaks on five ribs, a punctured lung, and a shattered collarbone (I’m writing this post nearly three months after the crash and am still healing… although I’m probably 99% good to go).

I’m sharing the above not to brag but to say that even after all that I’ve been through since October of 2021, my wife still wanted to get out on the trail with me and needed a bike. Parallel to my wife’s desire to get on the trail, my buddy Jason, who’s been riding with me since day one and has been there for crashes 1.0 through 3.0, was also looking to build a new bike. His current, Cannondale hardtail trail bike was a great entry-level bike but did nothing for him at the downhill parks and often slowed him down on the more challenging trails, pushing him to consider an Enduro bike for the trails and the parks. I was happy to agree to build Jason’s new Enduro but my new main focus was getting my wife set up and on the trails.
After successfully sourcing a frame and most of the parts from China for my iCan build (stem, forks, shock, handlebars, and various other parts were sourced from the US), I felt pretty confident that I could do the same, not only for my wife’s build but for Jason’s build as well. We agreed to source parts for both bikes via AliExpress but decided it was best for Jason and me to buy the frames separately. For my wife’s build, I wanted to go with a lightweight, less expensive cross-country frame, whereas Jason was looking at iCan’s P9 Enduro frame. For my wife’s build, I finally settled on the 15.5 (small) Myst frame by Lexon. It was affordable, available, carbon fiber, full suspension, and small enough for my wife (5′-1″ / 155cm) and my daughter (5′-5″ / 165cm) to both use. However, like anything on AliExpres, you really have to do your research on the products you intended to purchase to understand if, first, the reviews were real and legitimate, and second, what the legit reviews were saying. You often need to read between the lines and make sure that some of the more important aspects are considered. In the case of my wife’s bike, the geometry needed to be right for trail riding, the frame needed to be lightweight, and it needed to be affordable because my budget for the bike was sub $2,000 (assuming good components). With that said, there weren’t a ton of reviews for the Myst frame but Lexon does have a very large line of bikes and the reviews overall were respectable and so I rolled the dice.
The Frame:
So with the backstory behind us, let’s focus on the frame for a bit. I do have some first impressions that I’d like to share for anyone shopping or doing their research but before I do, let’s quickly touch on the manufacturer, Lexon.
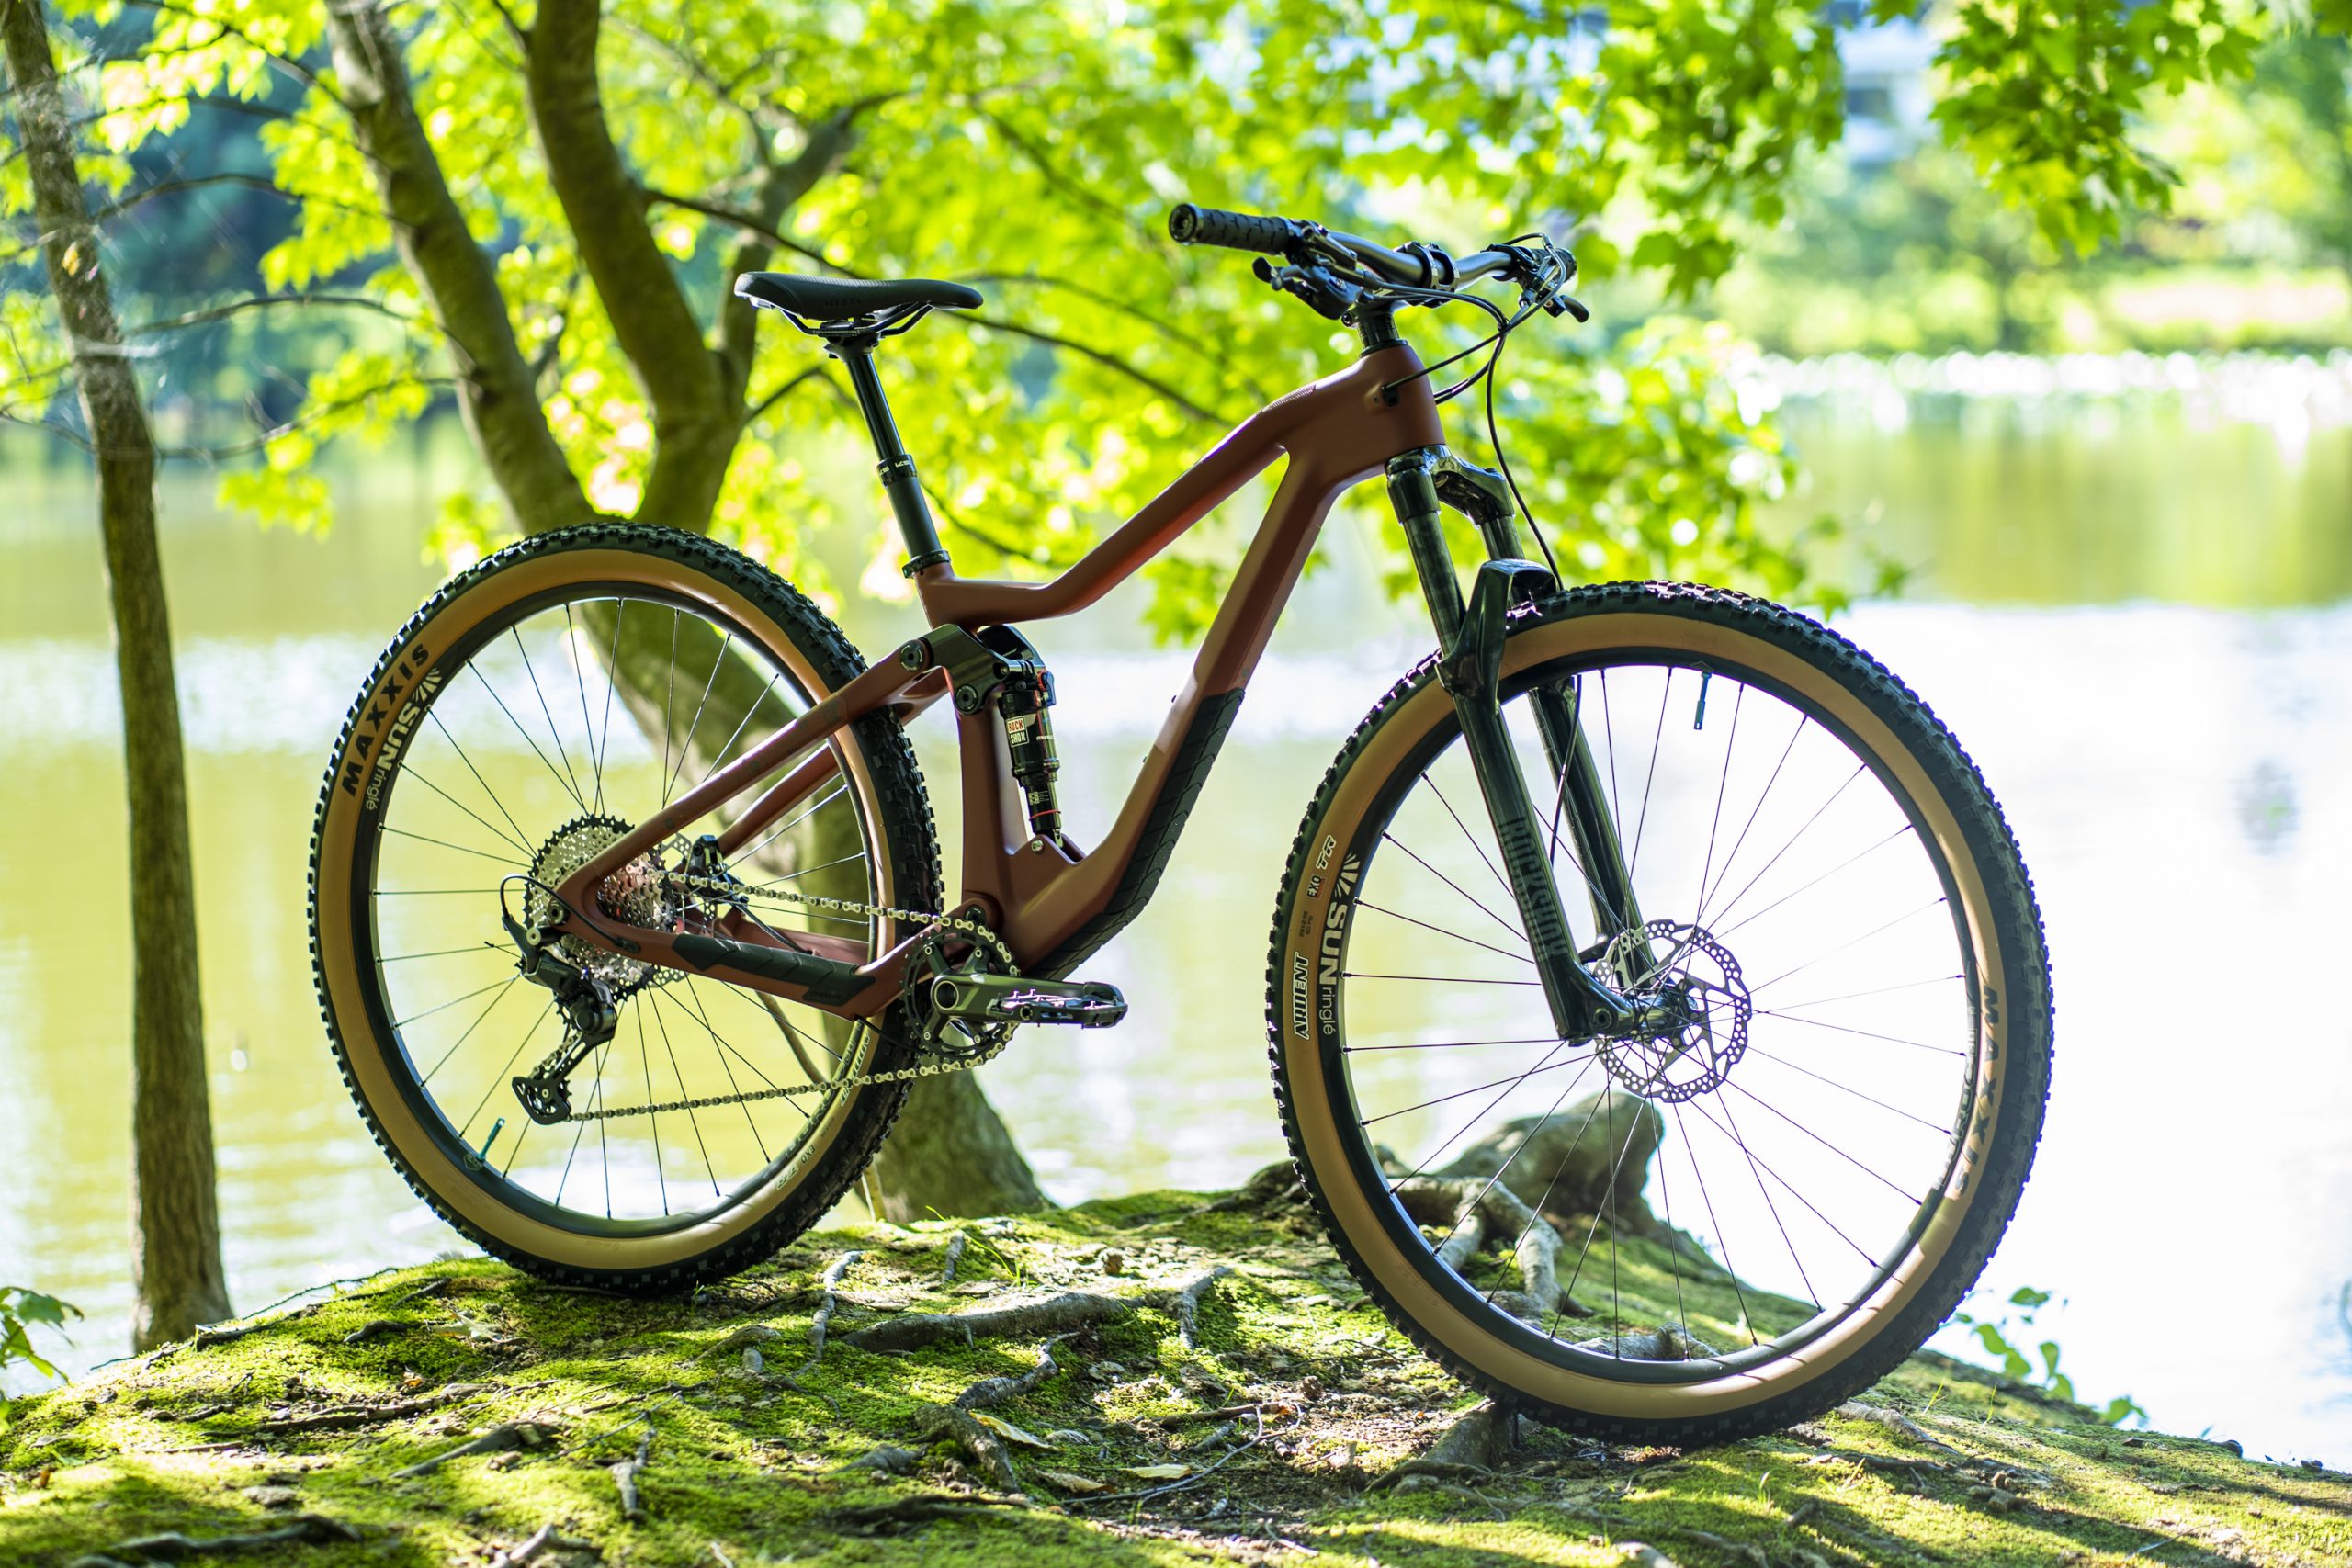
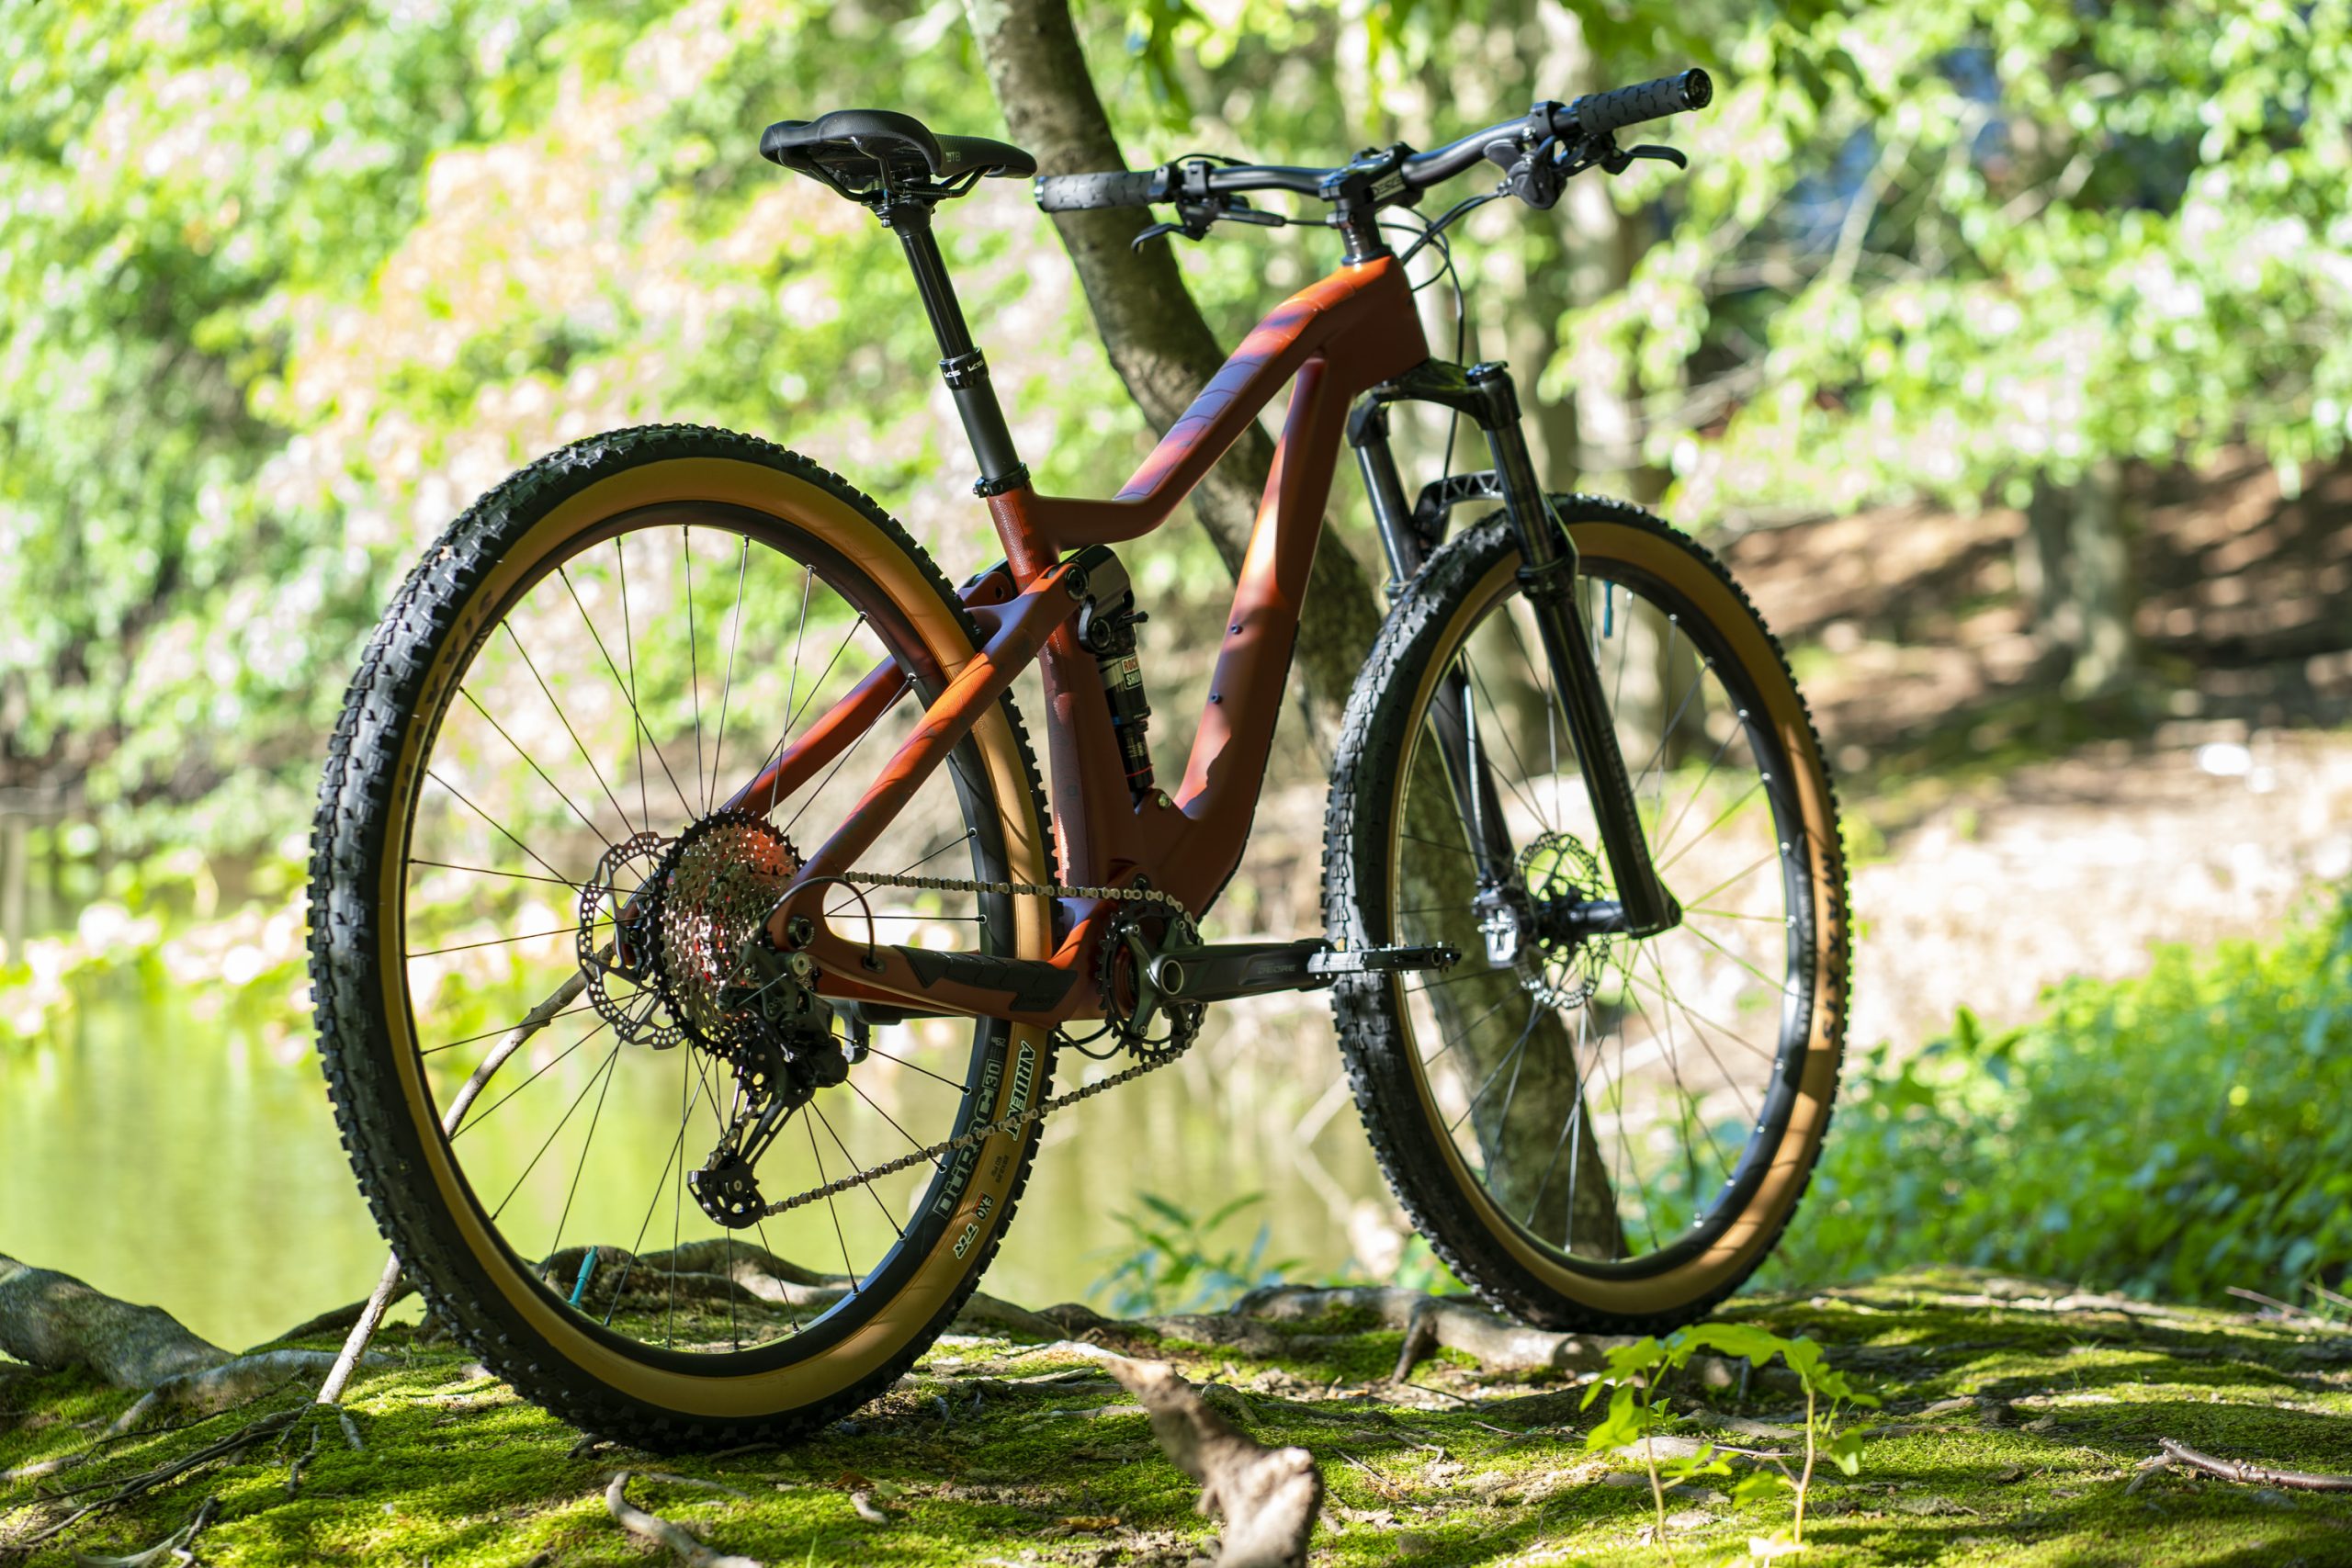
The frame is a Lexon carbon frame. I believe Lexon is a Chinese manufacturer that produces and sells many different components, including various styles of bike frames and forks. Their AliExpress store contains a myriad of components and frames to rummage through which sometimes makes understanding all of the different frames a bit challenging because some of the frames look exactly alike but have different names. For example, the Titan, the Myst, and the Tactic all have the same geometry numbers and look the same. The only discerning difference is the paint and logos – maybe that’s the only differences.
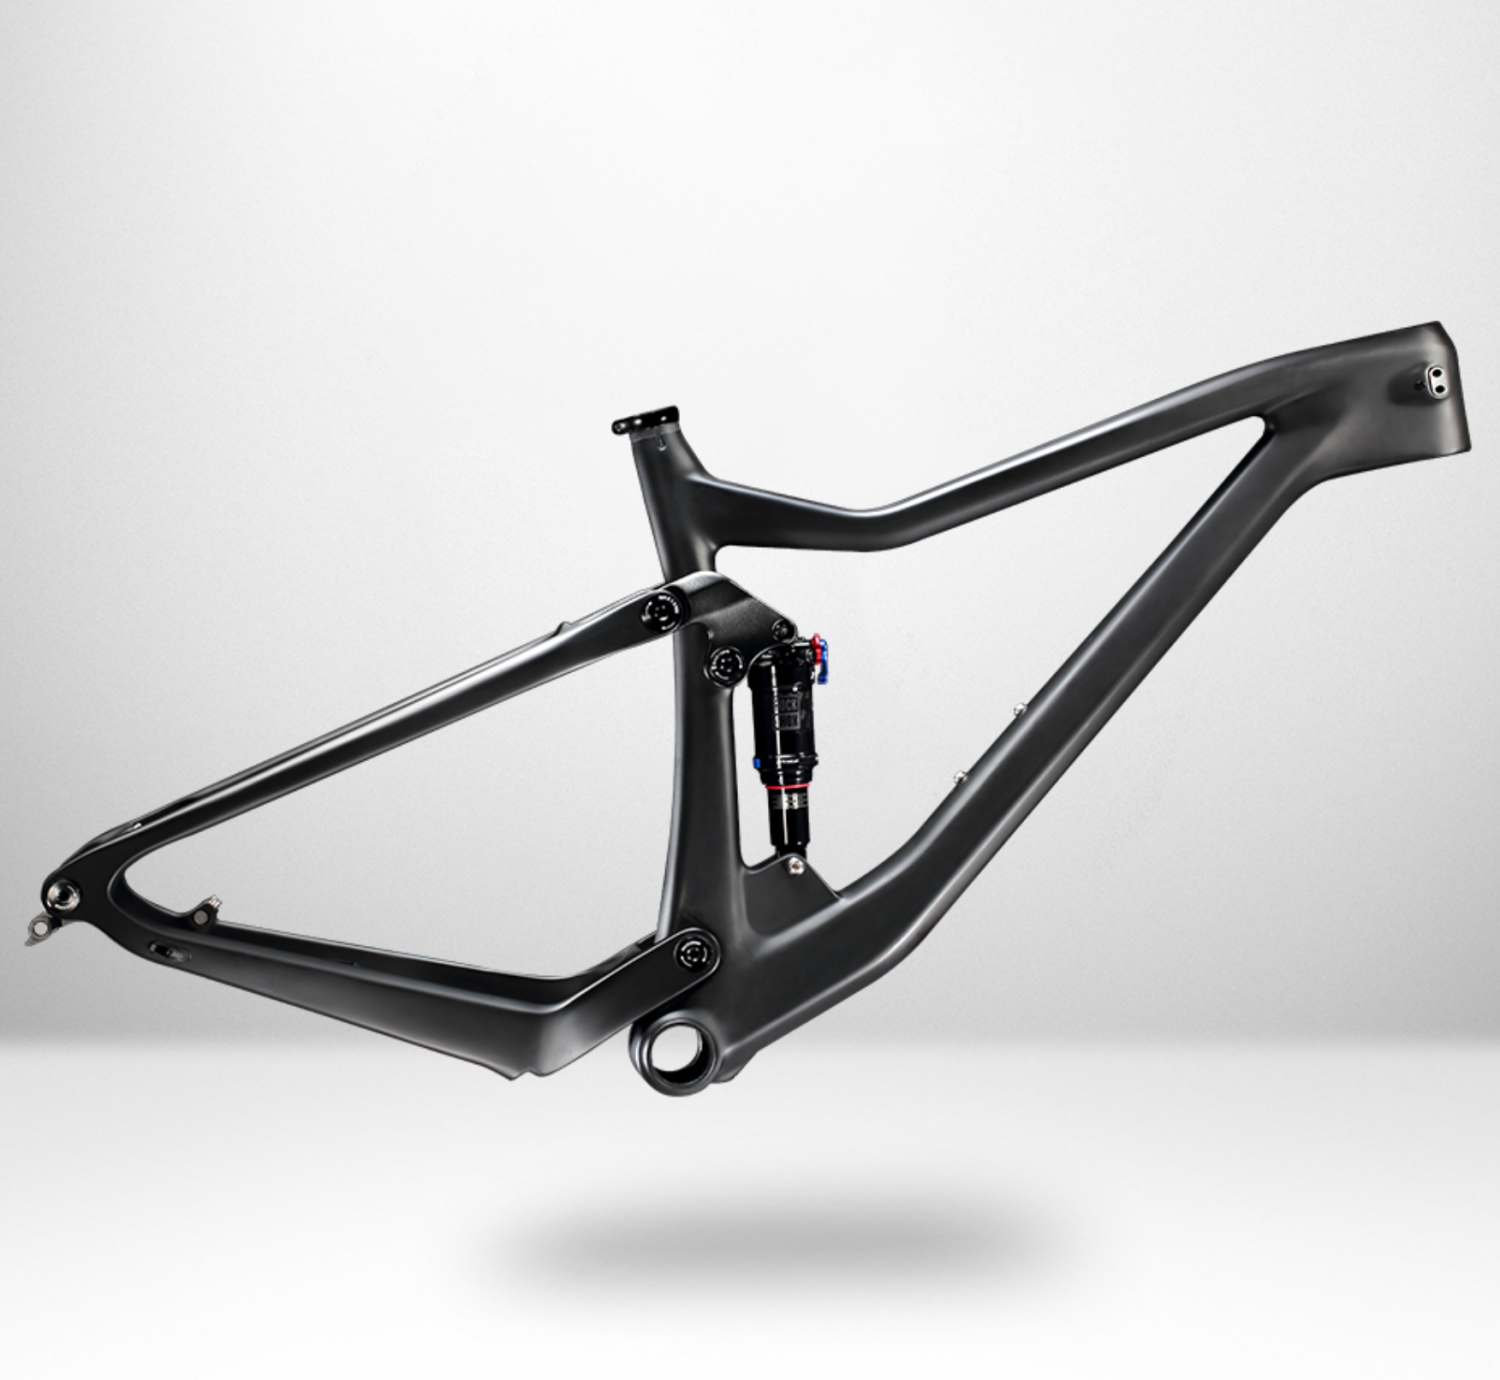
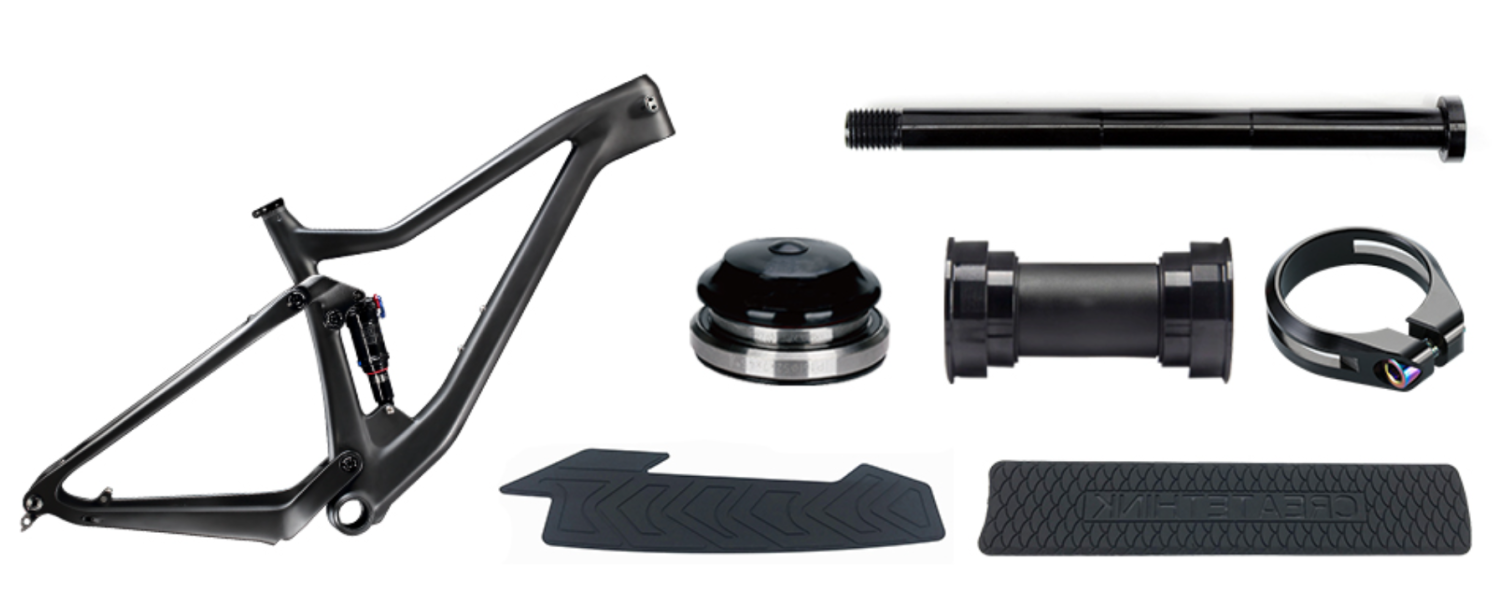
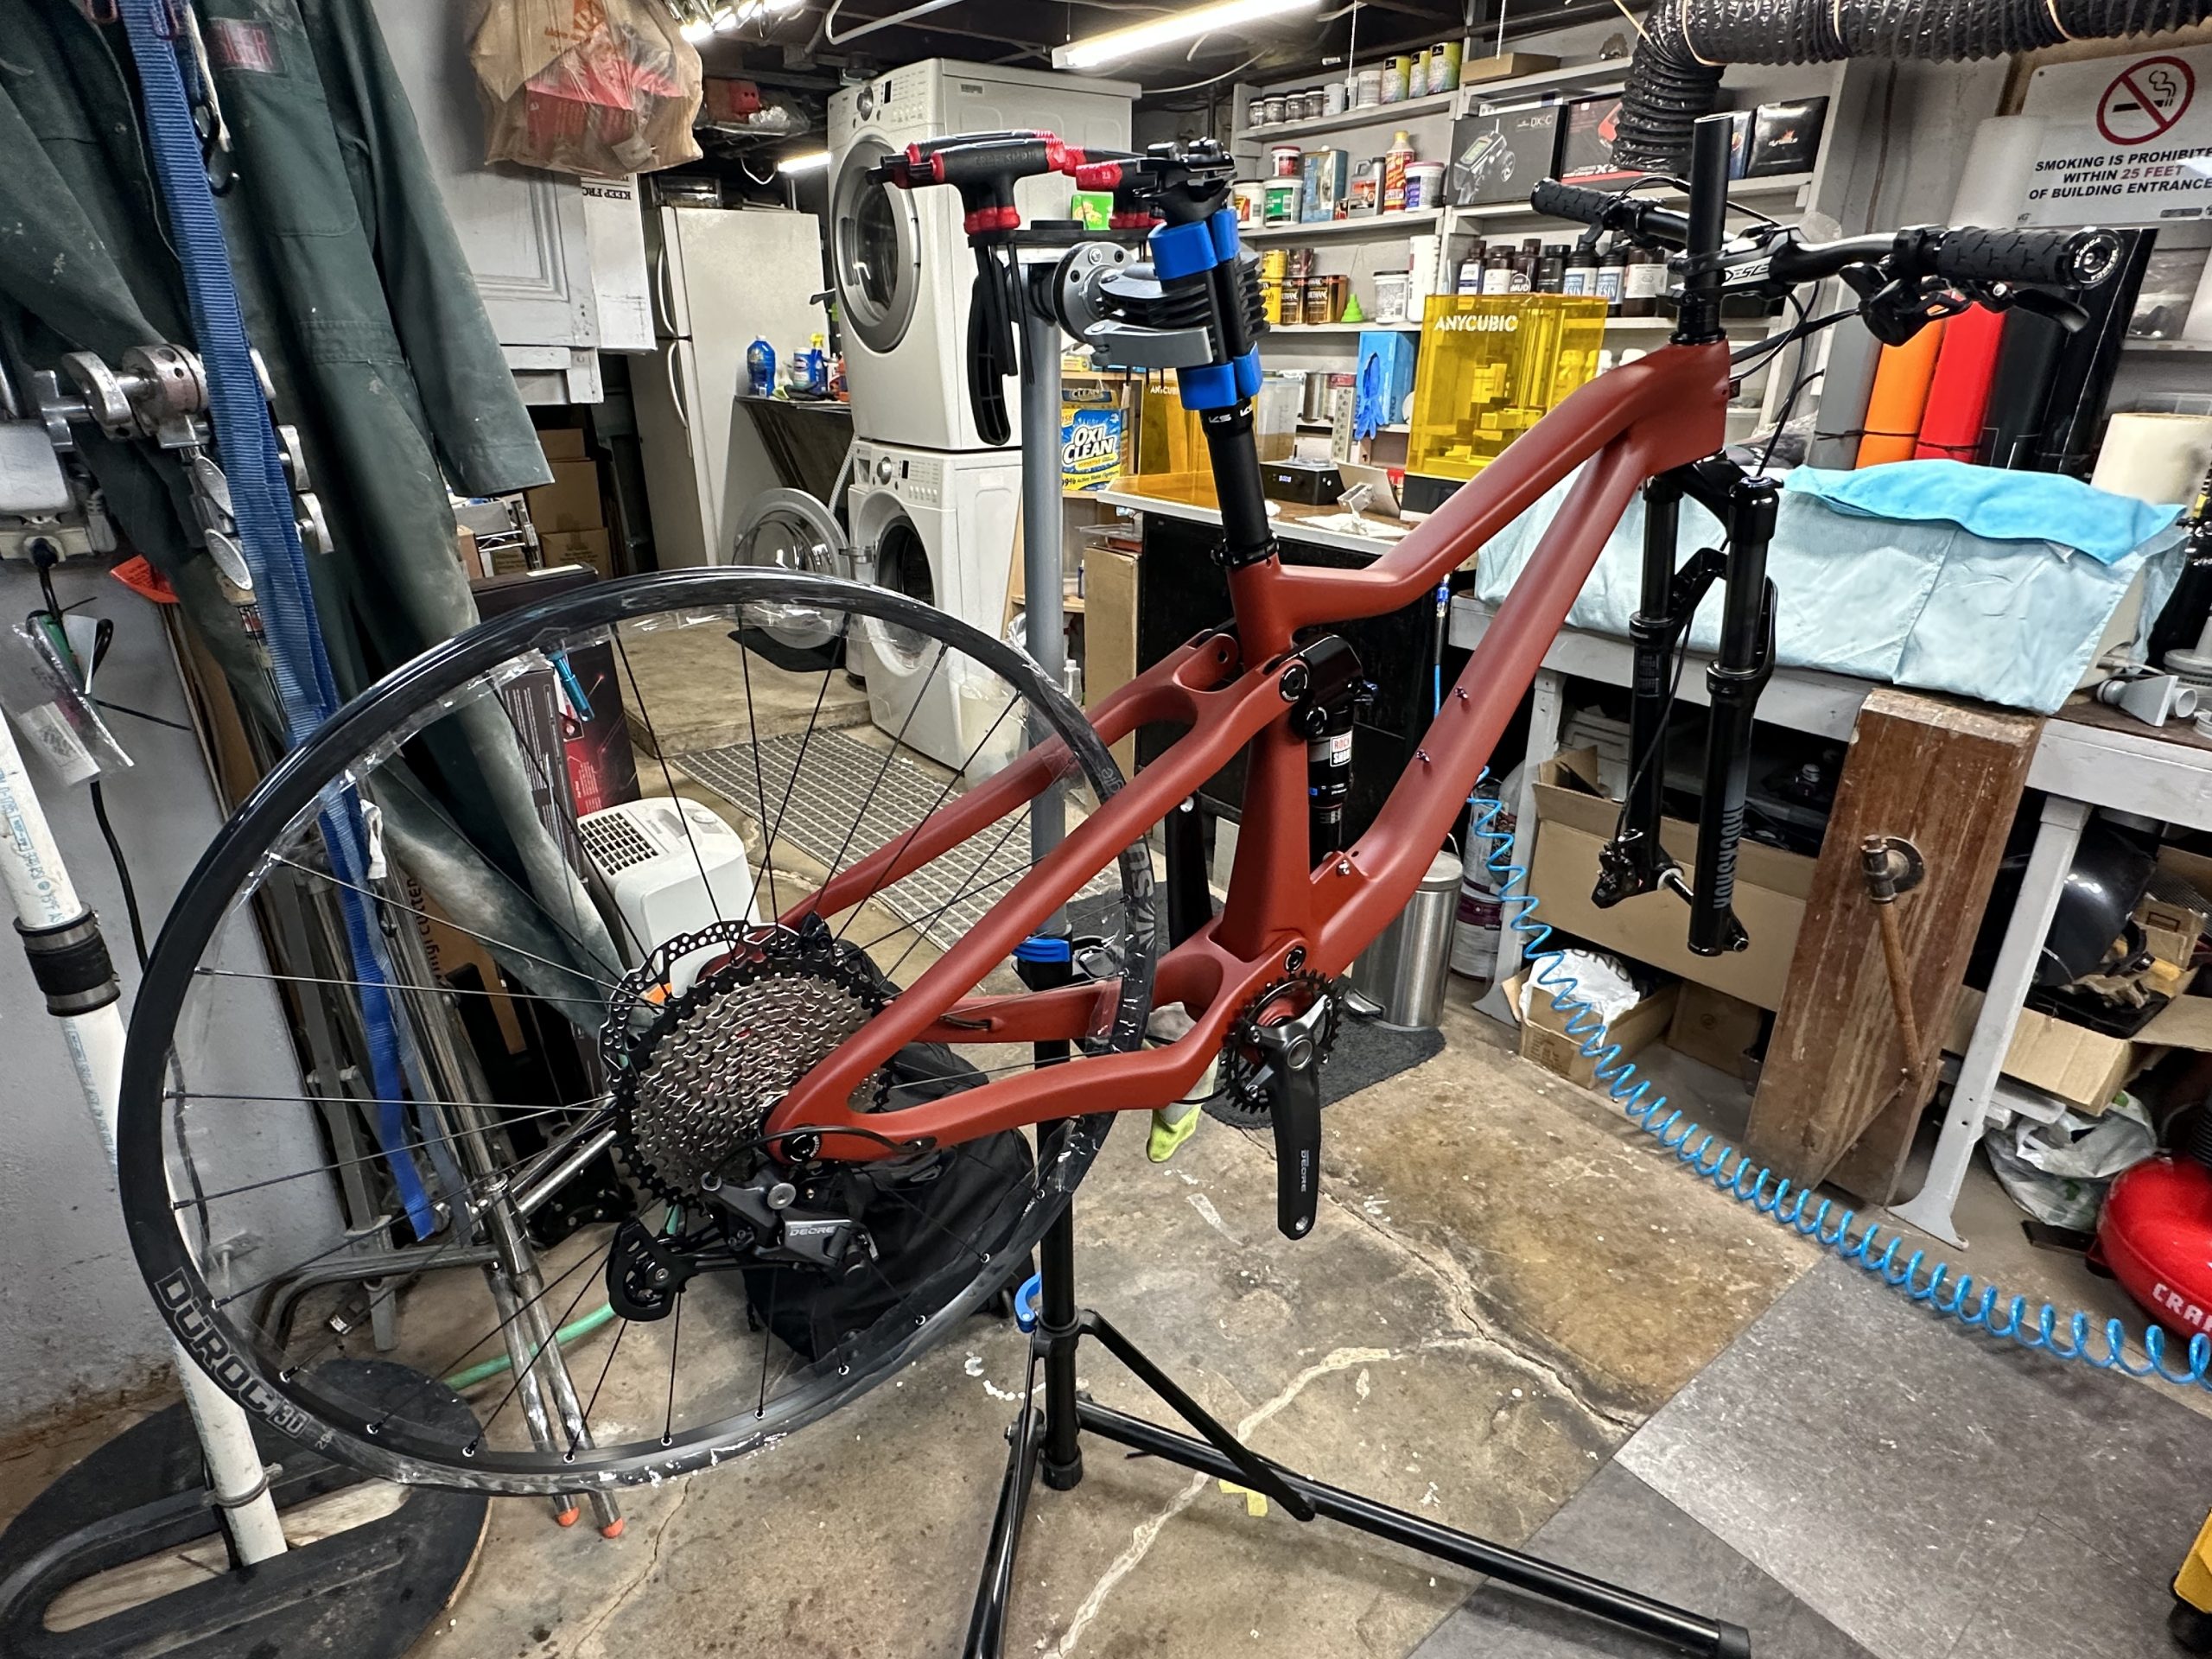
Eventually, I landed the Myst frame, in small. At the time, the price point was very low and seeing their photos of an XC rider on a Lexon frame pushed me over the edge. The low price point, I assume can be attributed to the lack of paint or logos. The frame was matte black to cover up the imperfect carbon weave (I’m just guessing here), which was fine since I intended to paint the frame anyway. The frame is shipped with a headset, rear axle, press-in bottom bracket, seat clamp, rear drop out, and two silicone frame protection pieces (more on the silicone later). Like most AliExpress shipments, you can expect to wait two to four weeks to see your goods arrive. Lexon promptly shipped my order and the box arrived undamaged, exactly two weeks later to the day – not bad!
A few things to note about the frame if considering the Myst, Tactic, or the Titan. First, all three are full suspension with a rigid rear triangle. Because the rear triangle is rigid and does not have a pivot point at the intersection of the seat and chainstays, the rear suspension relies on the rear triangle to flex in conjunction with the rear shock. I’m no engineer but flexing the carbon fiber triangle over and over again seems a little dodgy to me but only time will tell.
To illustrate what happens when you pivot the rigid rear triangle, at least on this specific rear triangle on this frame, here’s a video I shot (note I’m still in a sling at this point from my massive crash earlier this year) and shared with Lexon to make sure the frame and rear triangle were interacting correctly. Note that it takes some force to pivot the rear triangle without a shock and once it crosses a certain point, the triangle will snap in place. Again, it takes some force to pivot the triangle back down to its lower position and overall feels like it shouldn’t be this way. Lexon responded and said that this is normal.
Spoiler alert: I can say that now that the bike is completely built and is being ridden, the force that it takes to manually pivot the rear triangle is probably negligible compared to the forces exerted on it with a human body riding down a trail or hitting jumps. The rear shock must be taking 99% of the impacts… at least that’s what I am telling myself.
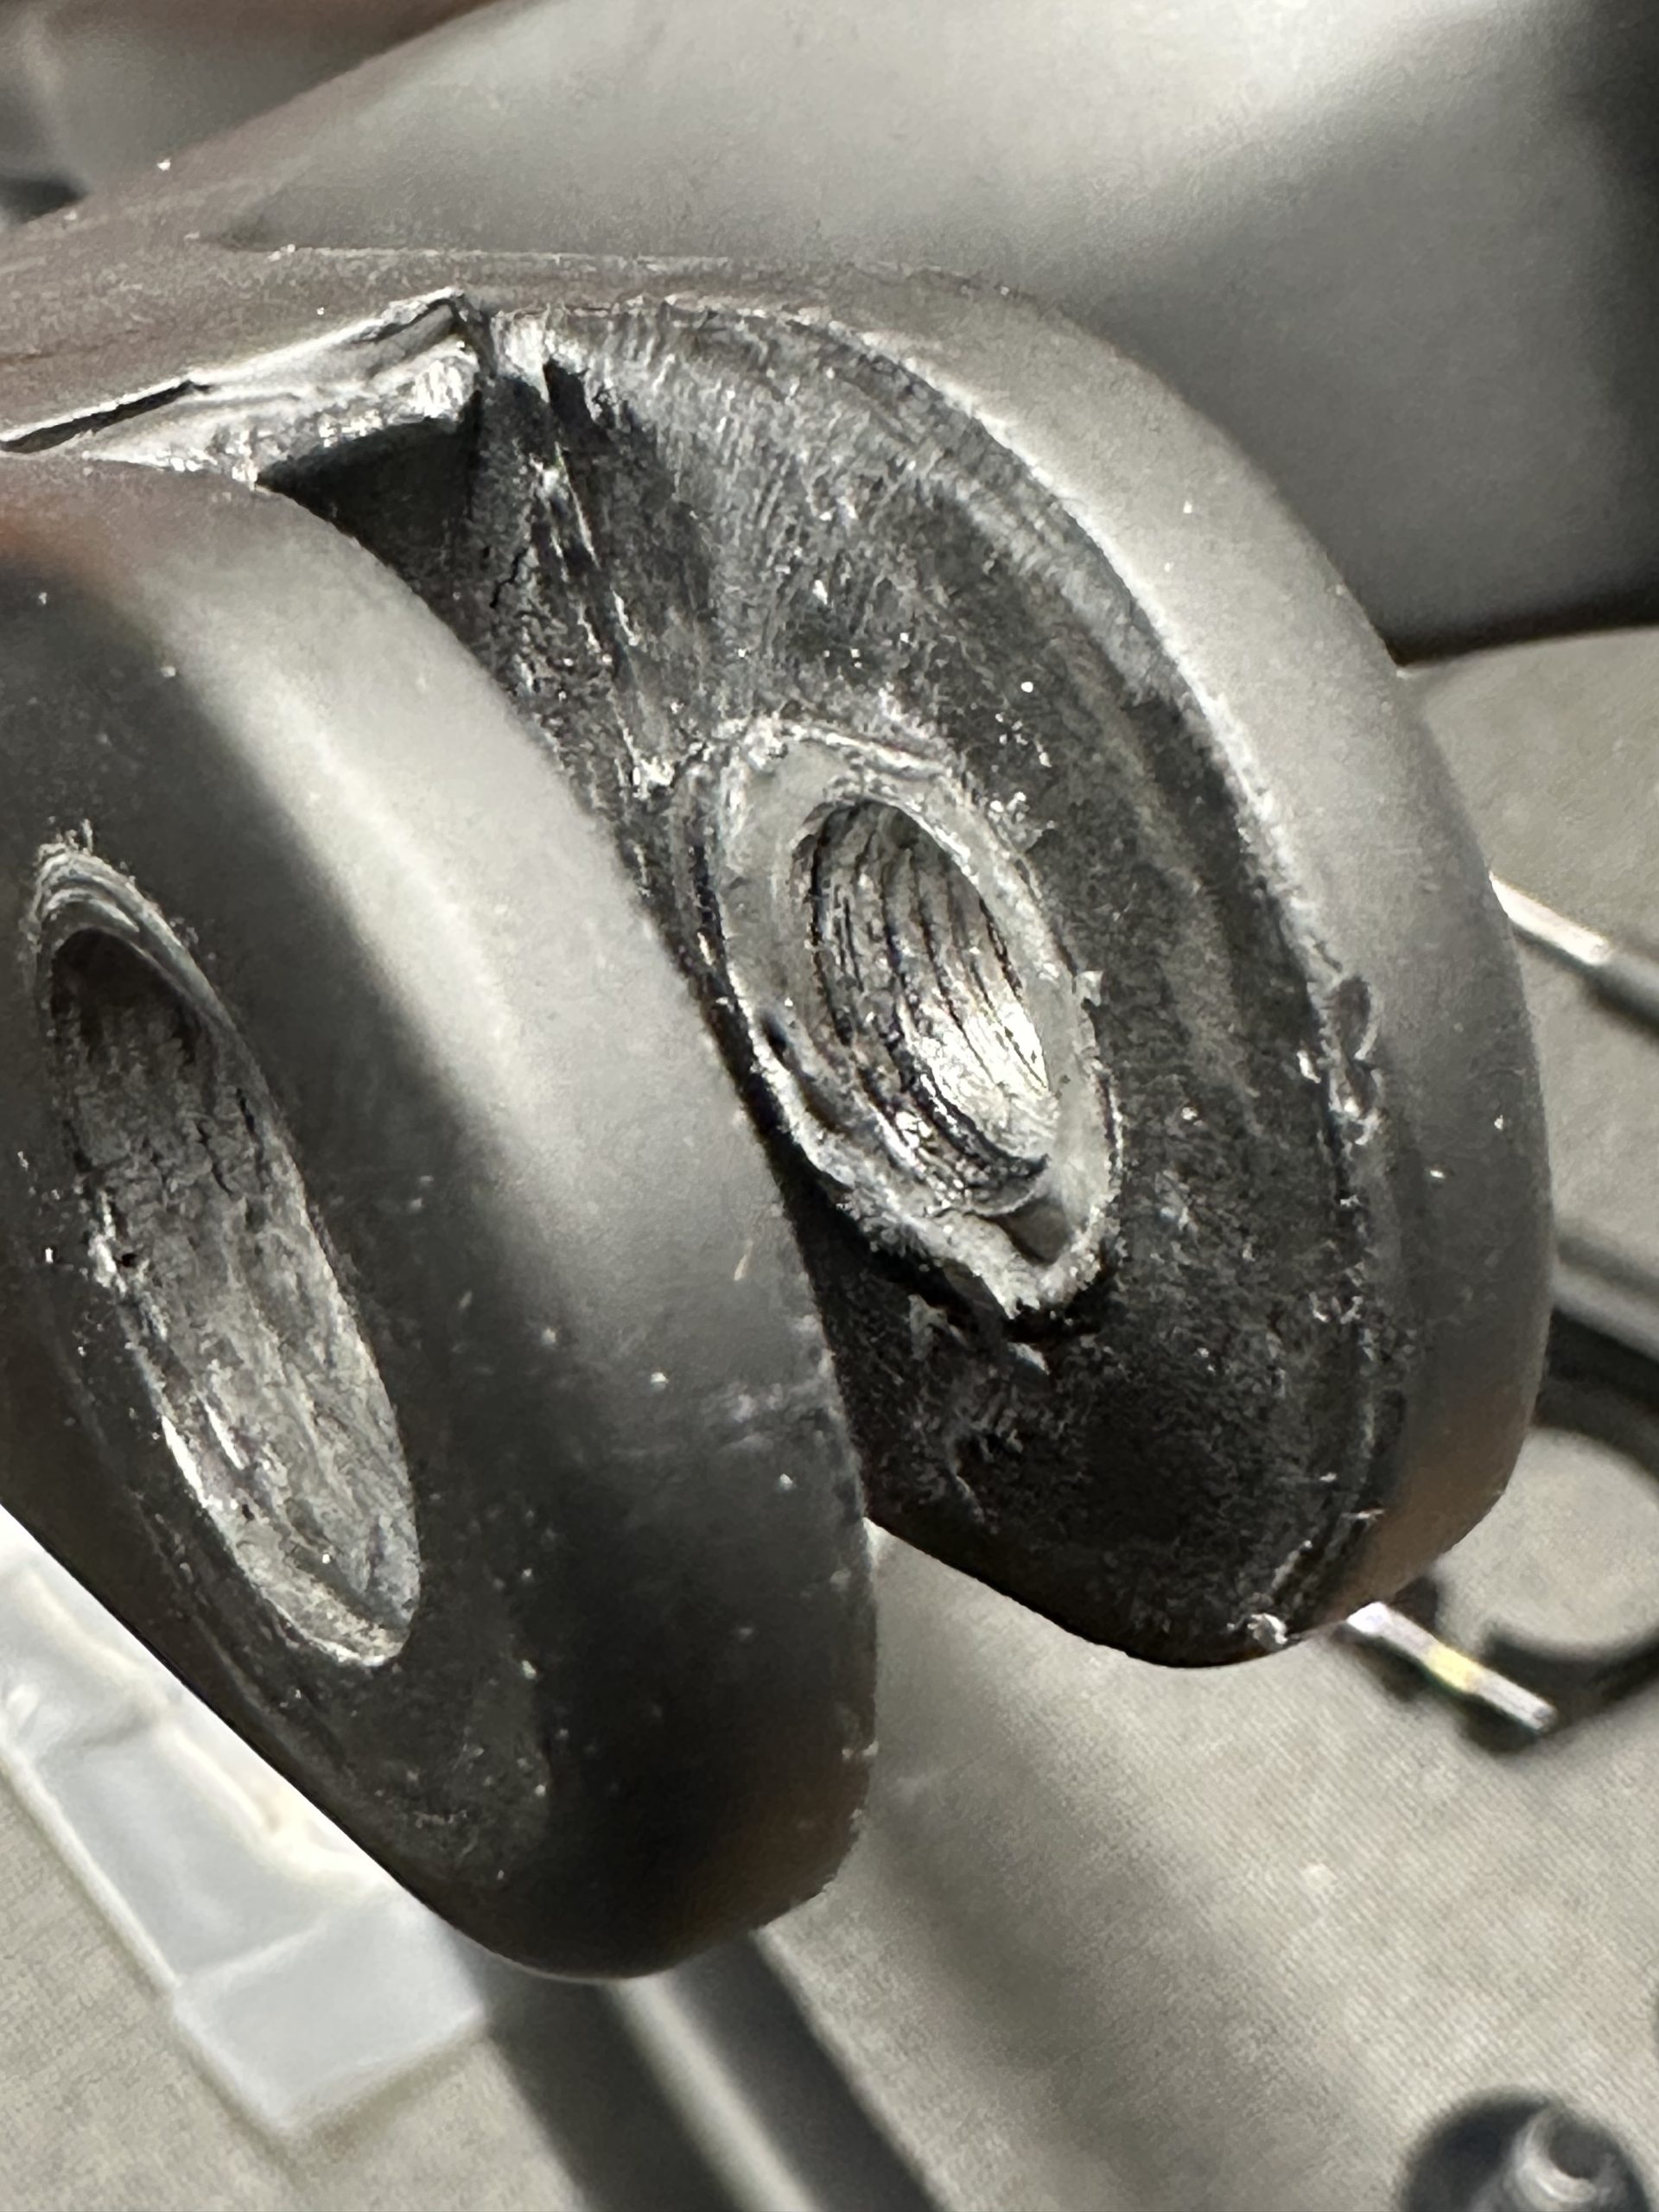
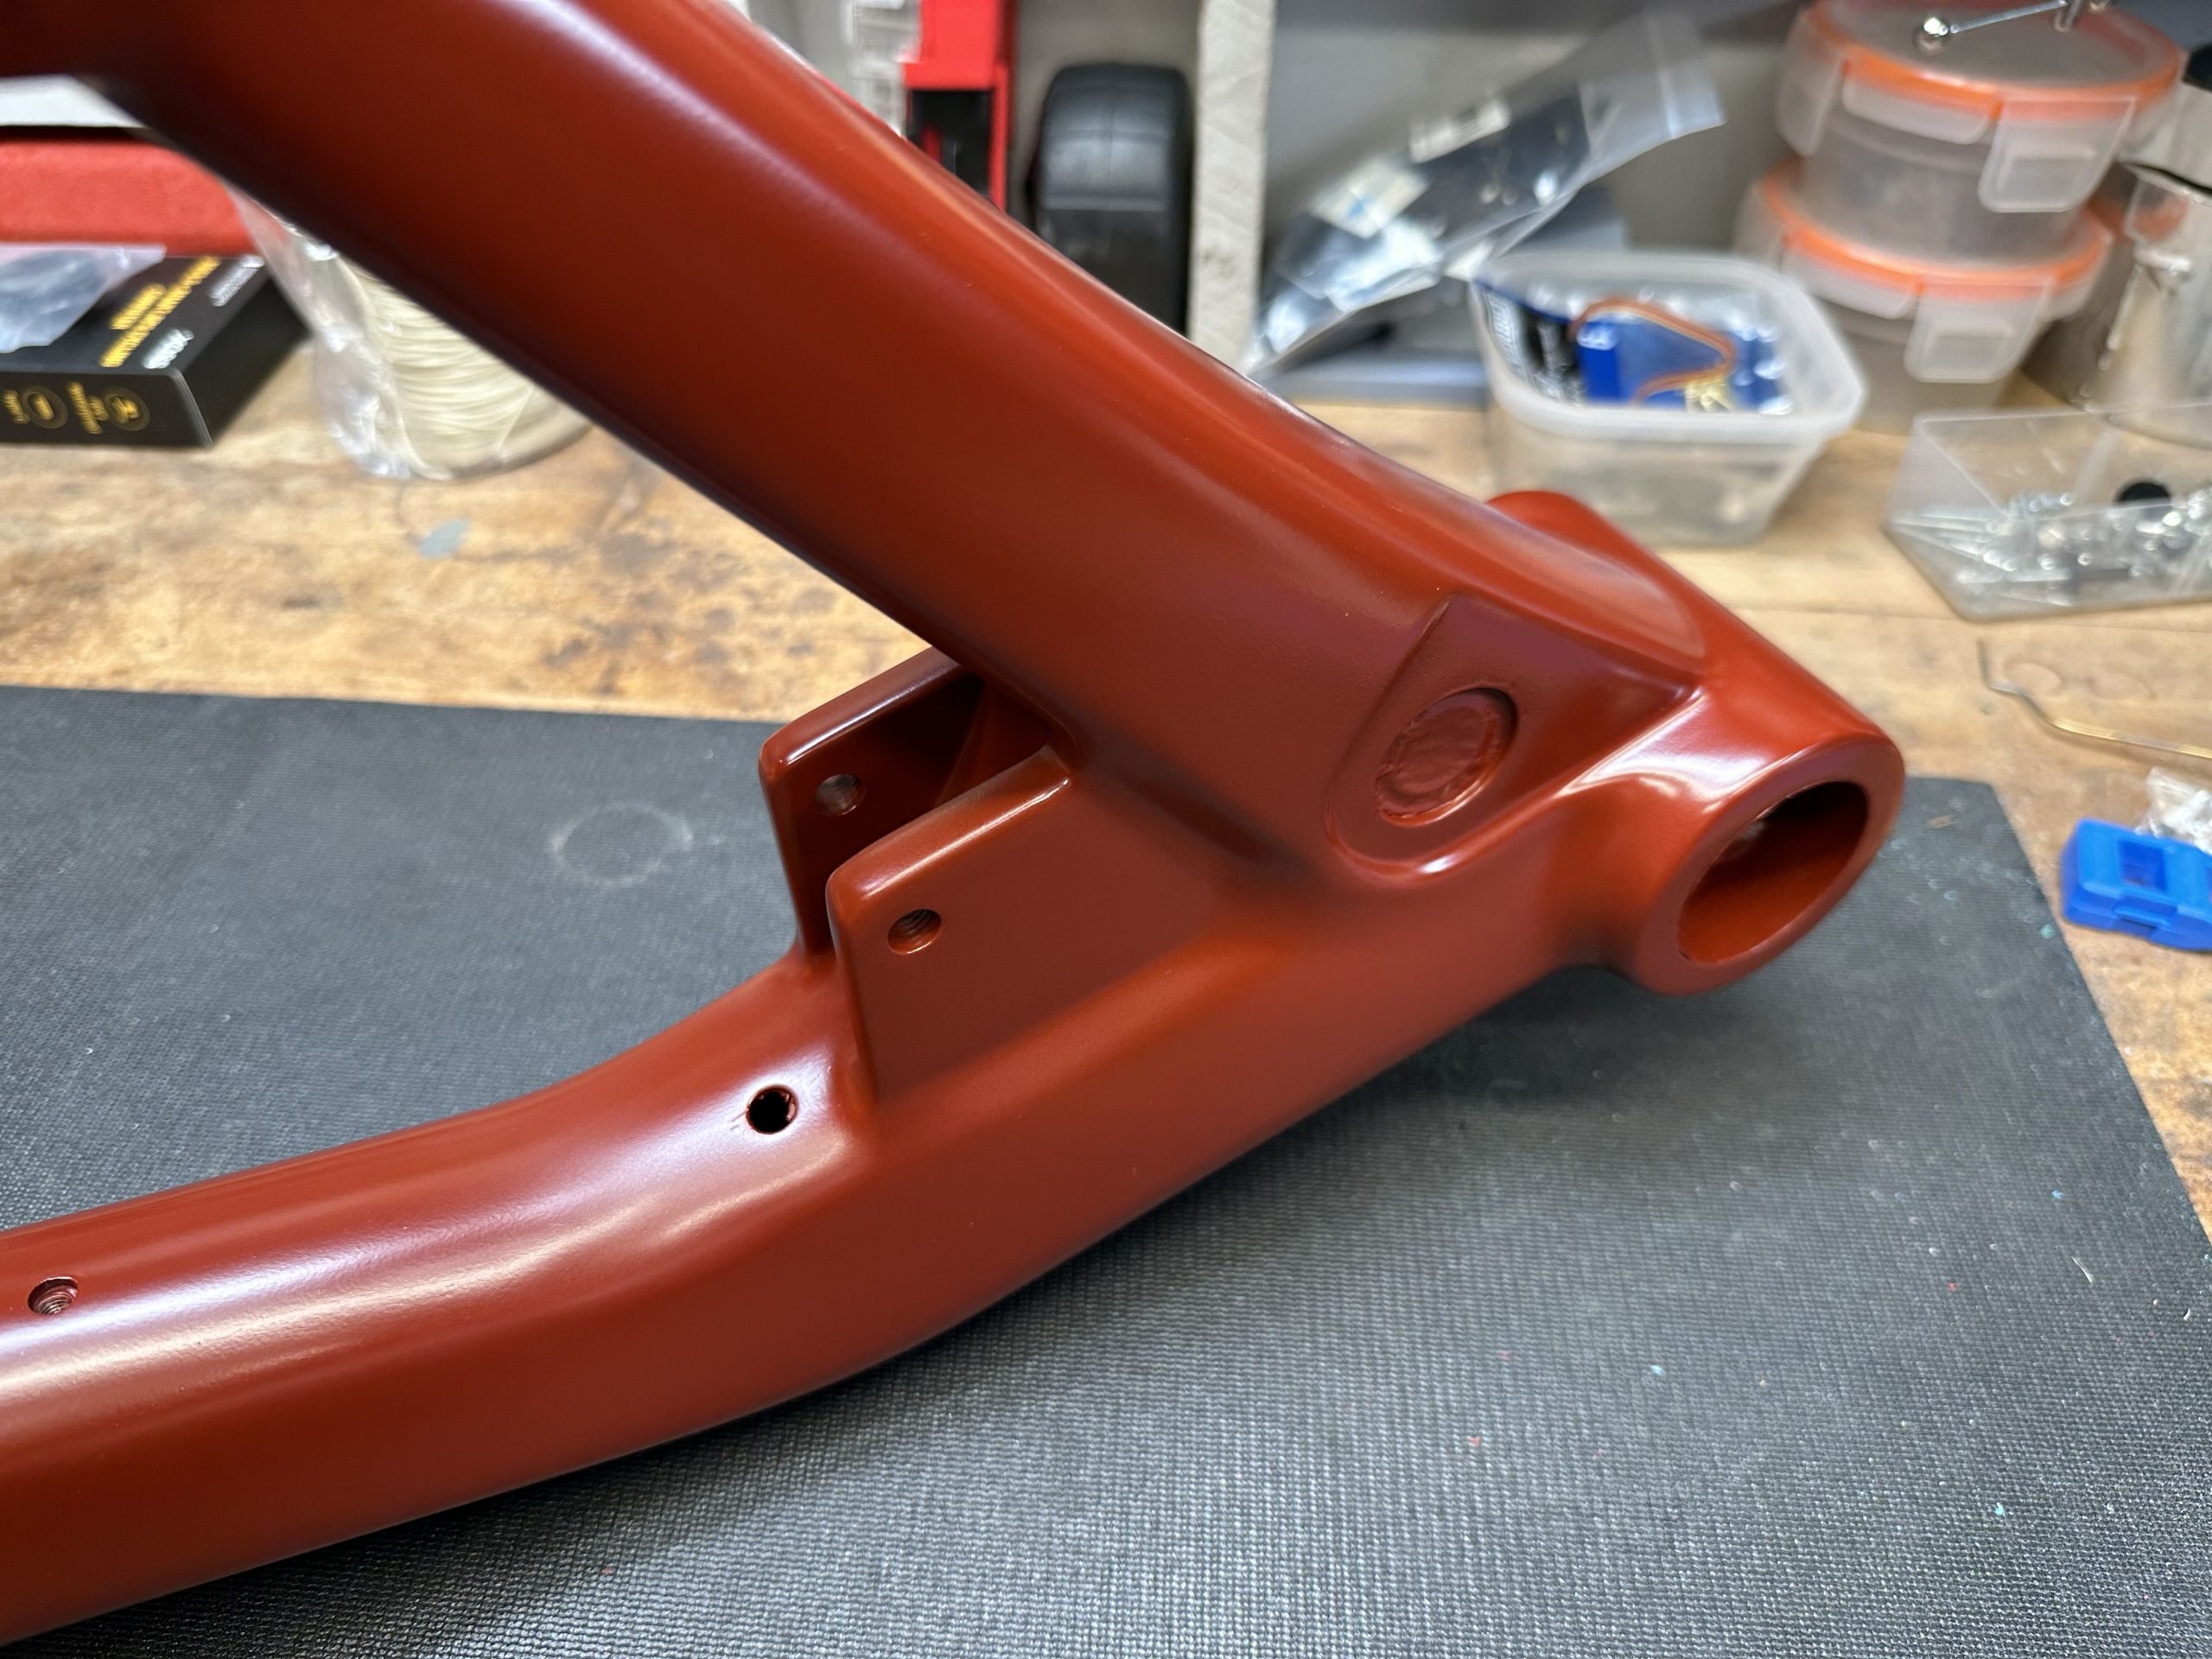
The second thing to note about this frame is the pivot hardware. Again, I’m no engineer but one of the rear aluminum suspension hardware bolts didn’t look or feel like the most robust bolt ever. The frame is shipped with the rear triangle already bolted to the frame and right out of the gate the first thing I wanted to do was remove the rear triangle. However, as I was removing one of the pivot bolts that connect the seatstay to the pivot arm, I noticed that the resistance as I was unscrewing it, felt odd. Before I could react, the bolt came out with threads that were all gnarled and disfigured. As you can see by the bottom right photo of the pivot point, the fit and finish aren’t that great either. Nothing like getting a new frame all the way from China that isn’t perfect!
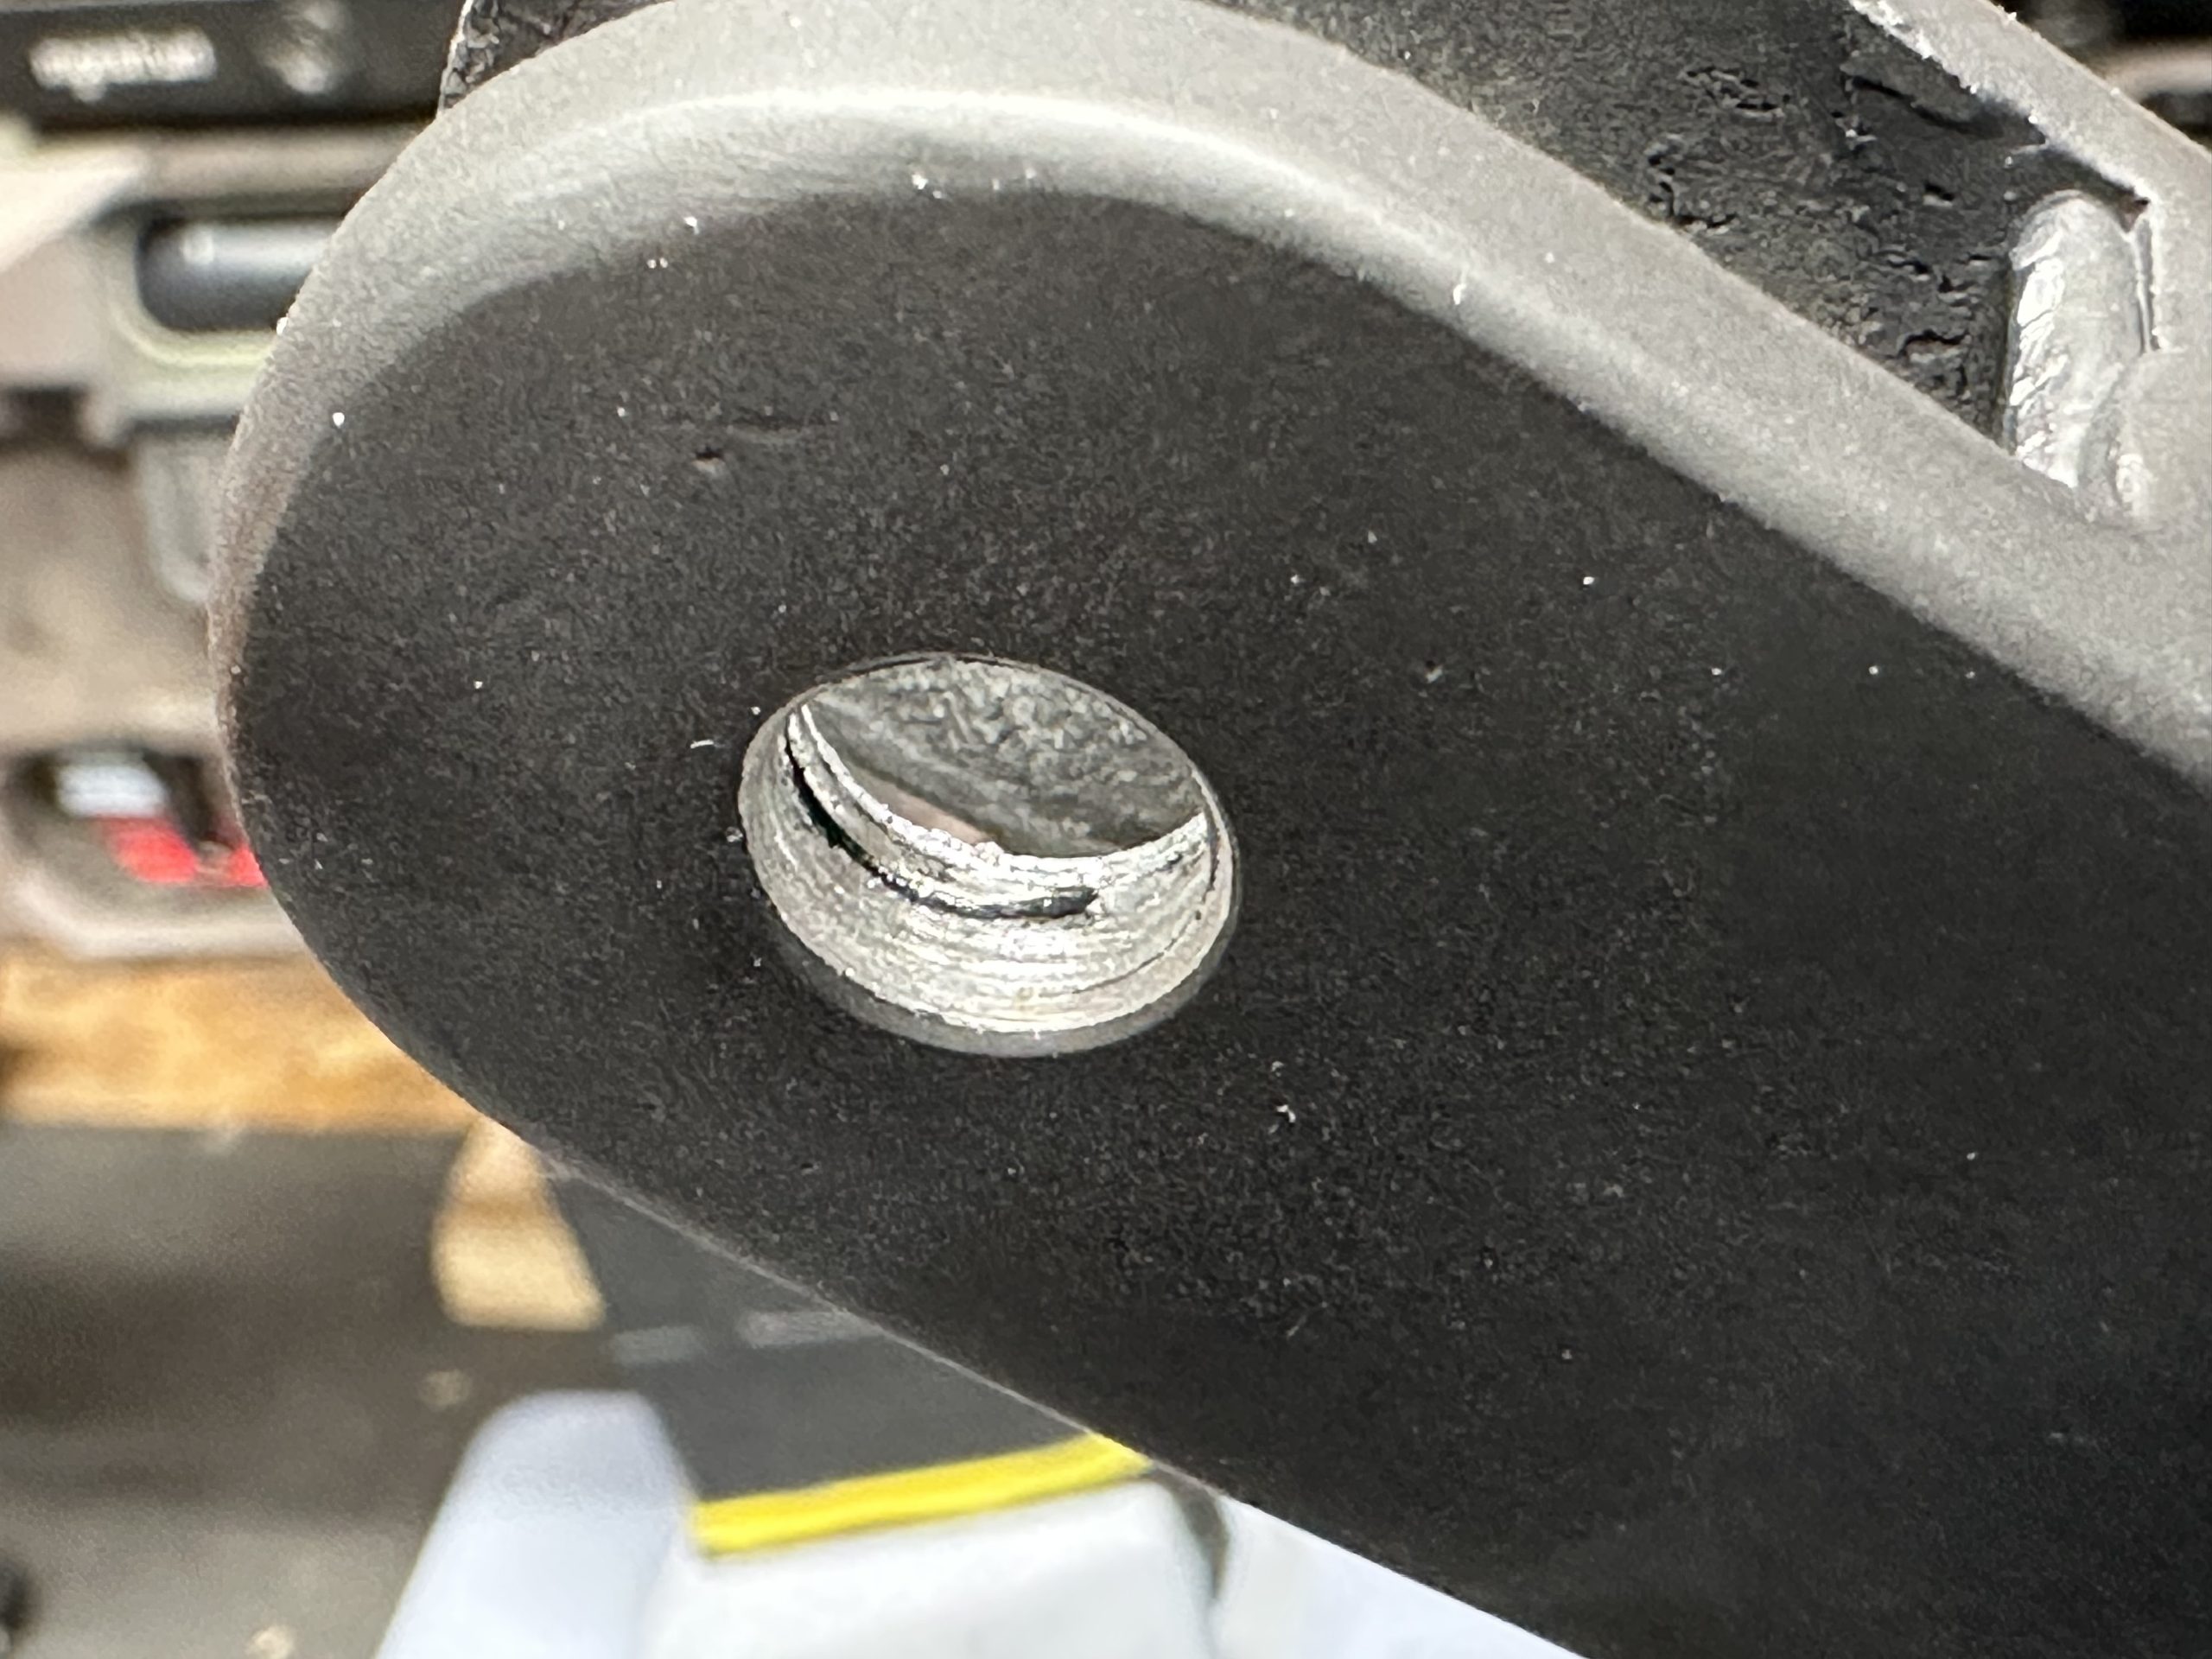
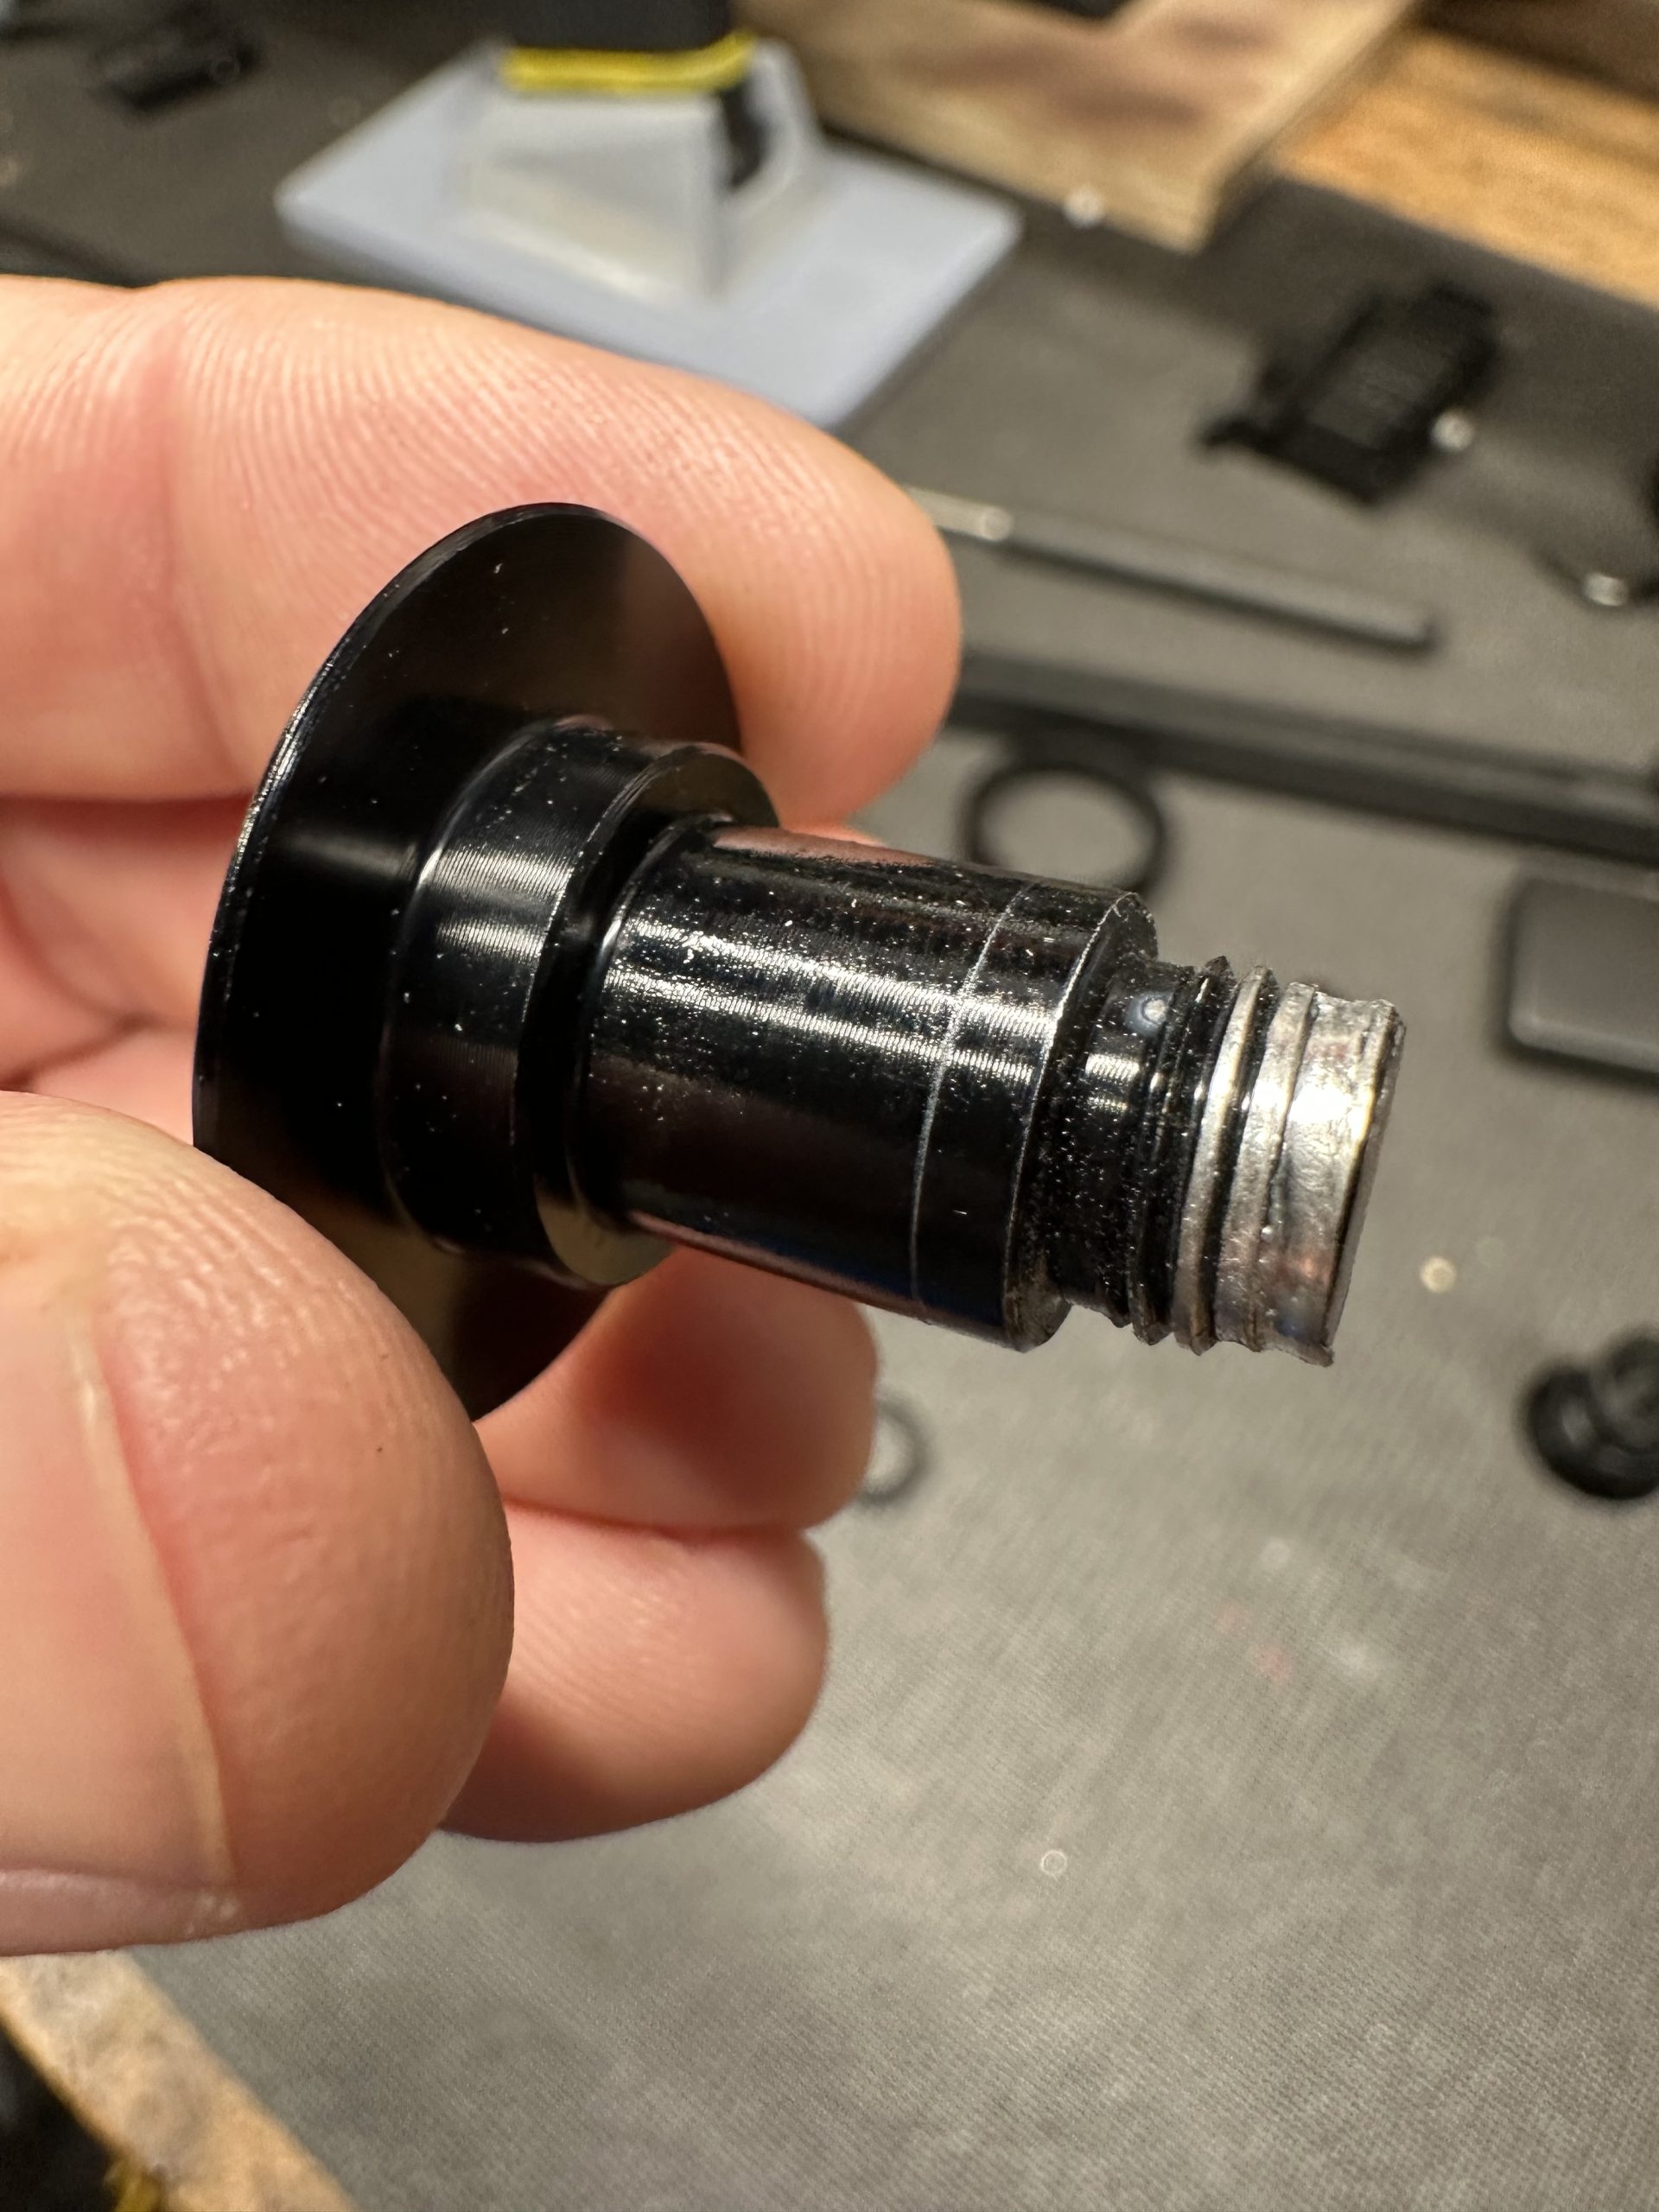
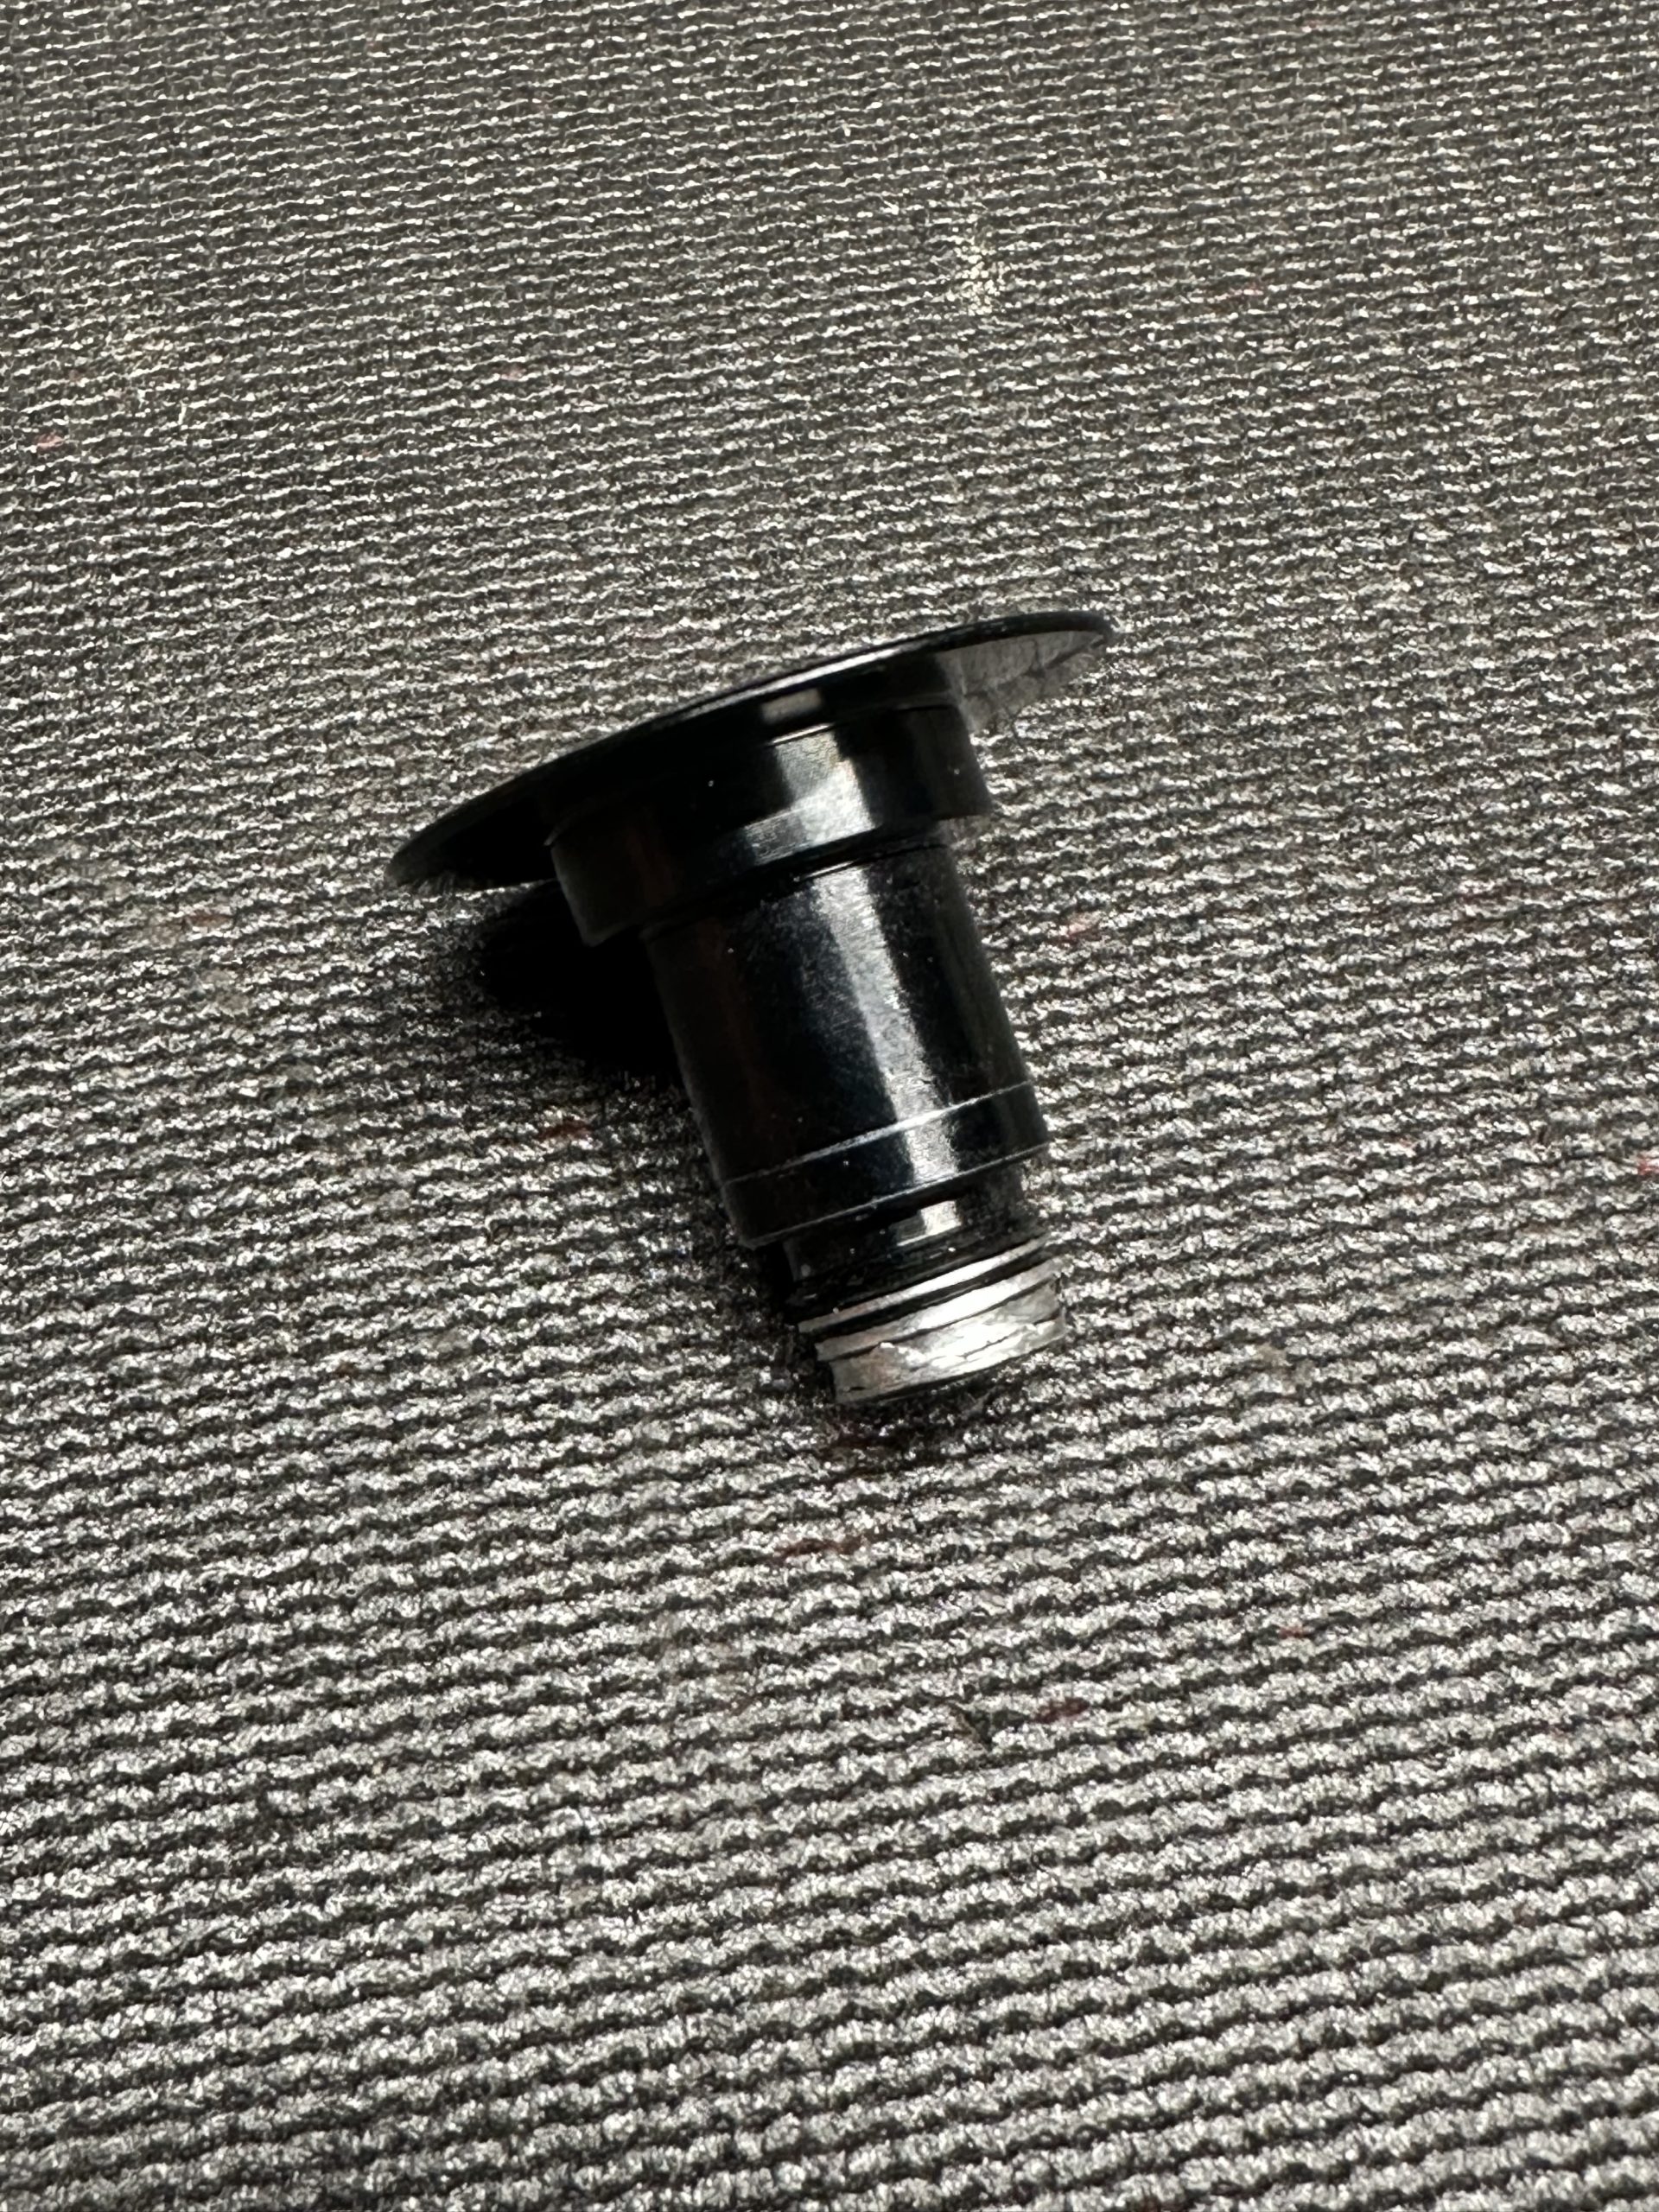
As quickly as I realized that I had a stripped bolt, I was on the computer to send a message to Lexon to advise me on the next steps. While I waited for their response, which usually takes 12 hours or so, I was already brainstorming solutions to fix the issue without having to deal with the hassle of returning the frame or rear triangle. Based on the damage, I felt I could retap the threaded hole as long as Lexon could send me replacement hardware.
Lexon did respond and was helpful enough and willing to send me two replacement bolts per my request. I asked for two just in case I had a similar issue down the road. I did take it upon myself to purchase the correct tap and retap the hole. The resulting threads seemed to look good enough but I was, of course, careful during the final installation to not over-torque the bolts. I will say that the other pivot bolts are a bit more robust and less delicate and I don’t have the same concerns with them as I do this particular bolt.
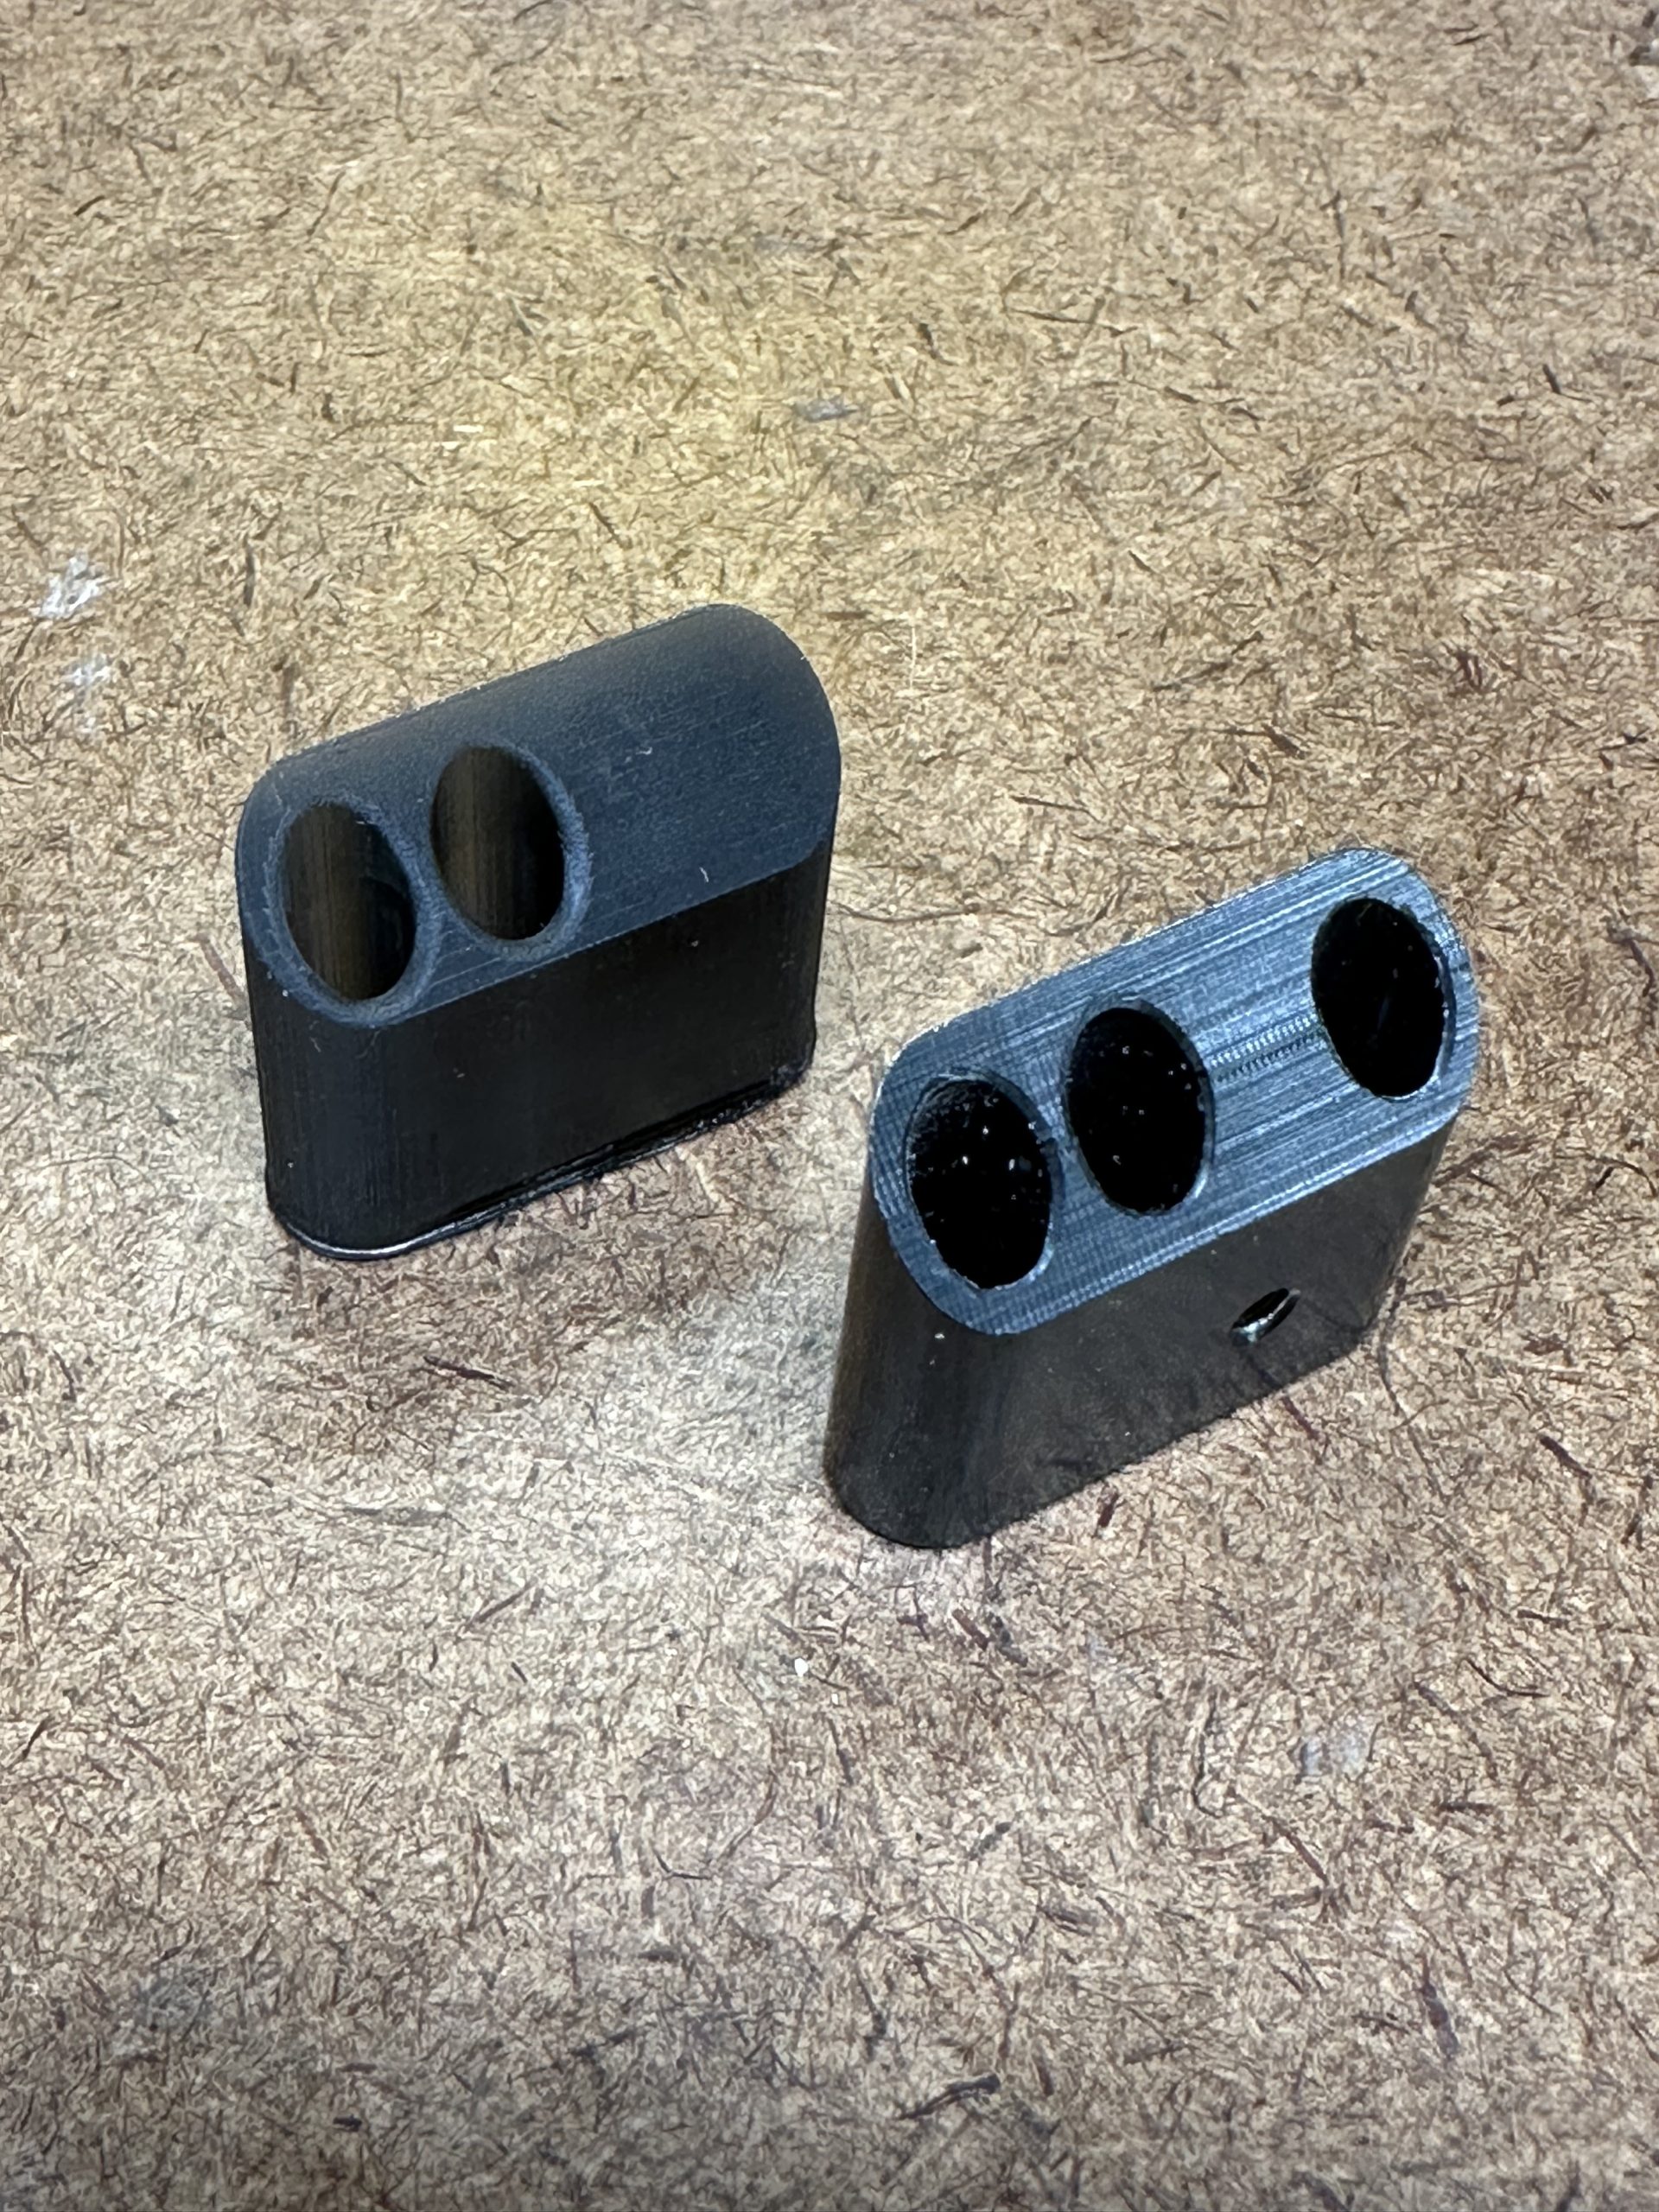
The third and final issue I had with the Lexon frame was a bit small but did cause me to go back and redo the rear brake and rear derailleur cables nonetheless. The grommet inserts that Lexon provides with this frame are nicely machined, however, once installed, they will shred the cable housings with every turn of the handlebars, which isn’t something I figured out until after everything was fully put together. I ended up 3D printing my own version of these grommet inserts so that the plastic wouldn’t damage the brake or shifter line housings, however, in order to swap the grommet, I had to cut the hydraulic brake line in order to slide the grommet off. While I was at it, I also decided to flip the lines so that the affected parts of the line were hidden in the frame towards the back of the bike. For this build, I only need two holes on this side of the bike – 3D print is on the right.
One other minor point to consider is that there is no way to add a bash-guard on this frame. The frame doesn’t have the needed bolt holes and because it’s a press-in bottom bracket, you can use the bash guards that are sandwiched between the frame and BB. Also, the seat tube is not round so the bash guards that clamp to the round seat tubes don’t work either. Something to keep in mind.
Beyond those three to four issues, the frame’s finish and overall appearance are good and could be built out without painting. As to the frame’s durability, that remains to be seen.
The Parts List:
AliExpress
- Lexon Myst Carbon Fiber XC Frame
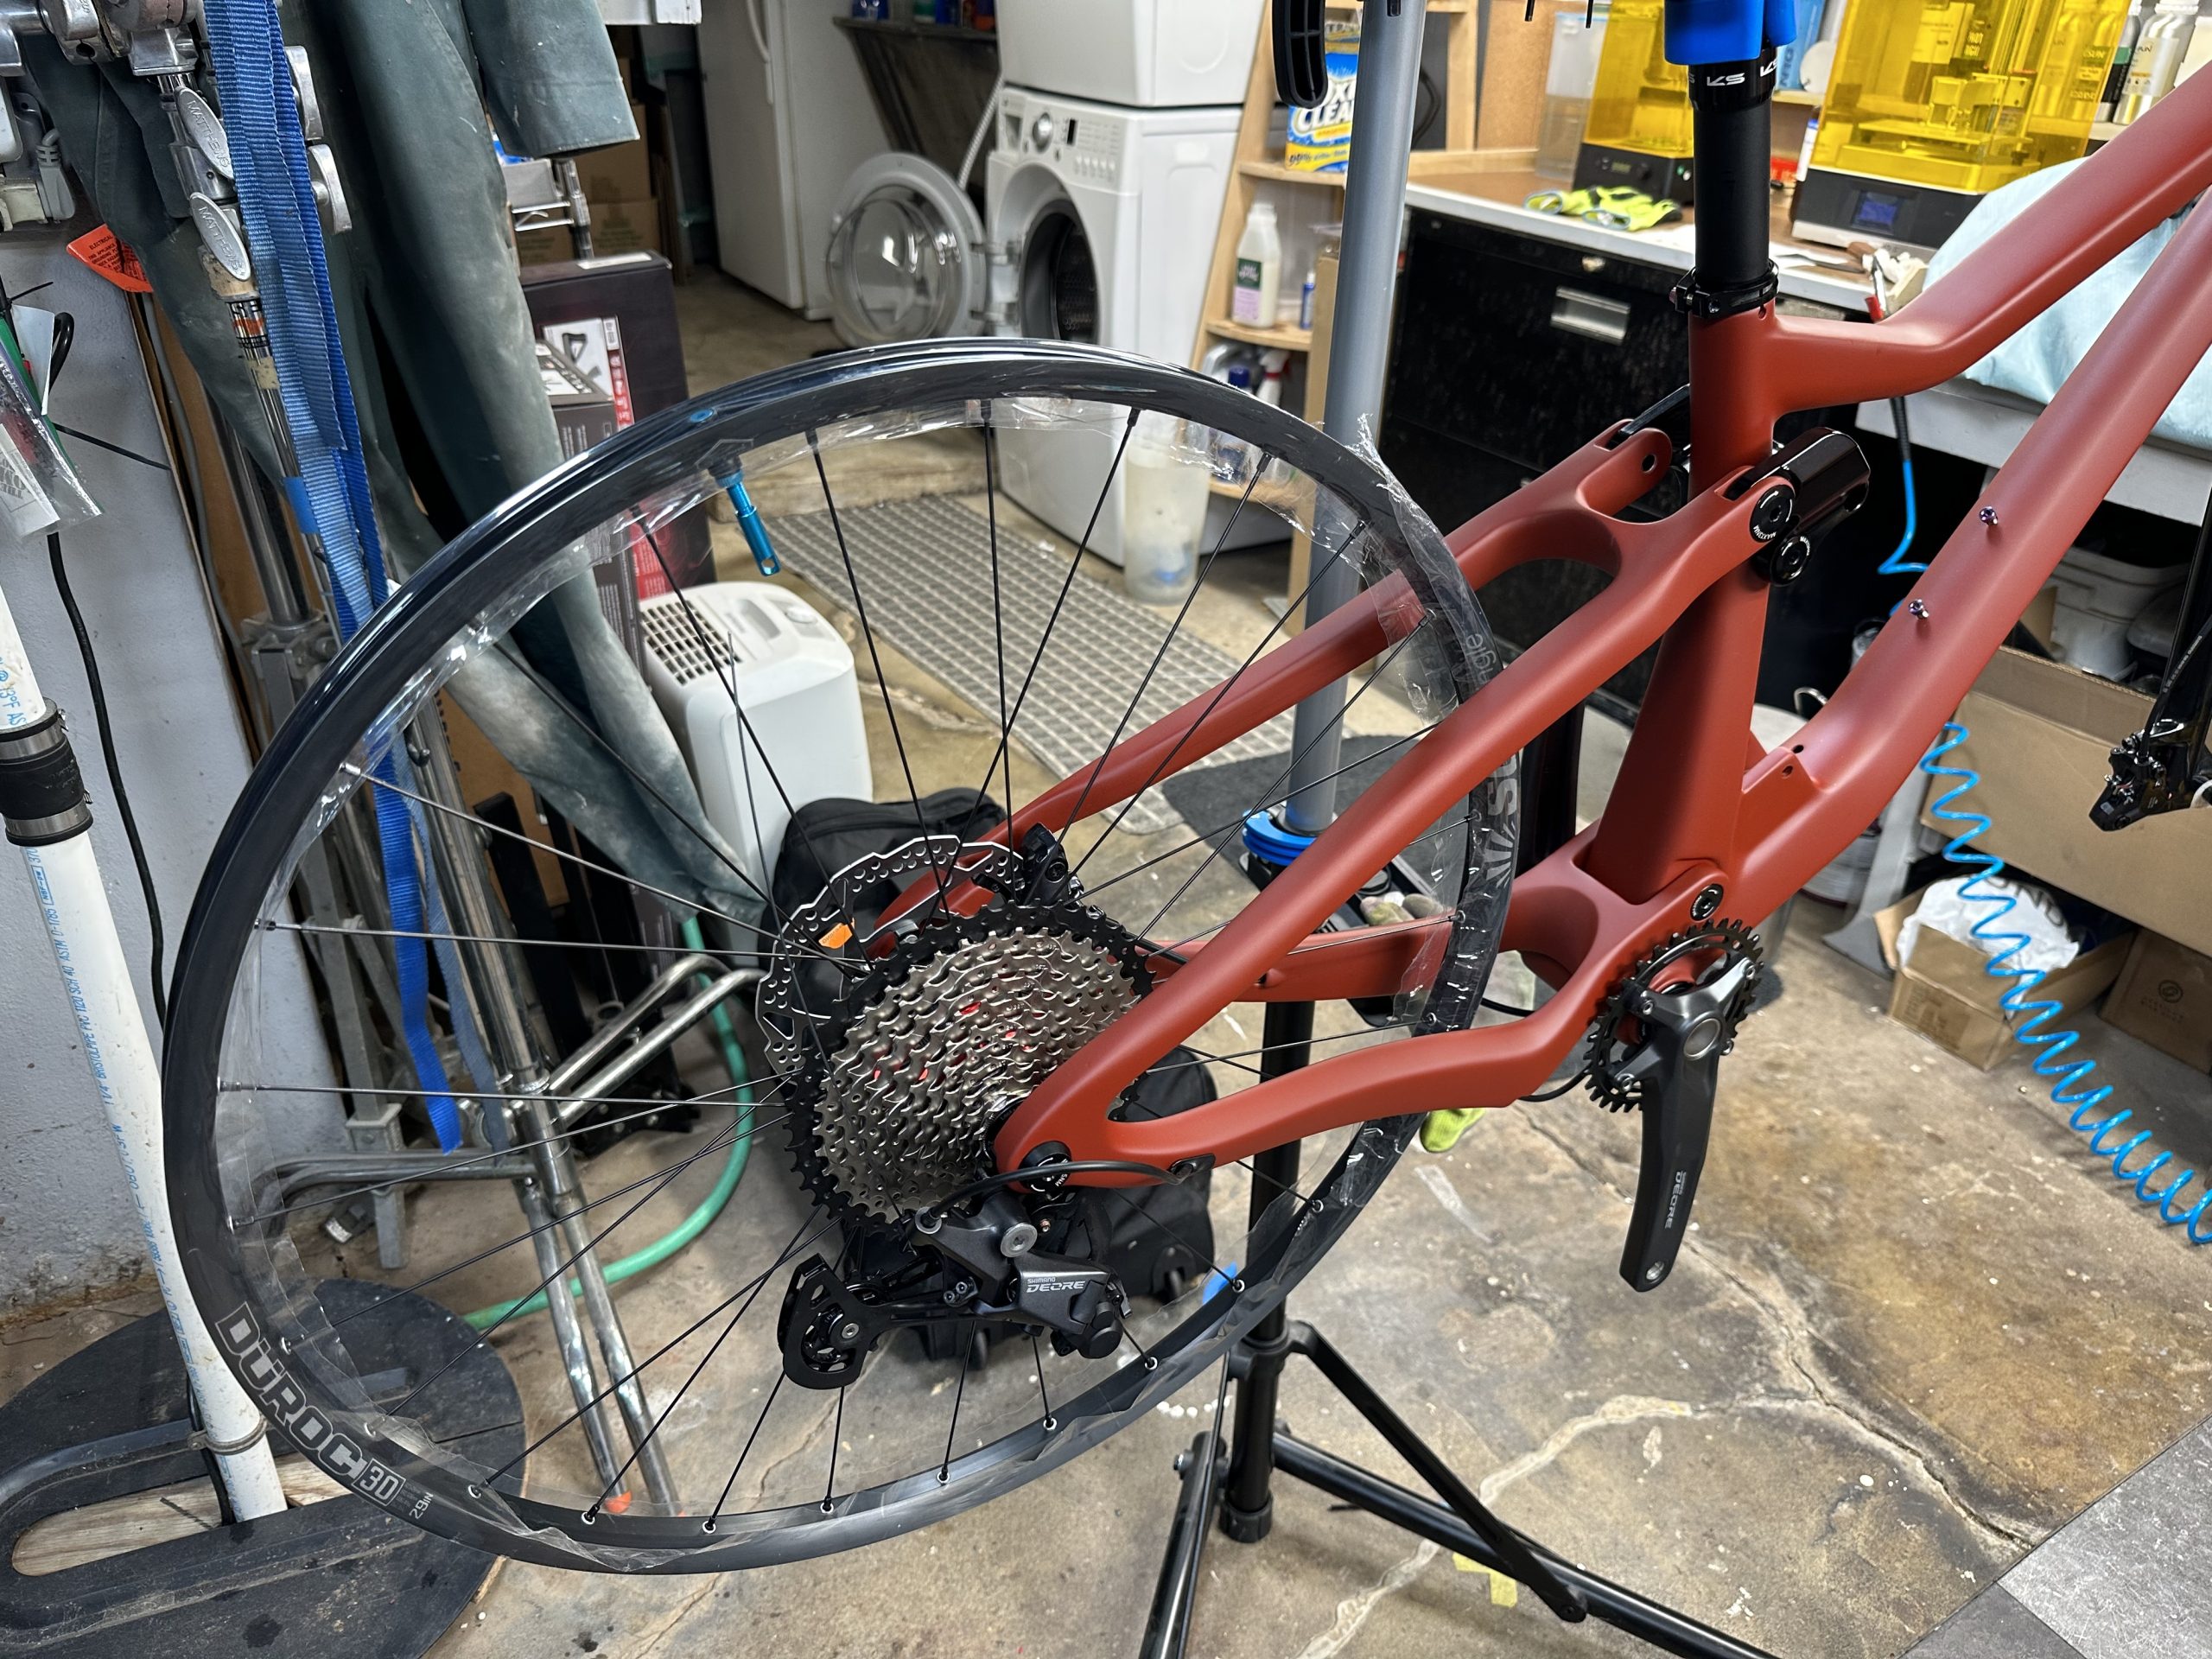
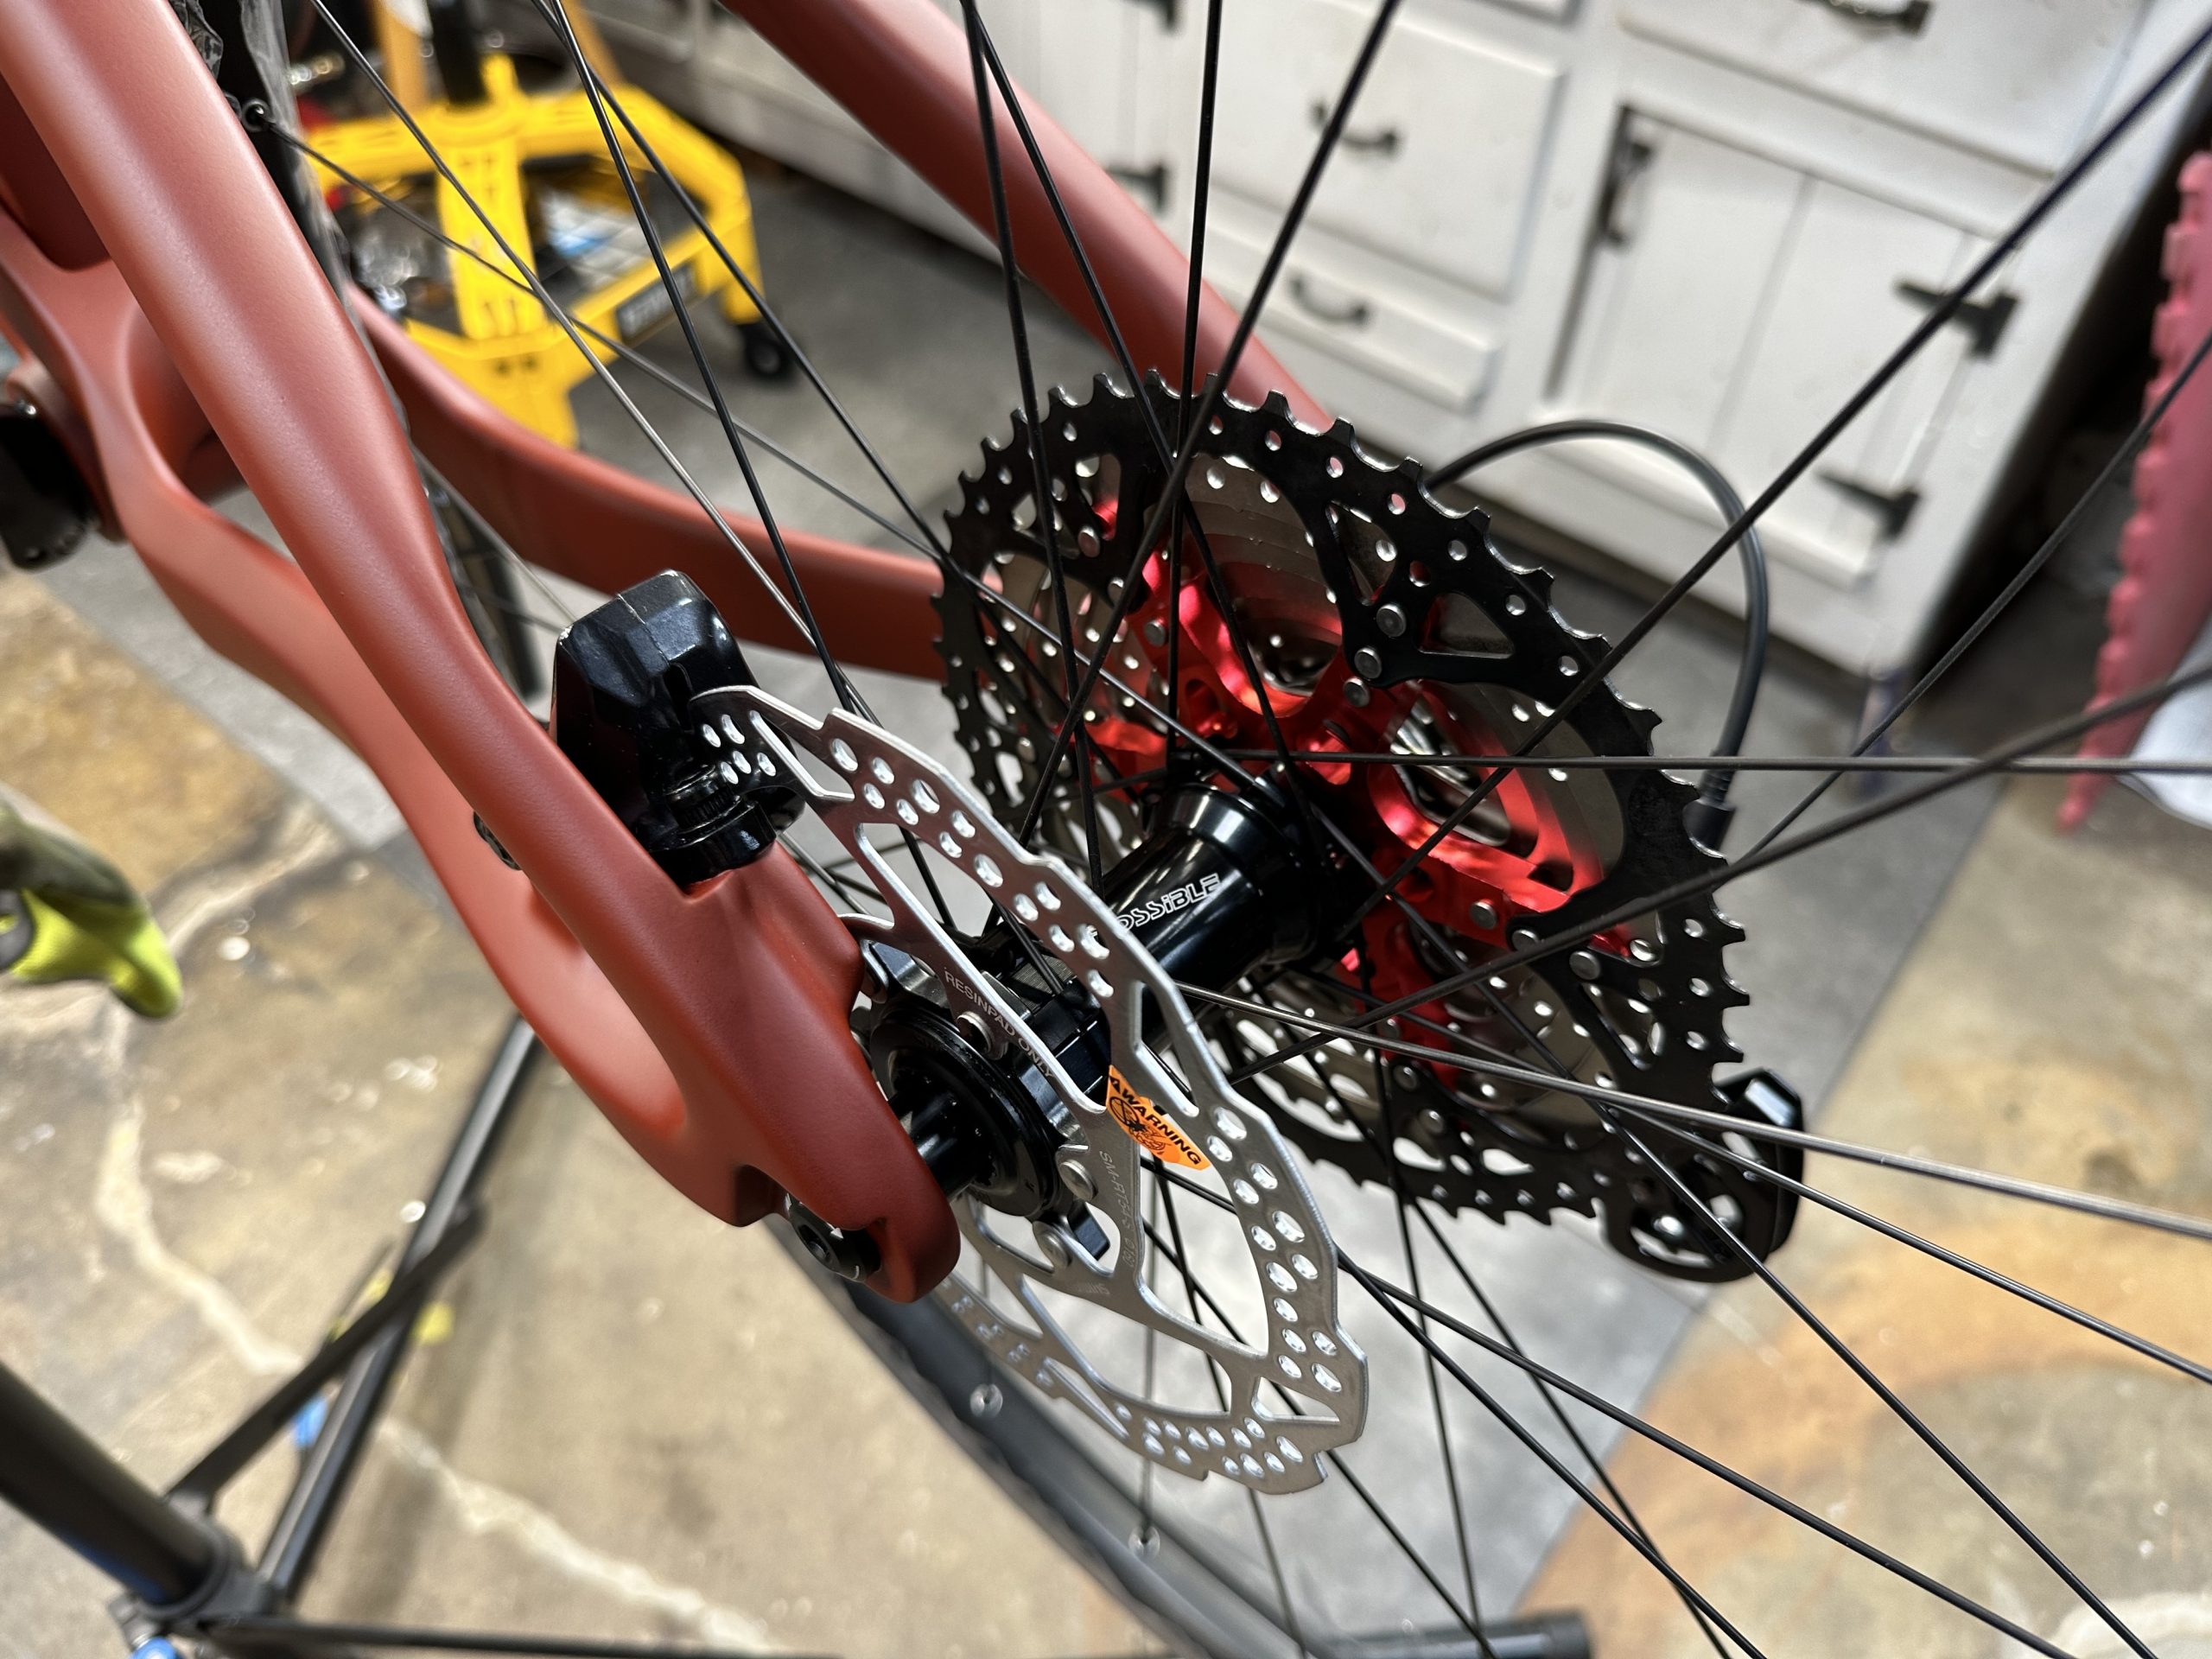
- 29″ SunRingle Duroc 30 Wheels with Possible Centerlock Hubs 110X15 148X12
- Shimano 160mm Front and Rear Center Lock Rotors
- Shimano Deore M5100 11 Speed Groupset with Sunshine 46T Cassette
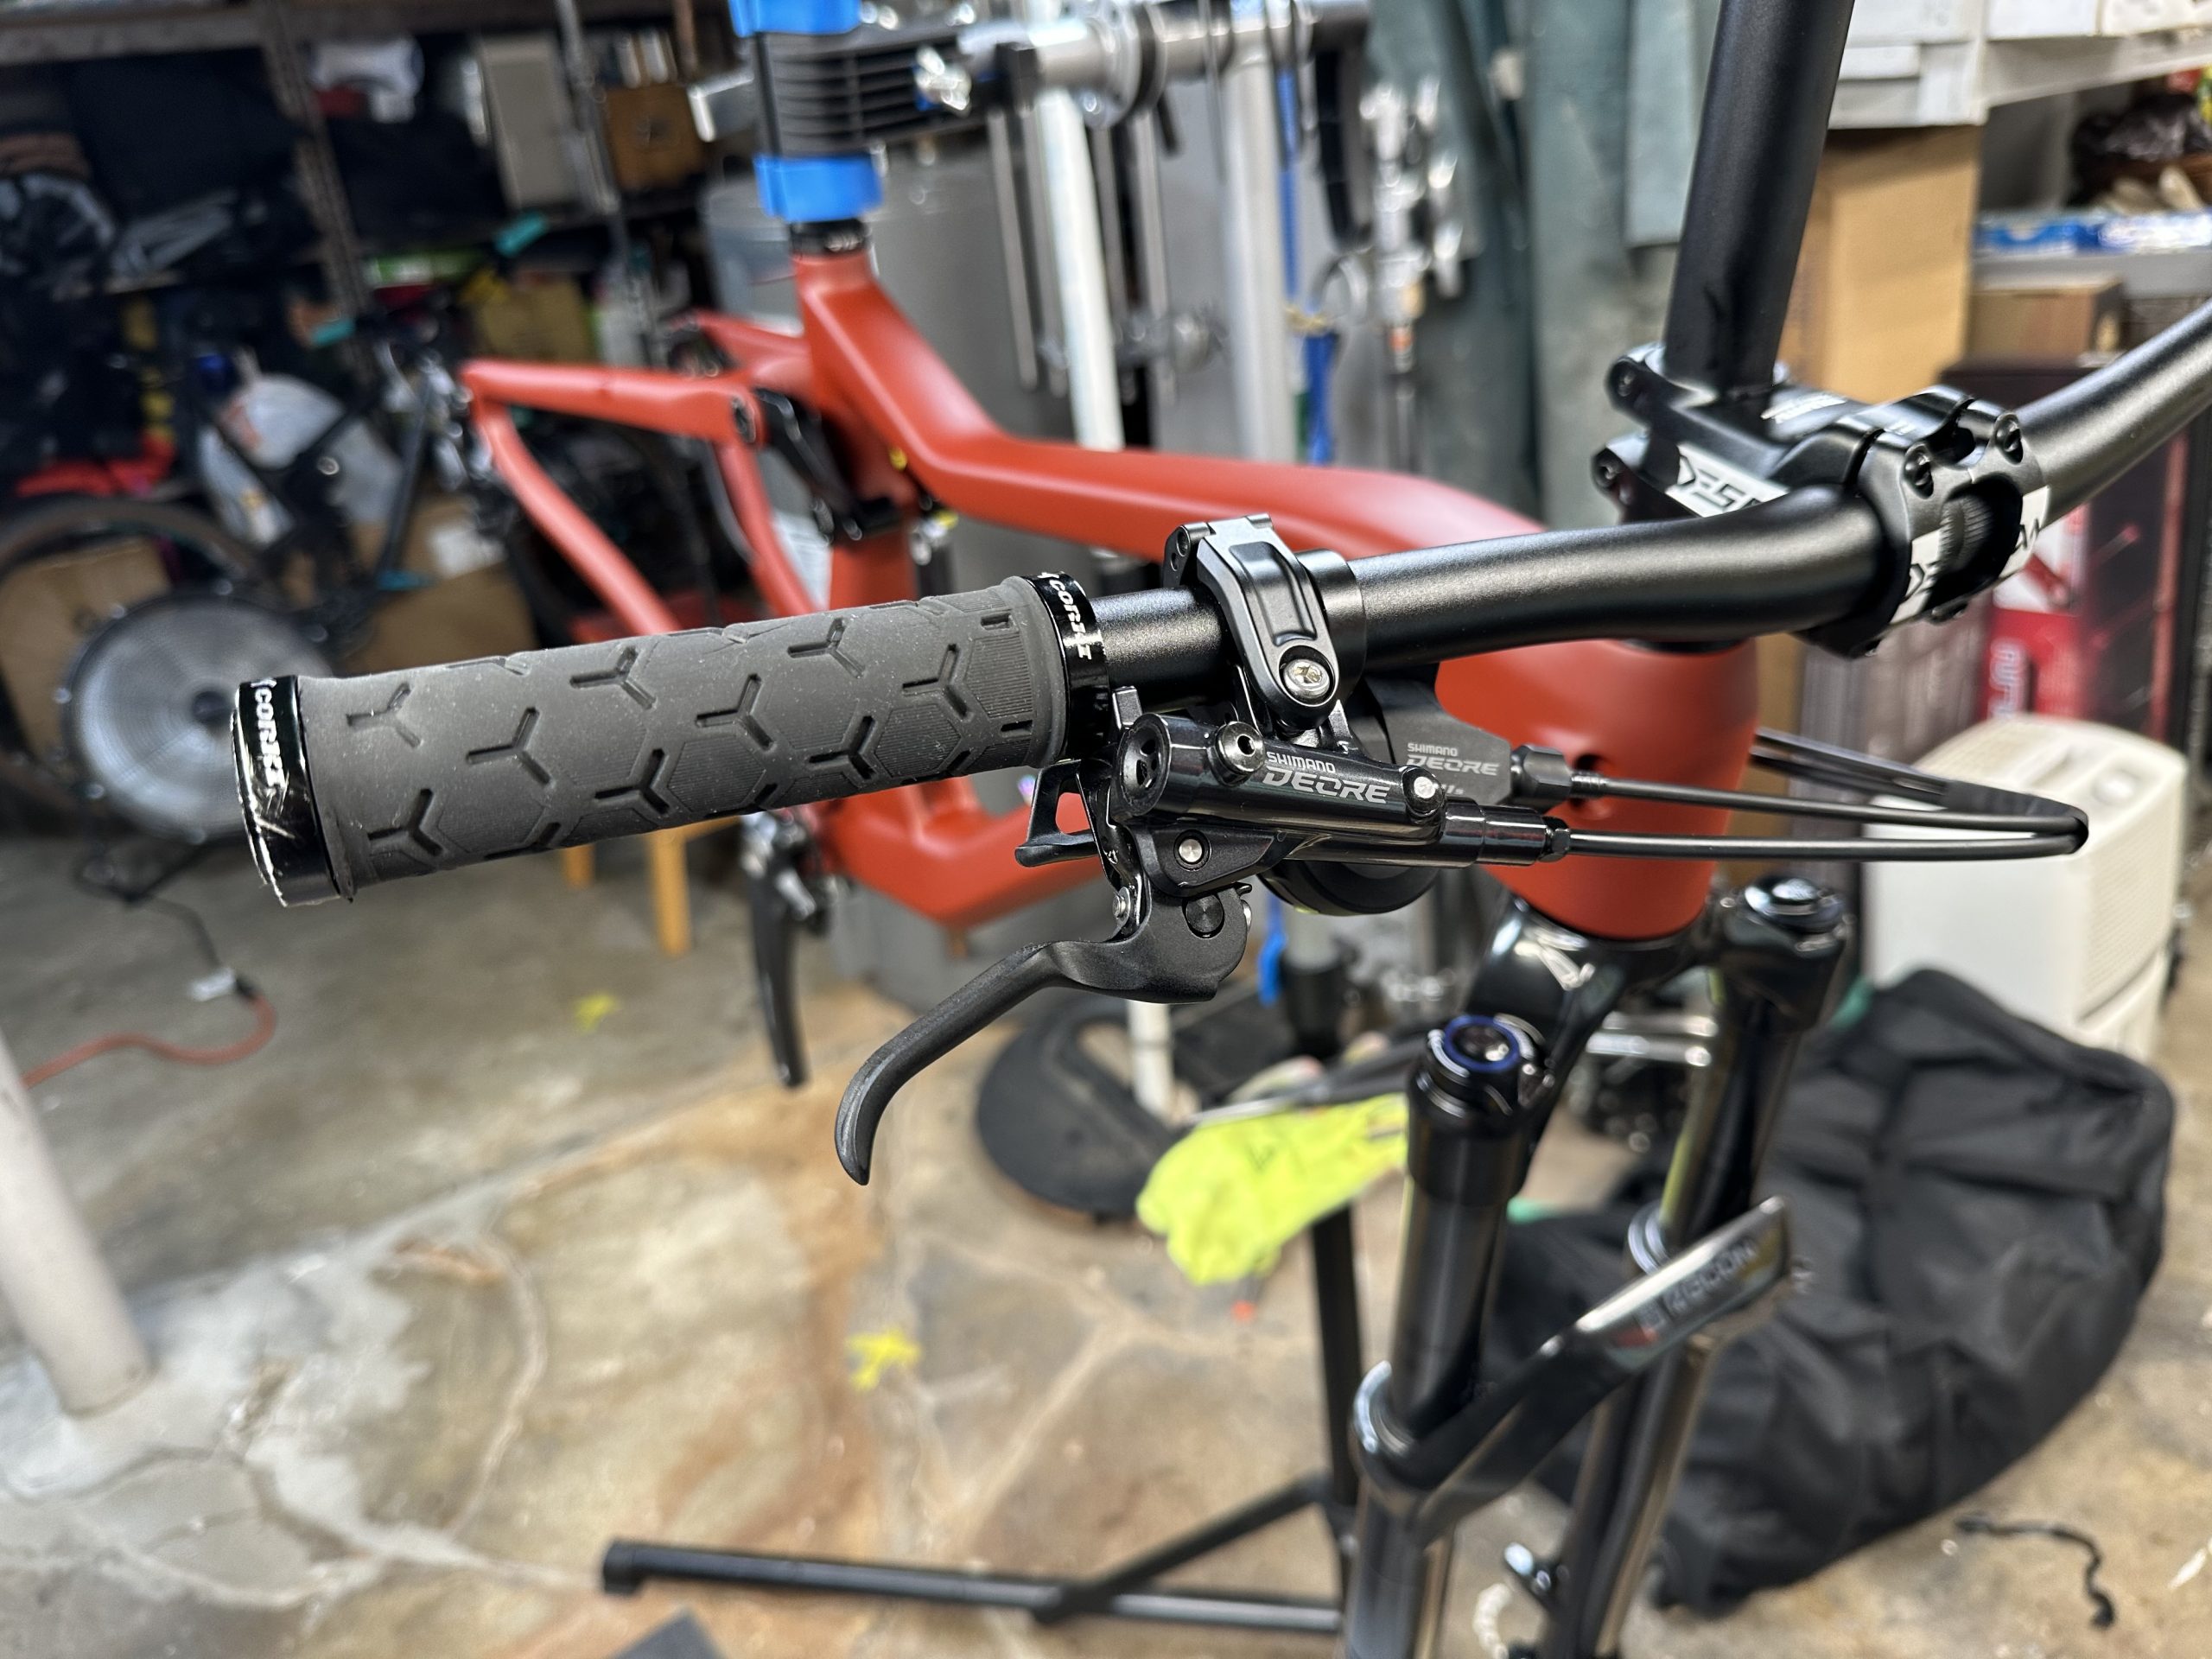
- Shimano Deore XT M6100 Hydraulic Brake
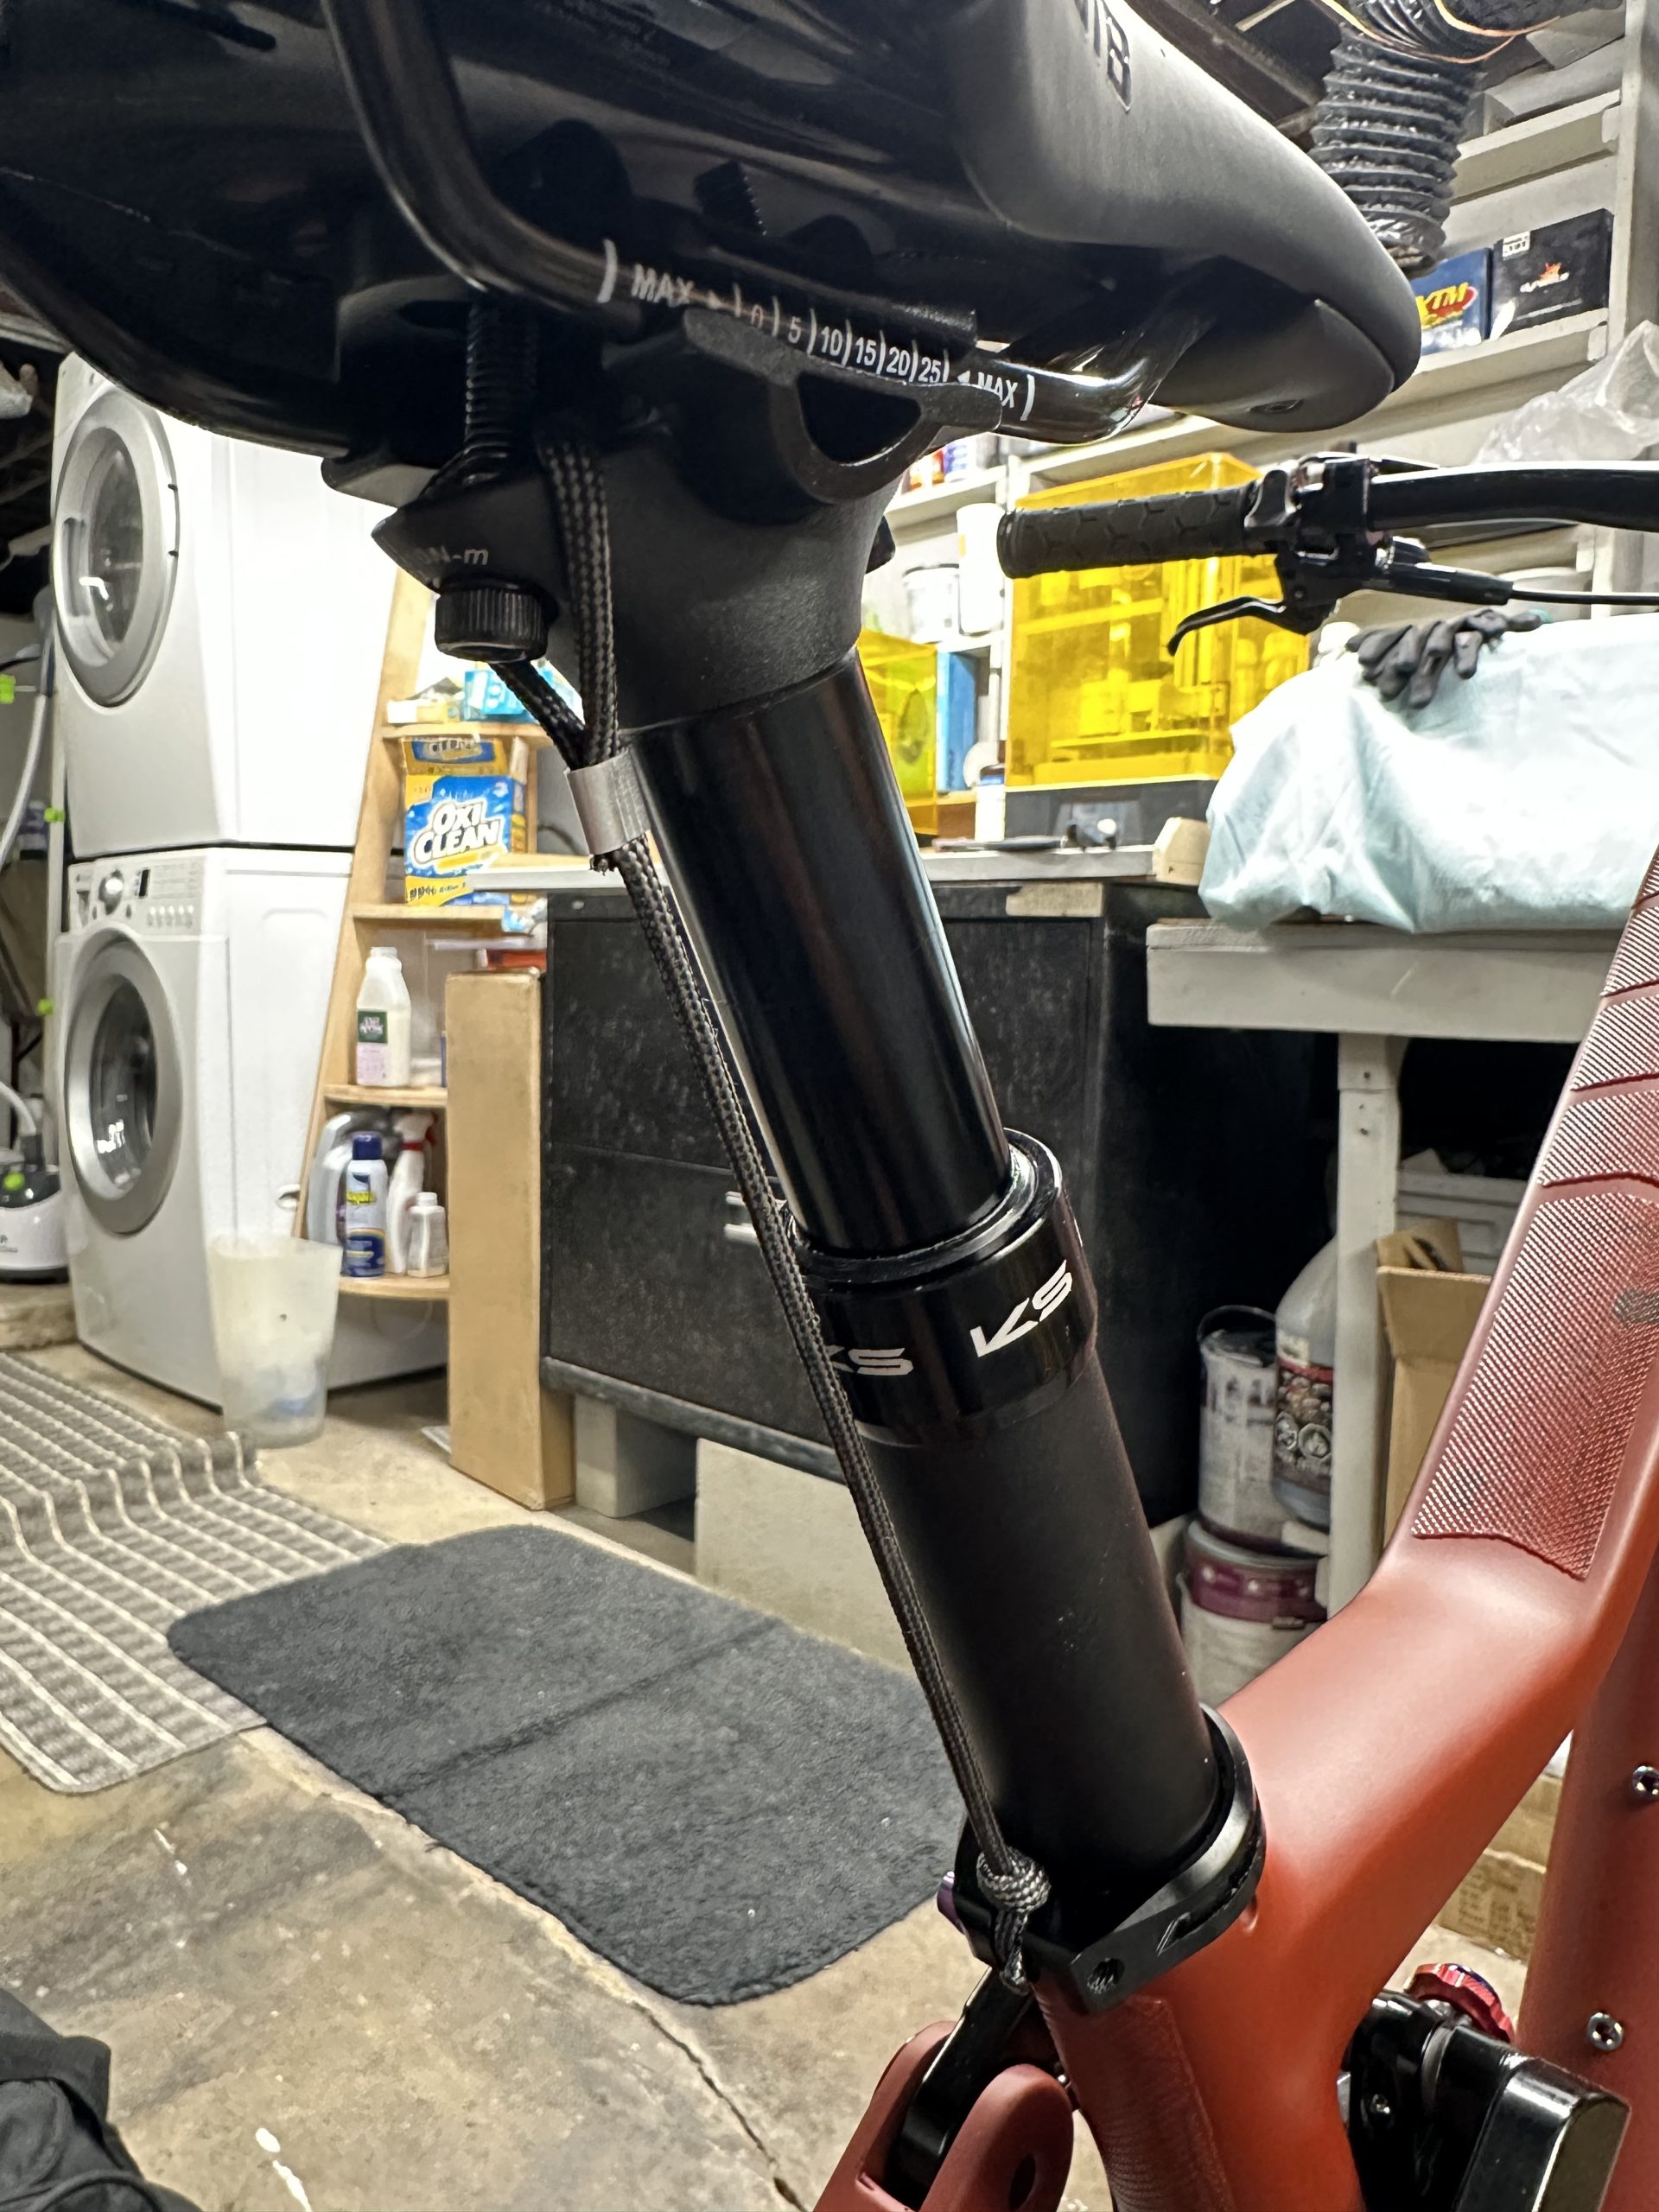
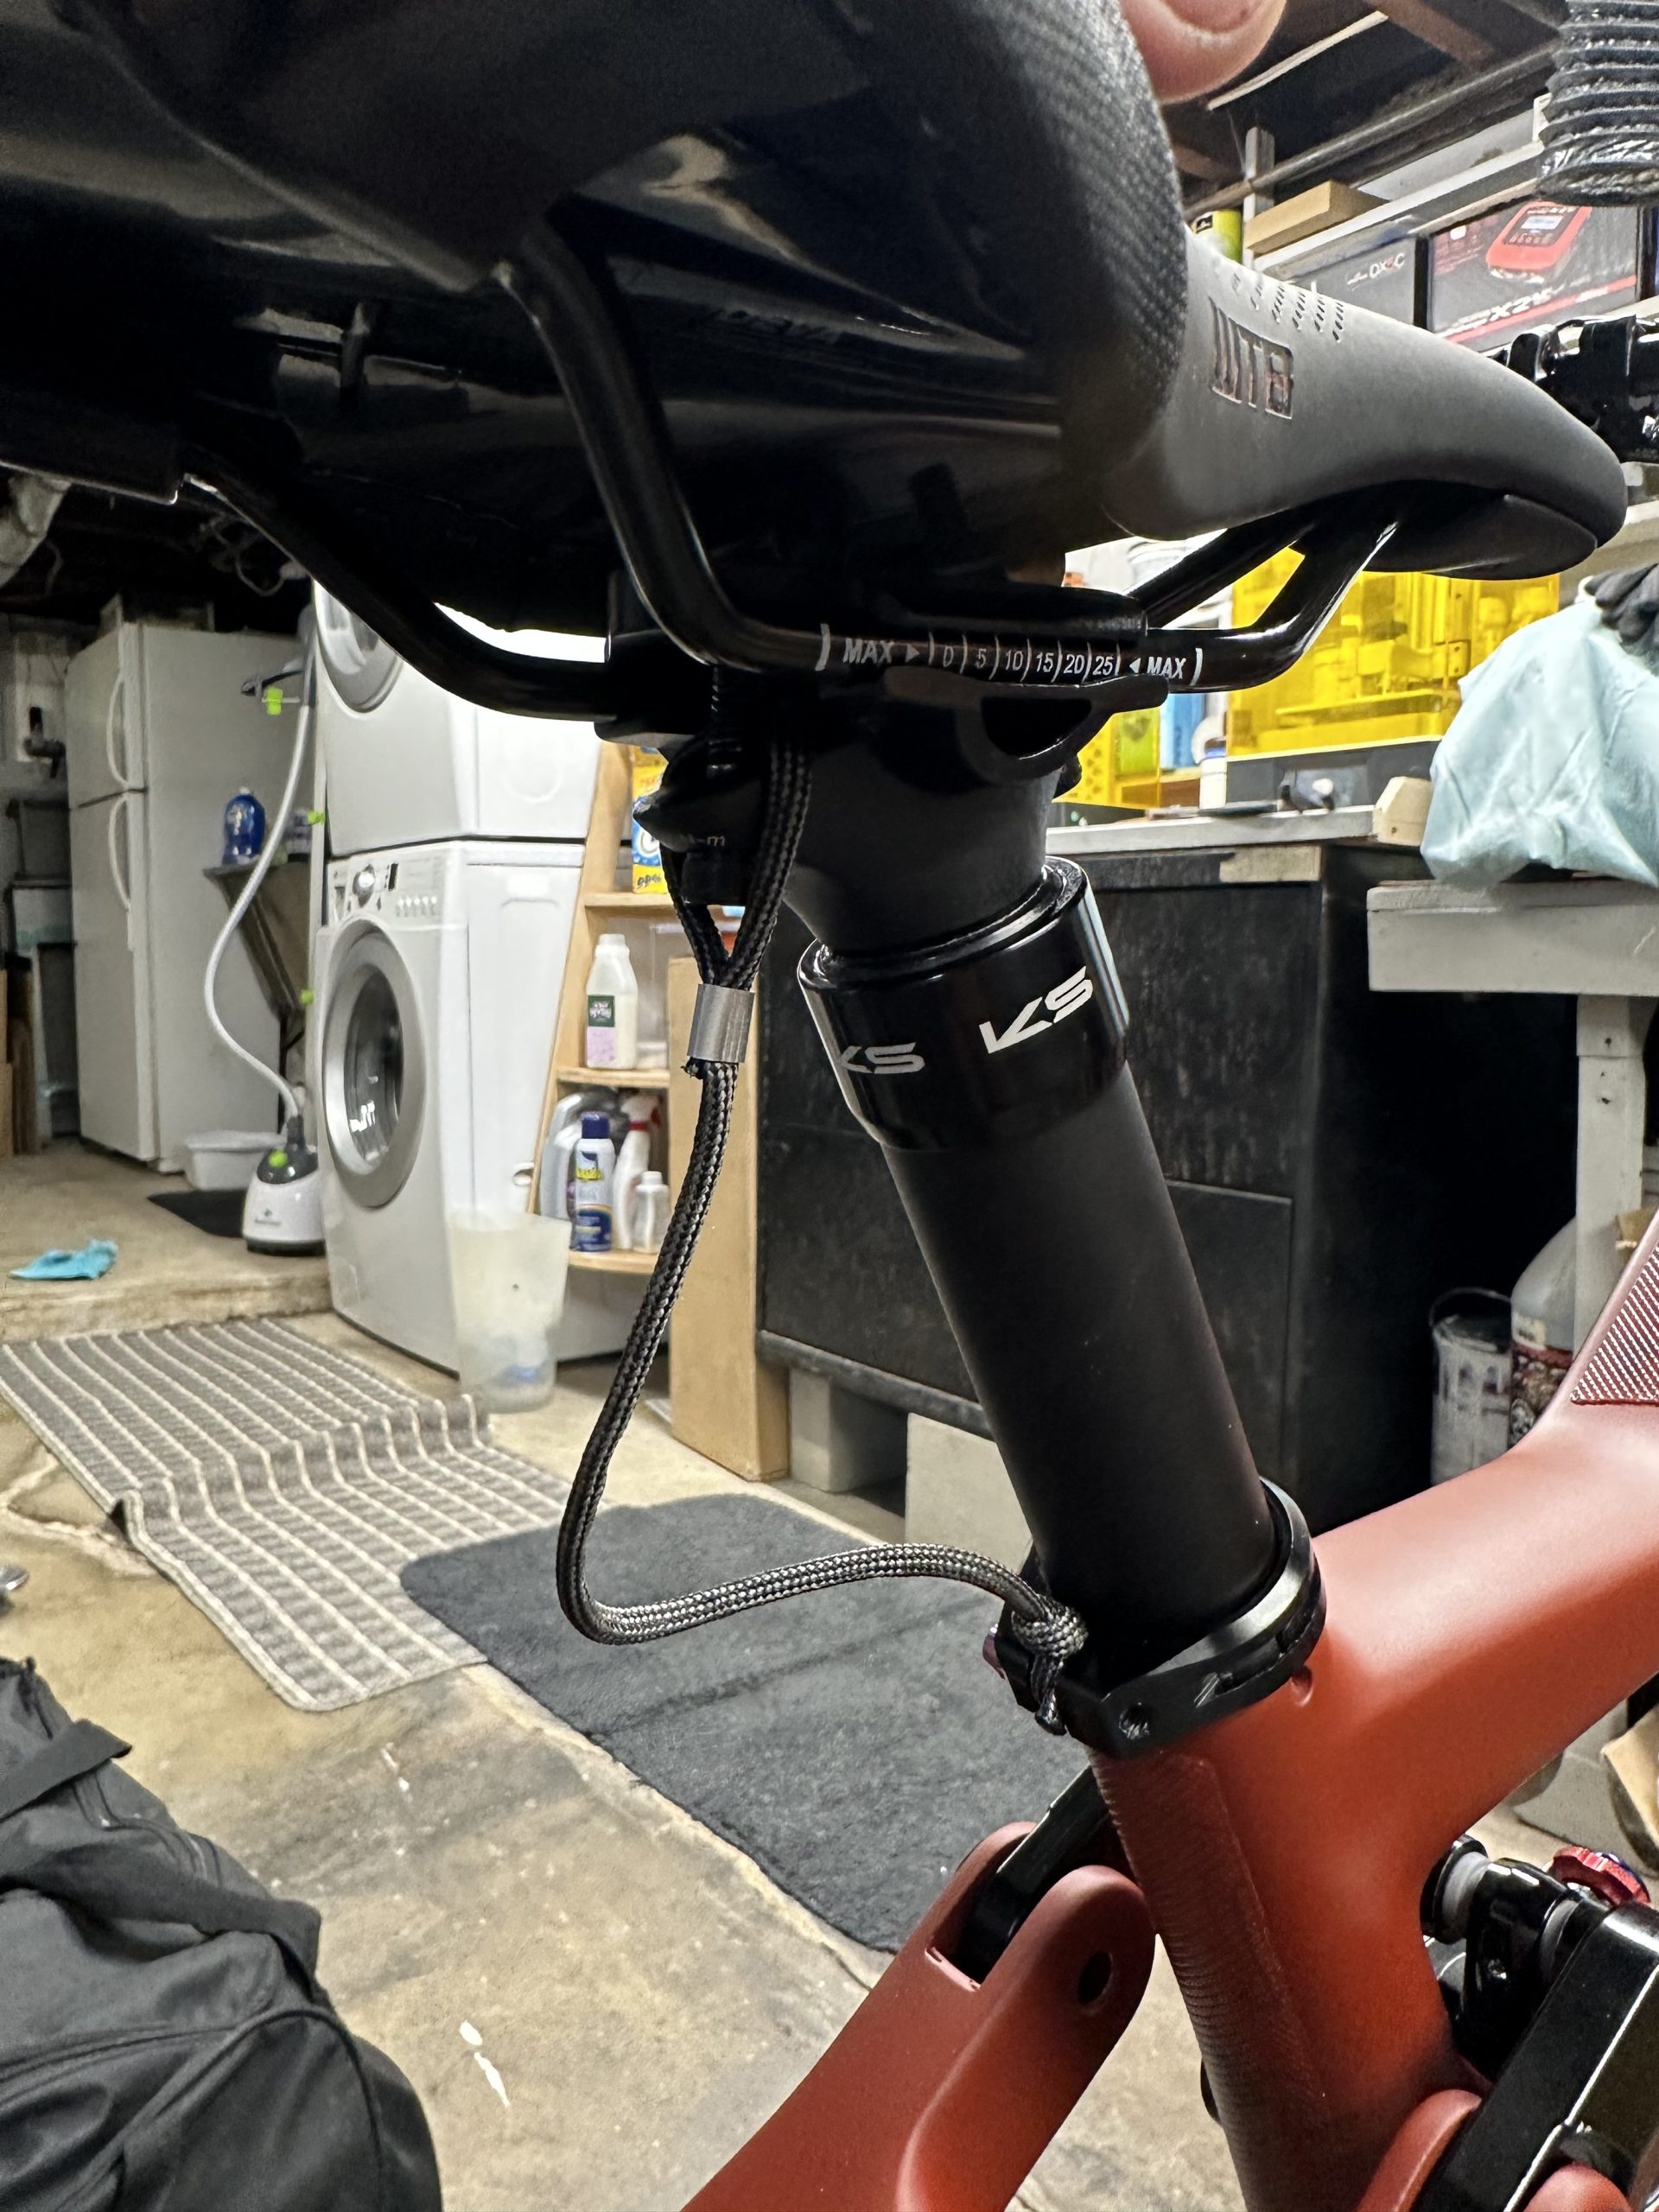
- KS E20/E20-i travel125mm Dropper Post
- MAXXIS Ardent Bicycle Tire
Within the USA
Most everything arrived in two to three weeks, except the wheelsets due to the hubs being on backorder. We ended up paying extra to get more expensive hubs that were in stock so that we could get them shipped sooner, rather than waiting the month or two that the seller said it would take to get the hubs. I guess it could have been an upsell technique but the wheelsets were already so cheap, even with the upgraded hubs, it wasn’t an issue. So far, I’ve been very lucky, between the two builds, that all of the AliExpress parts arrived on time and undamaged.
Paint:
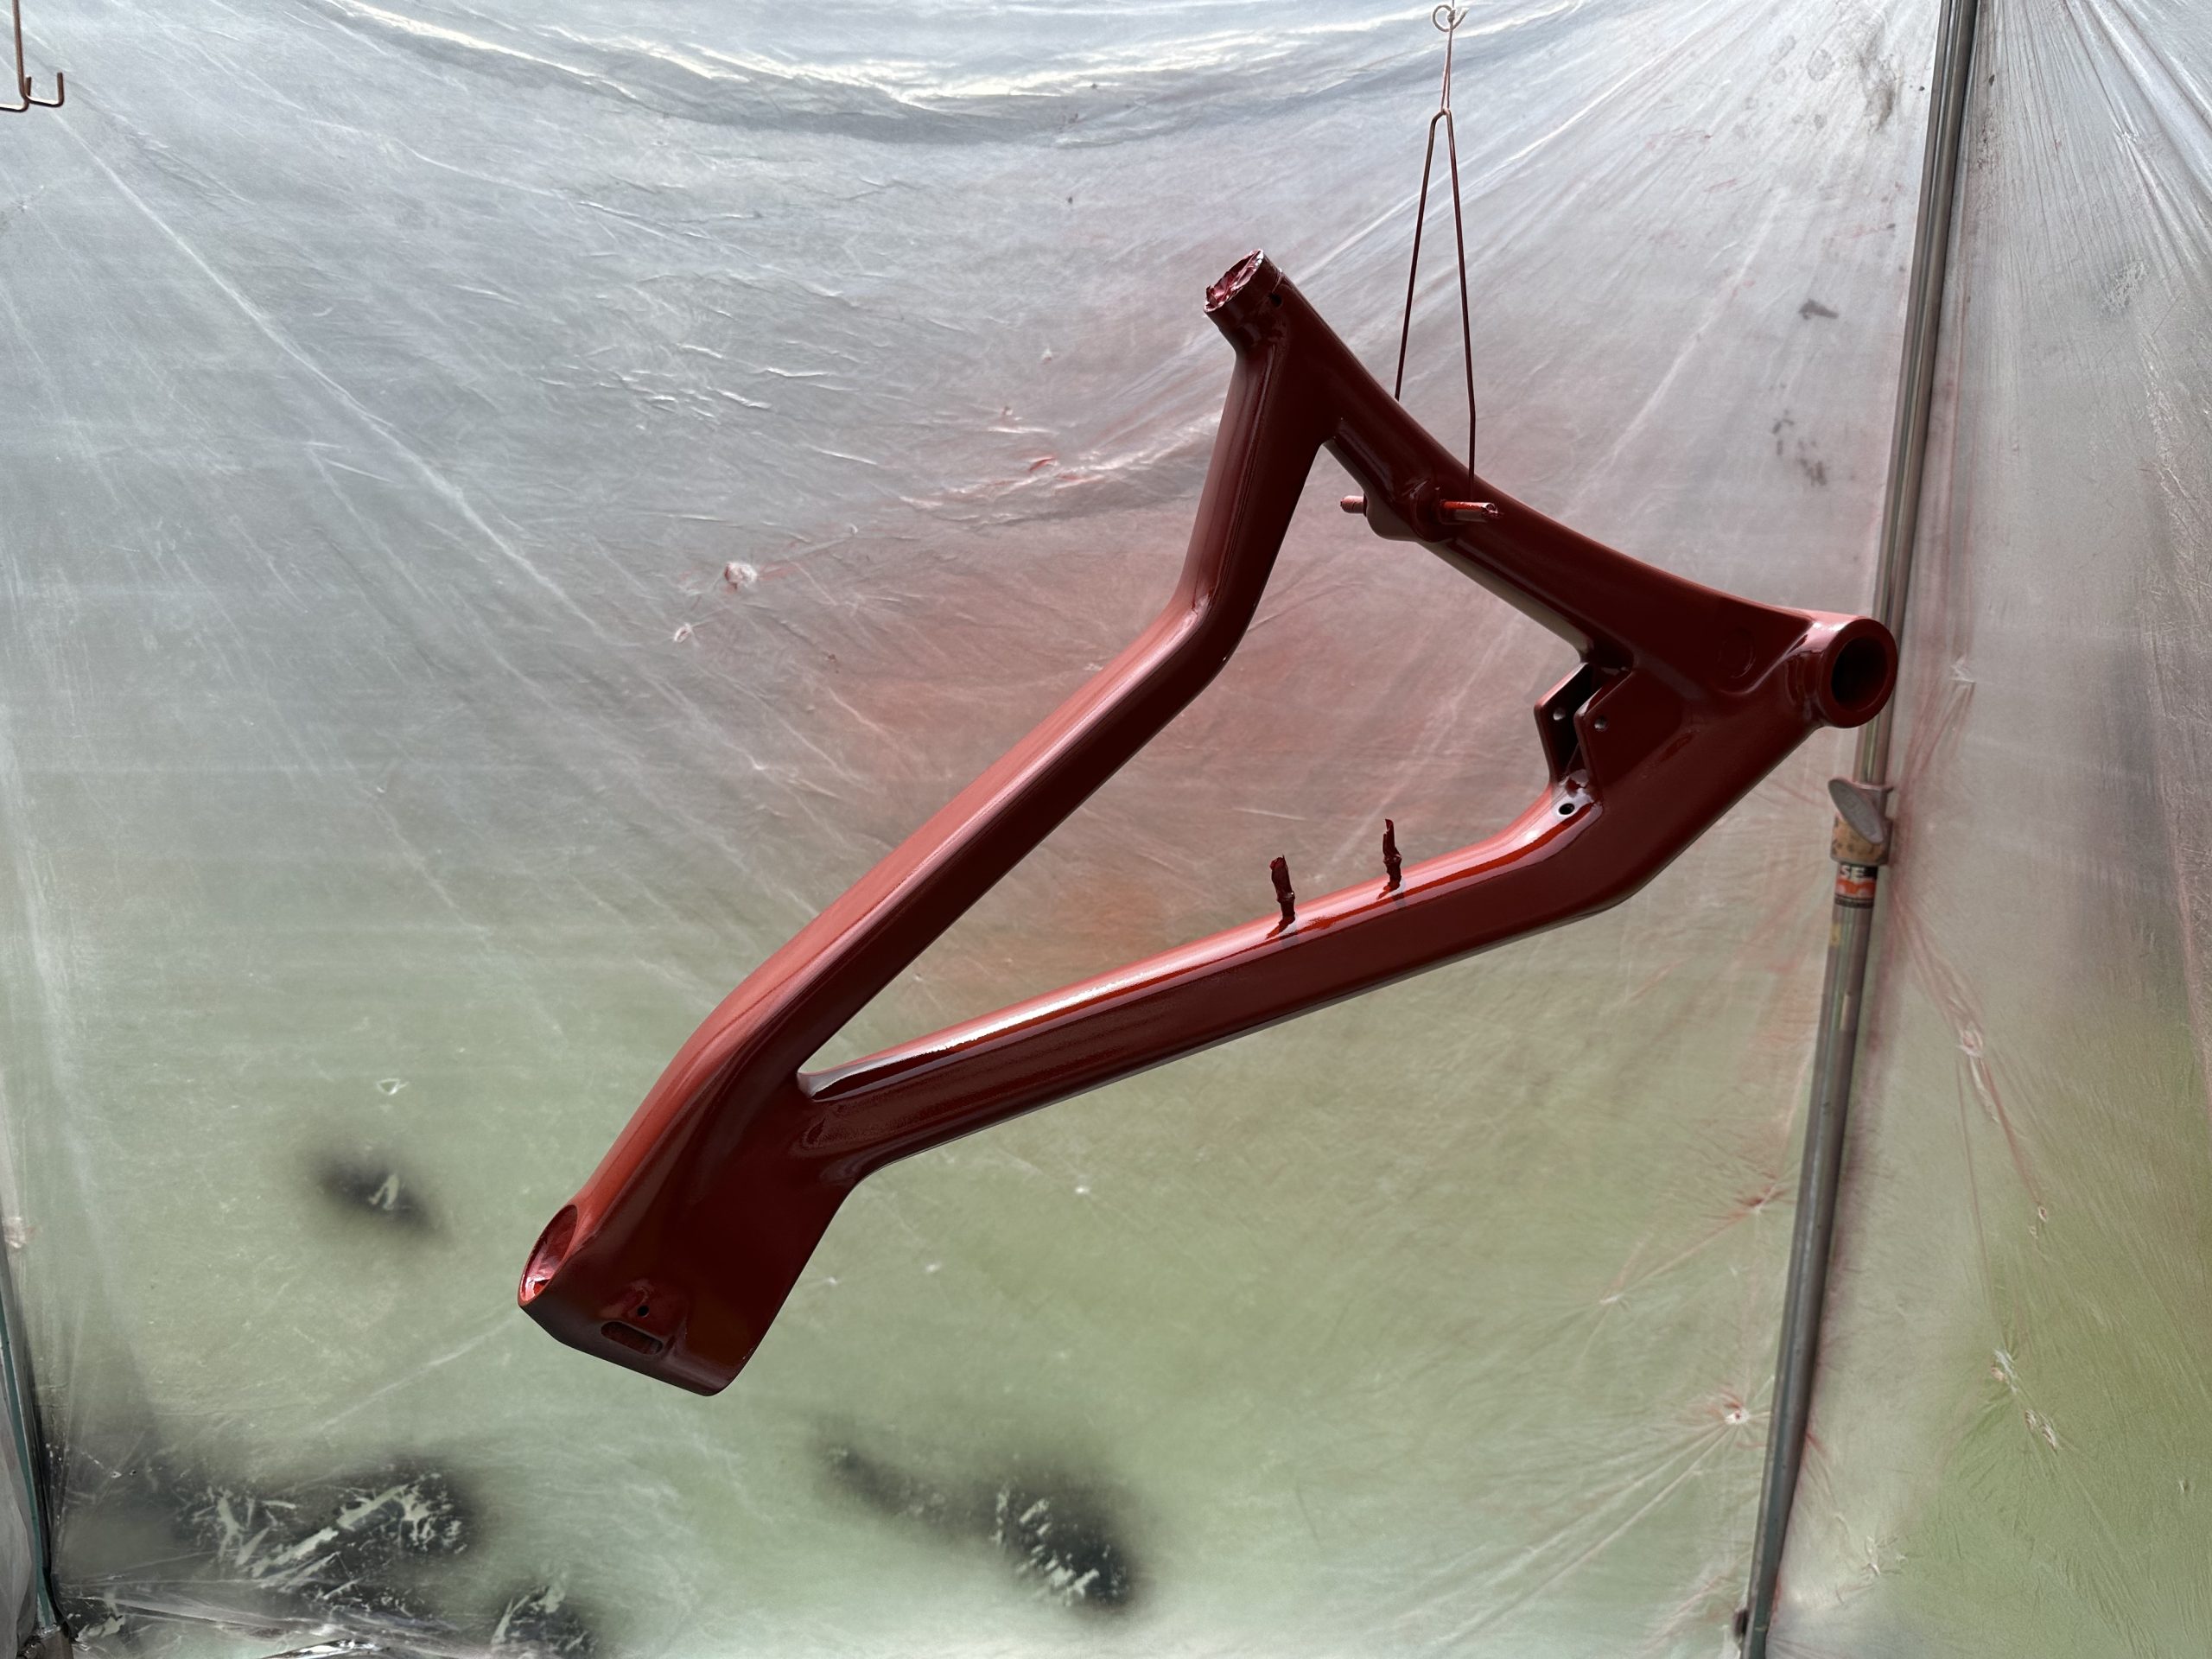
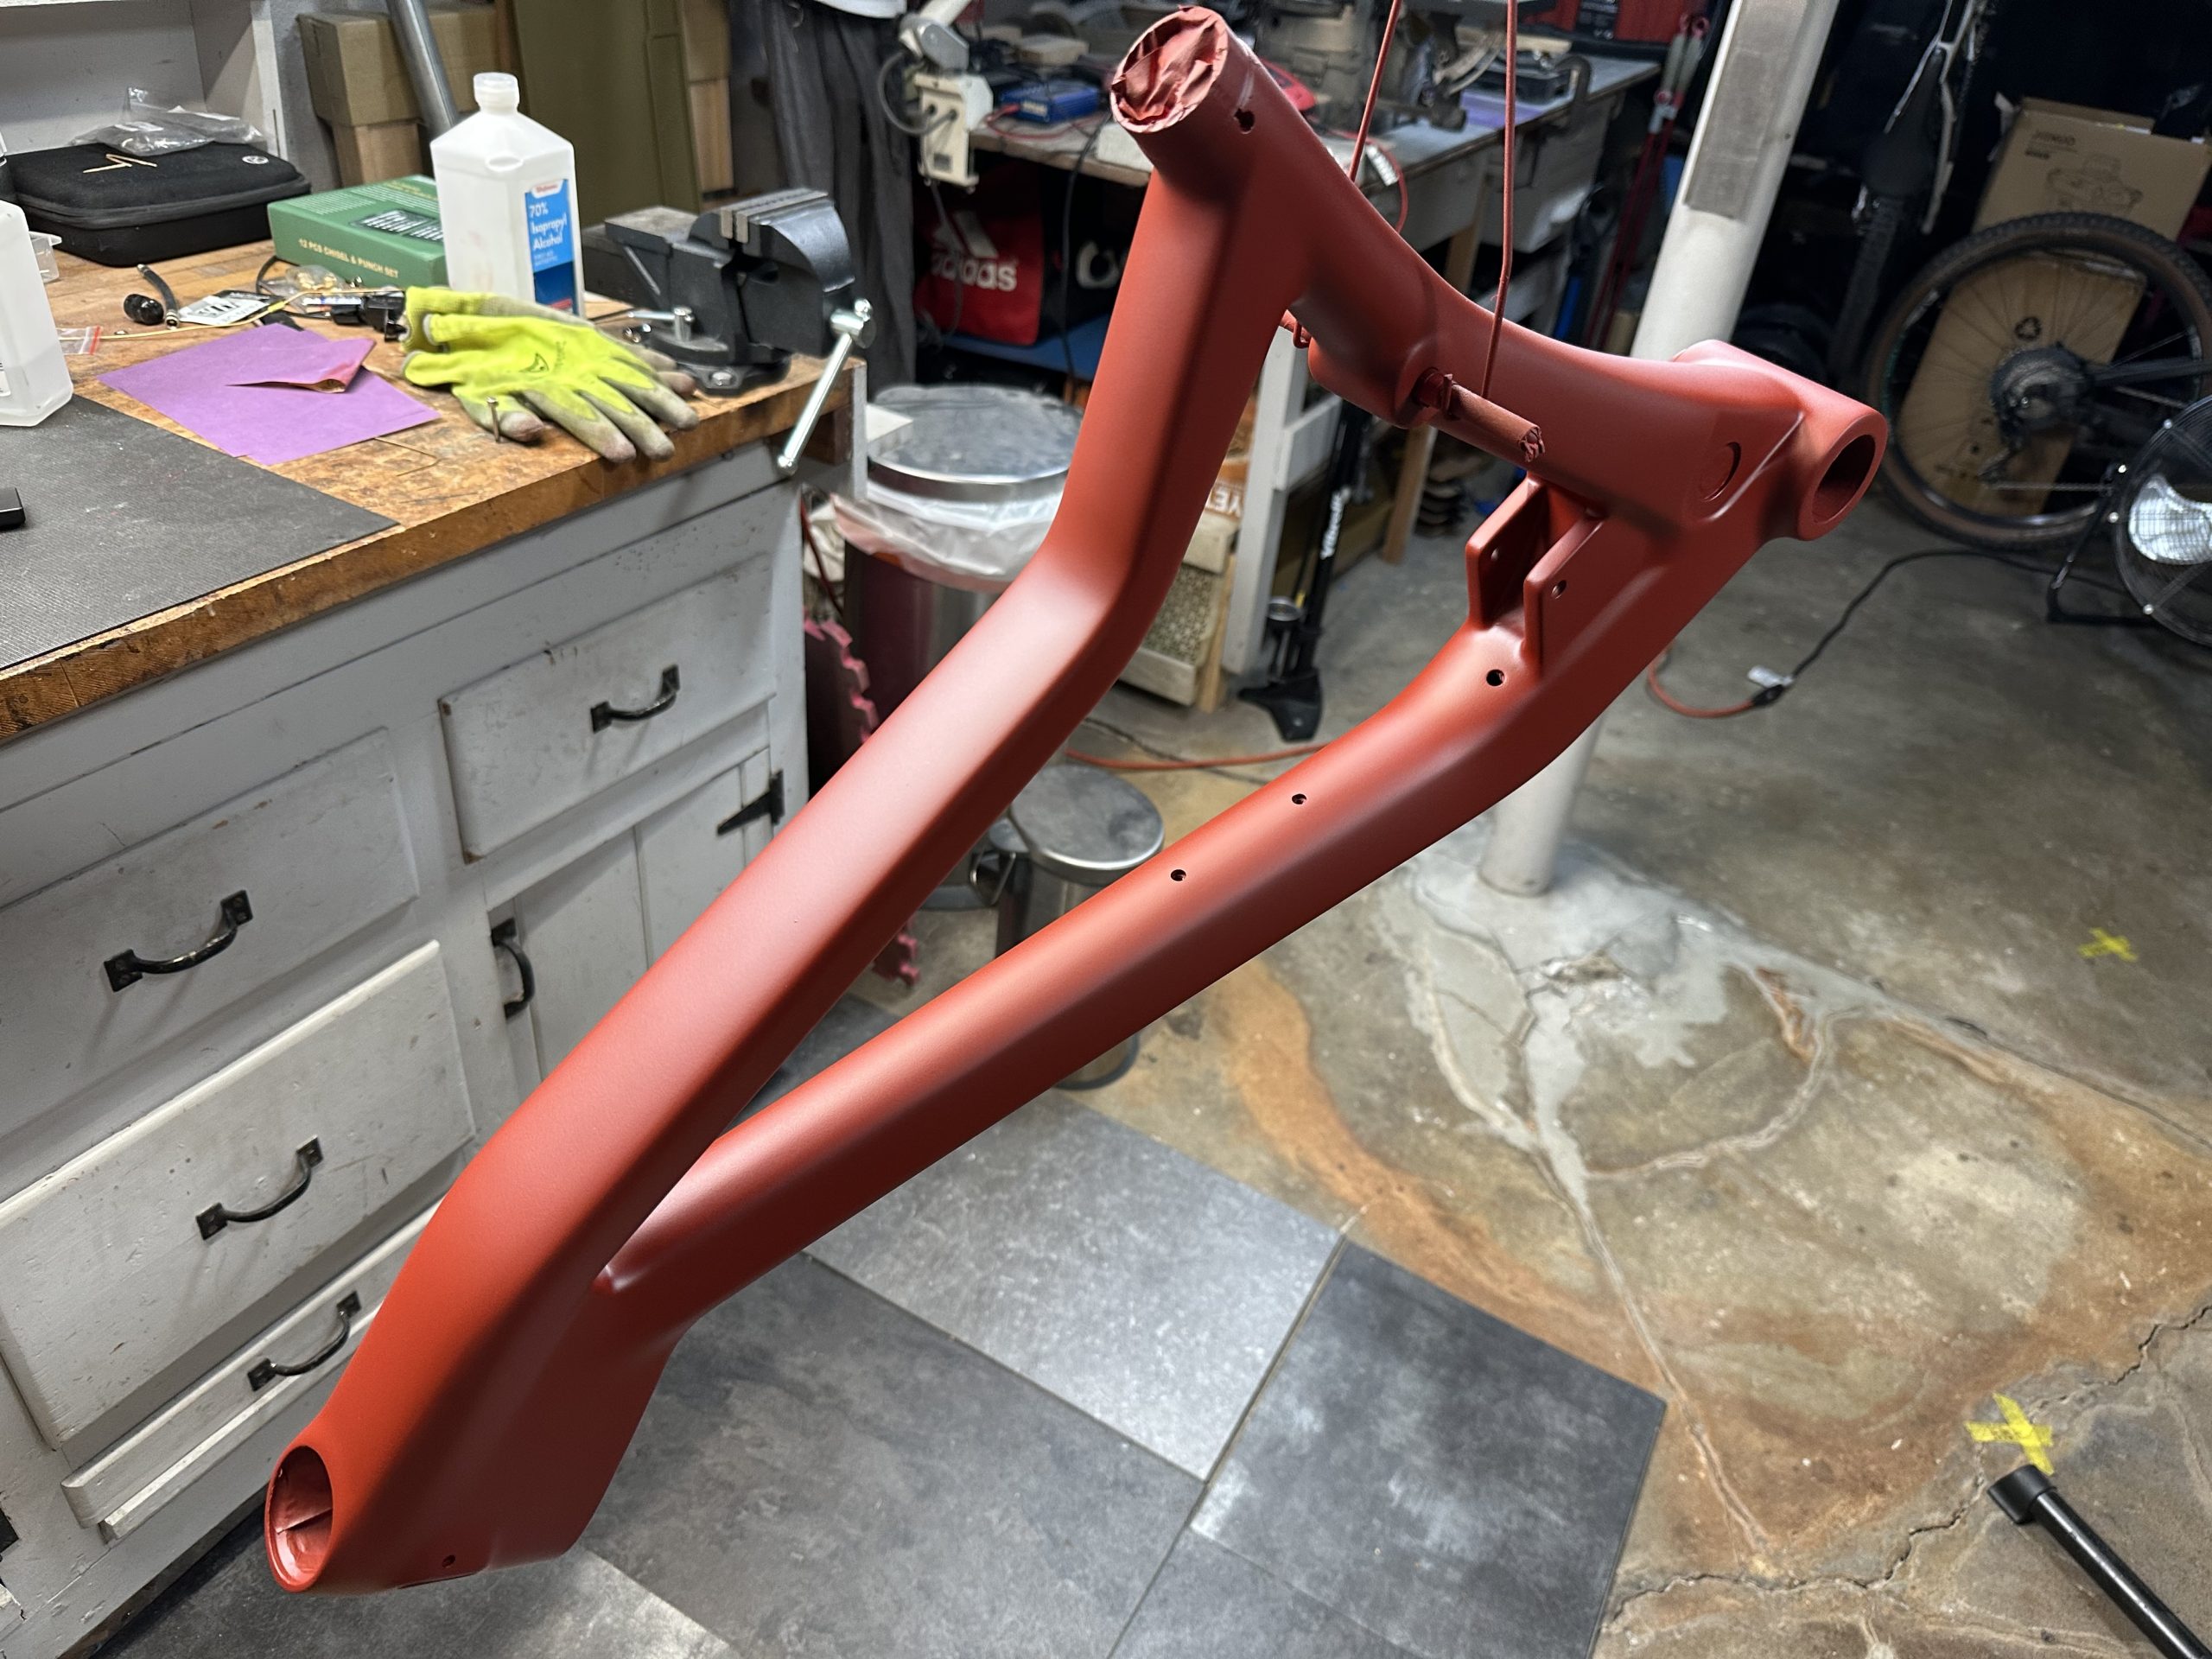
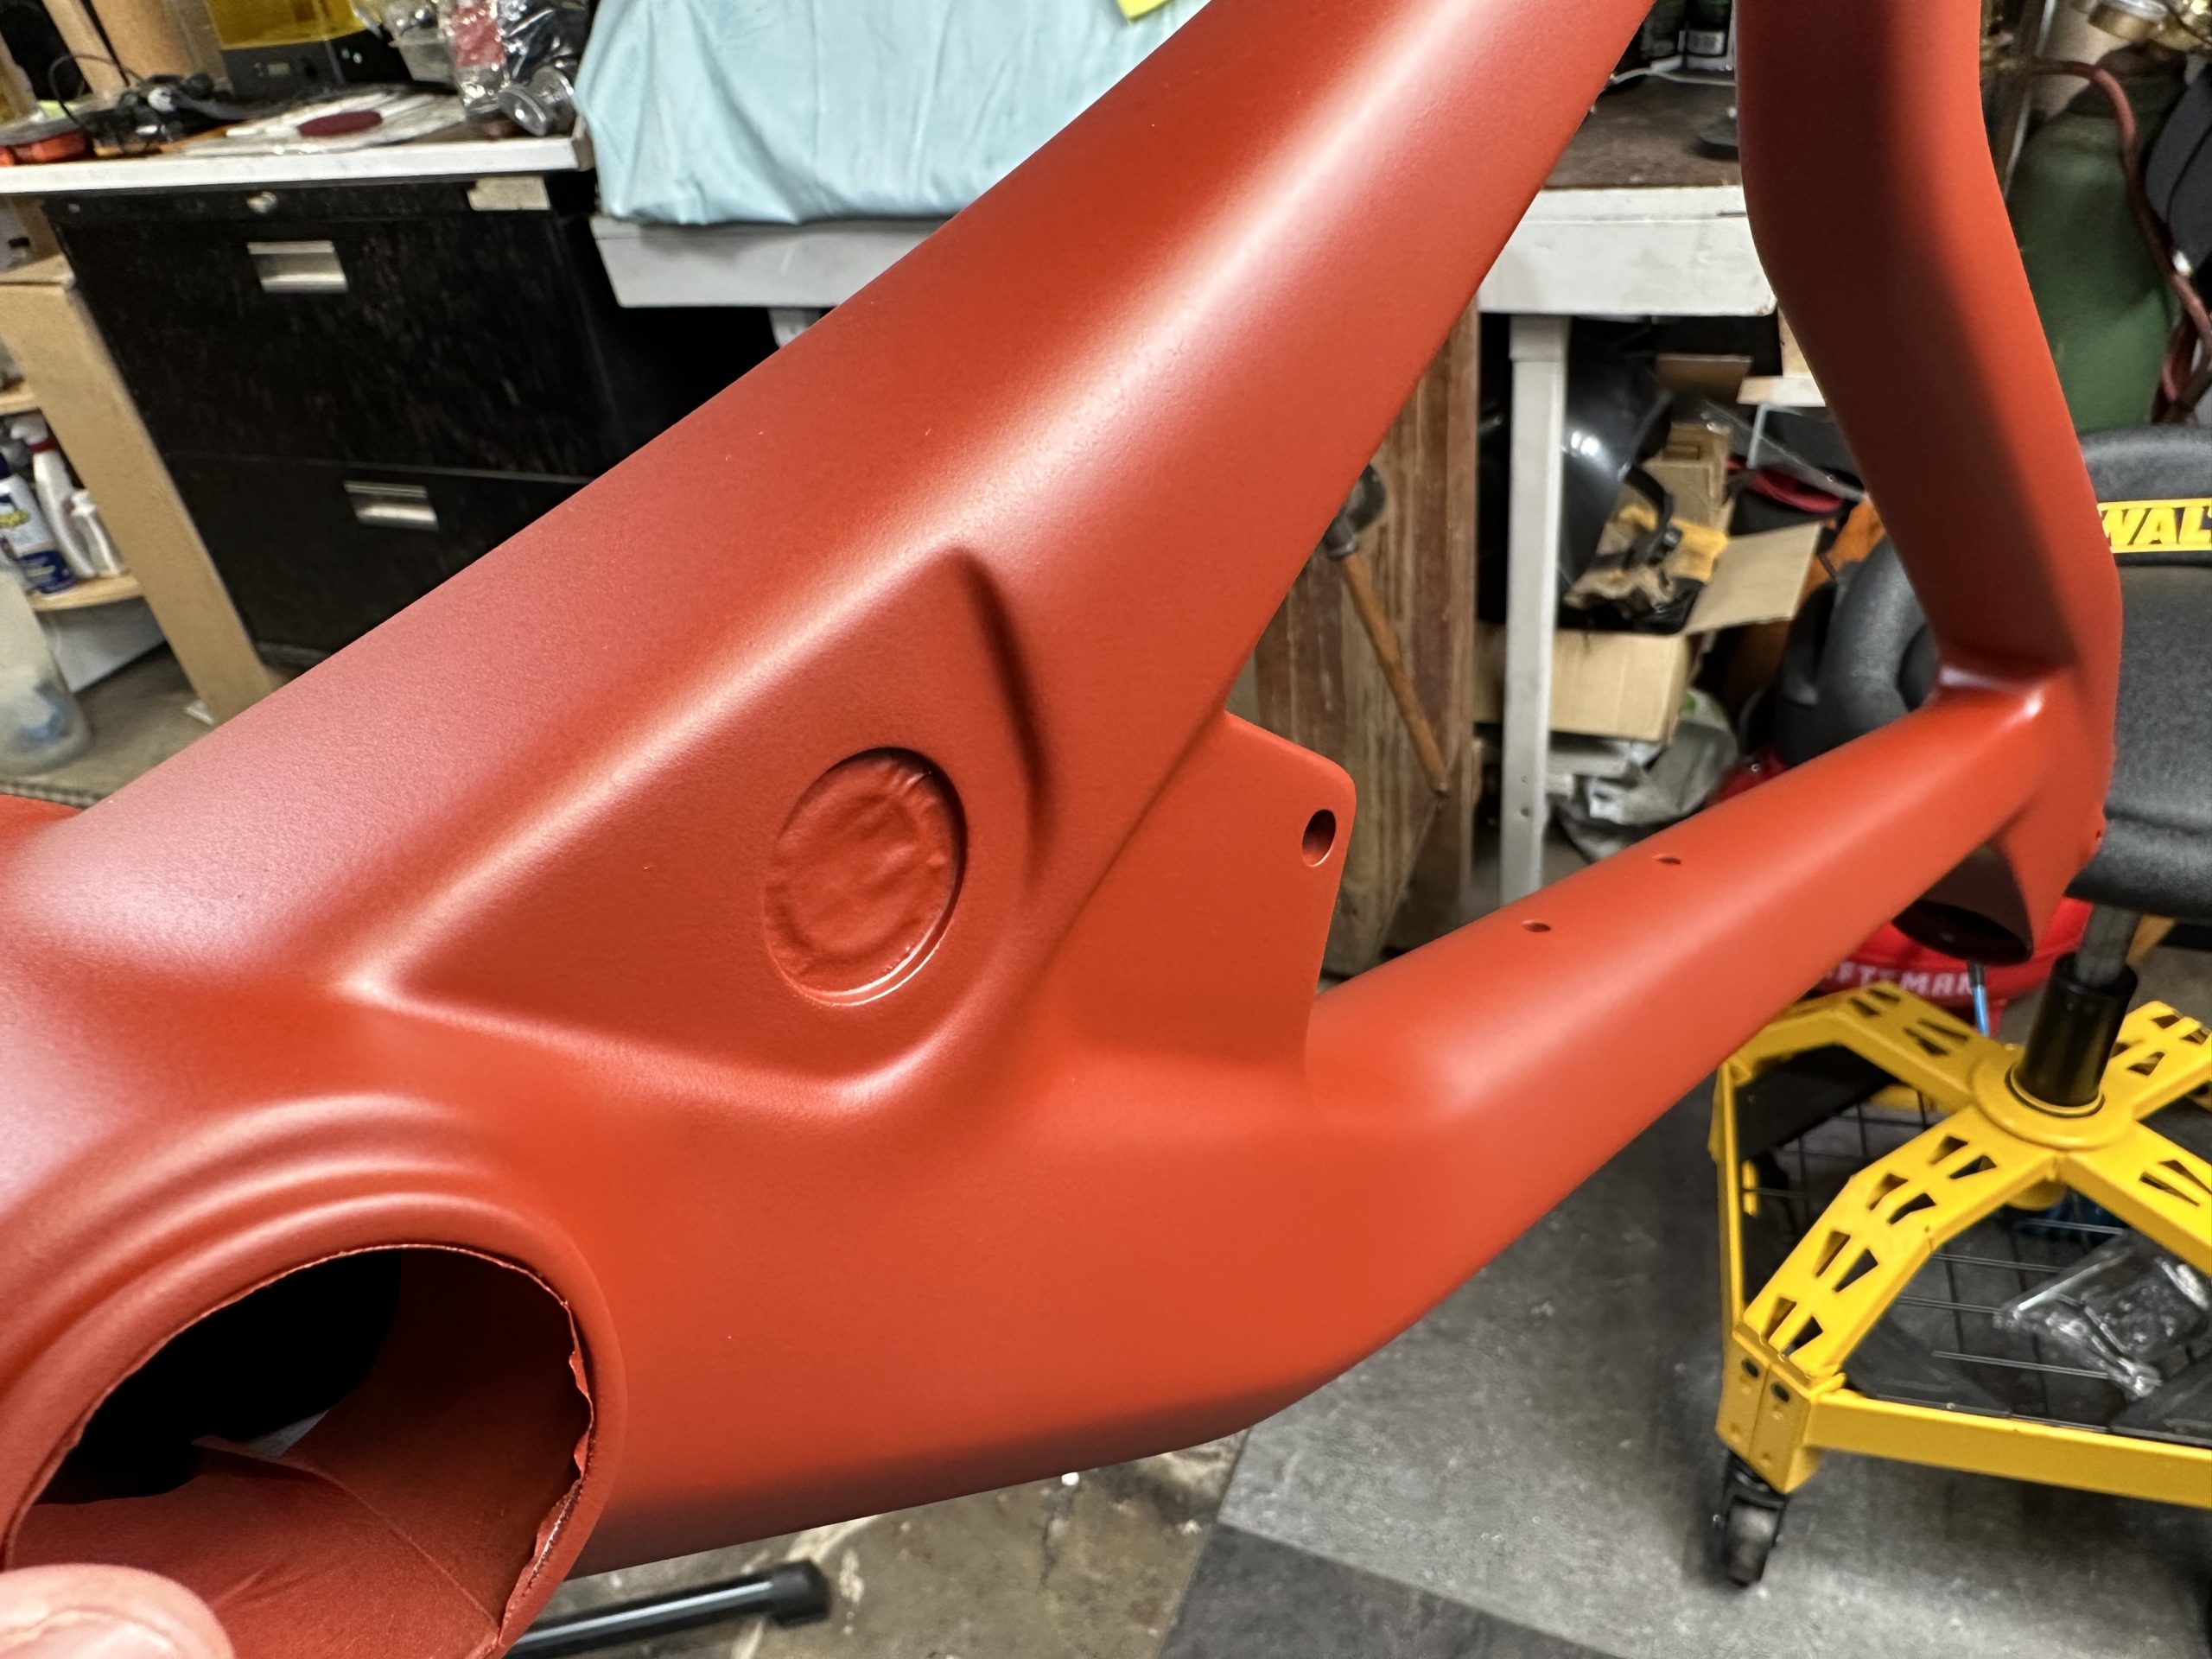
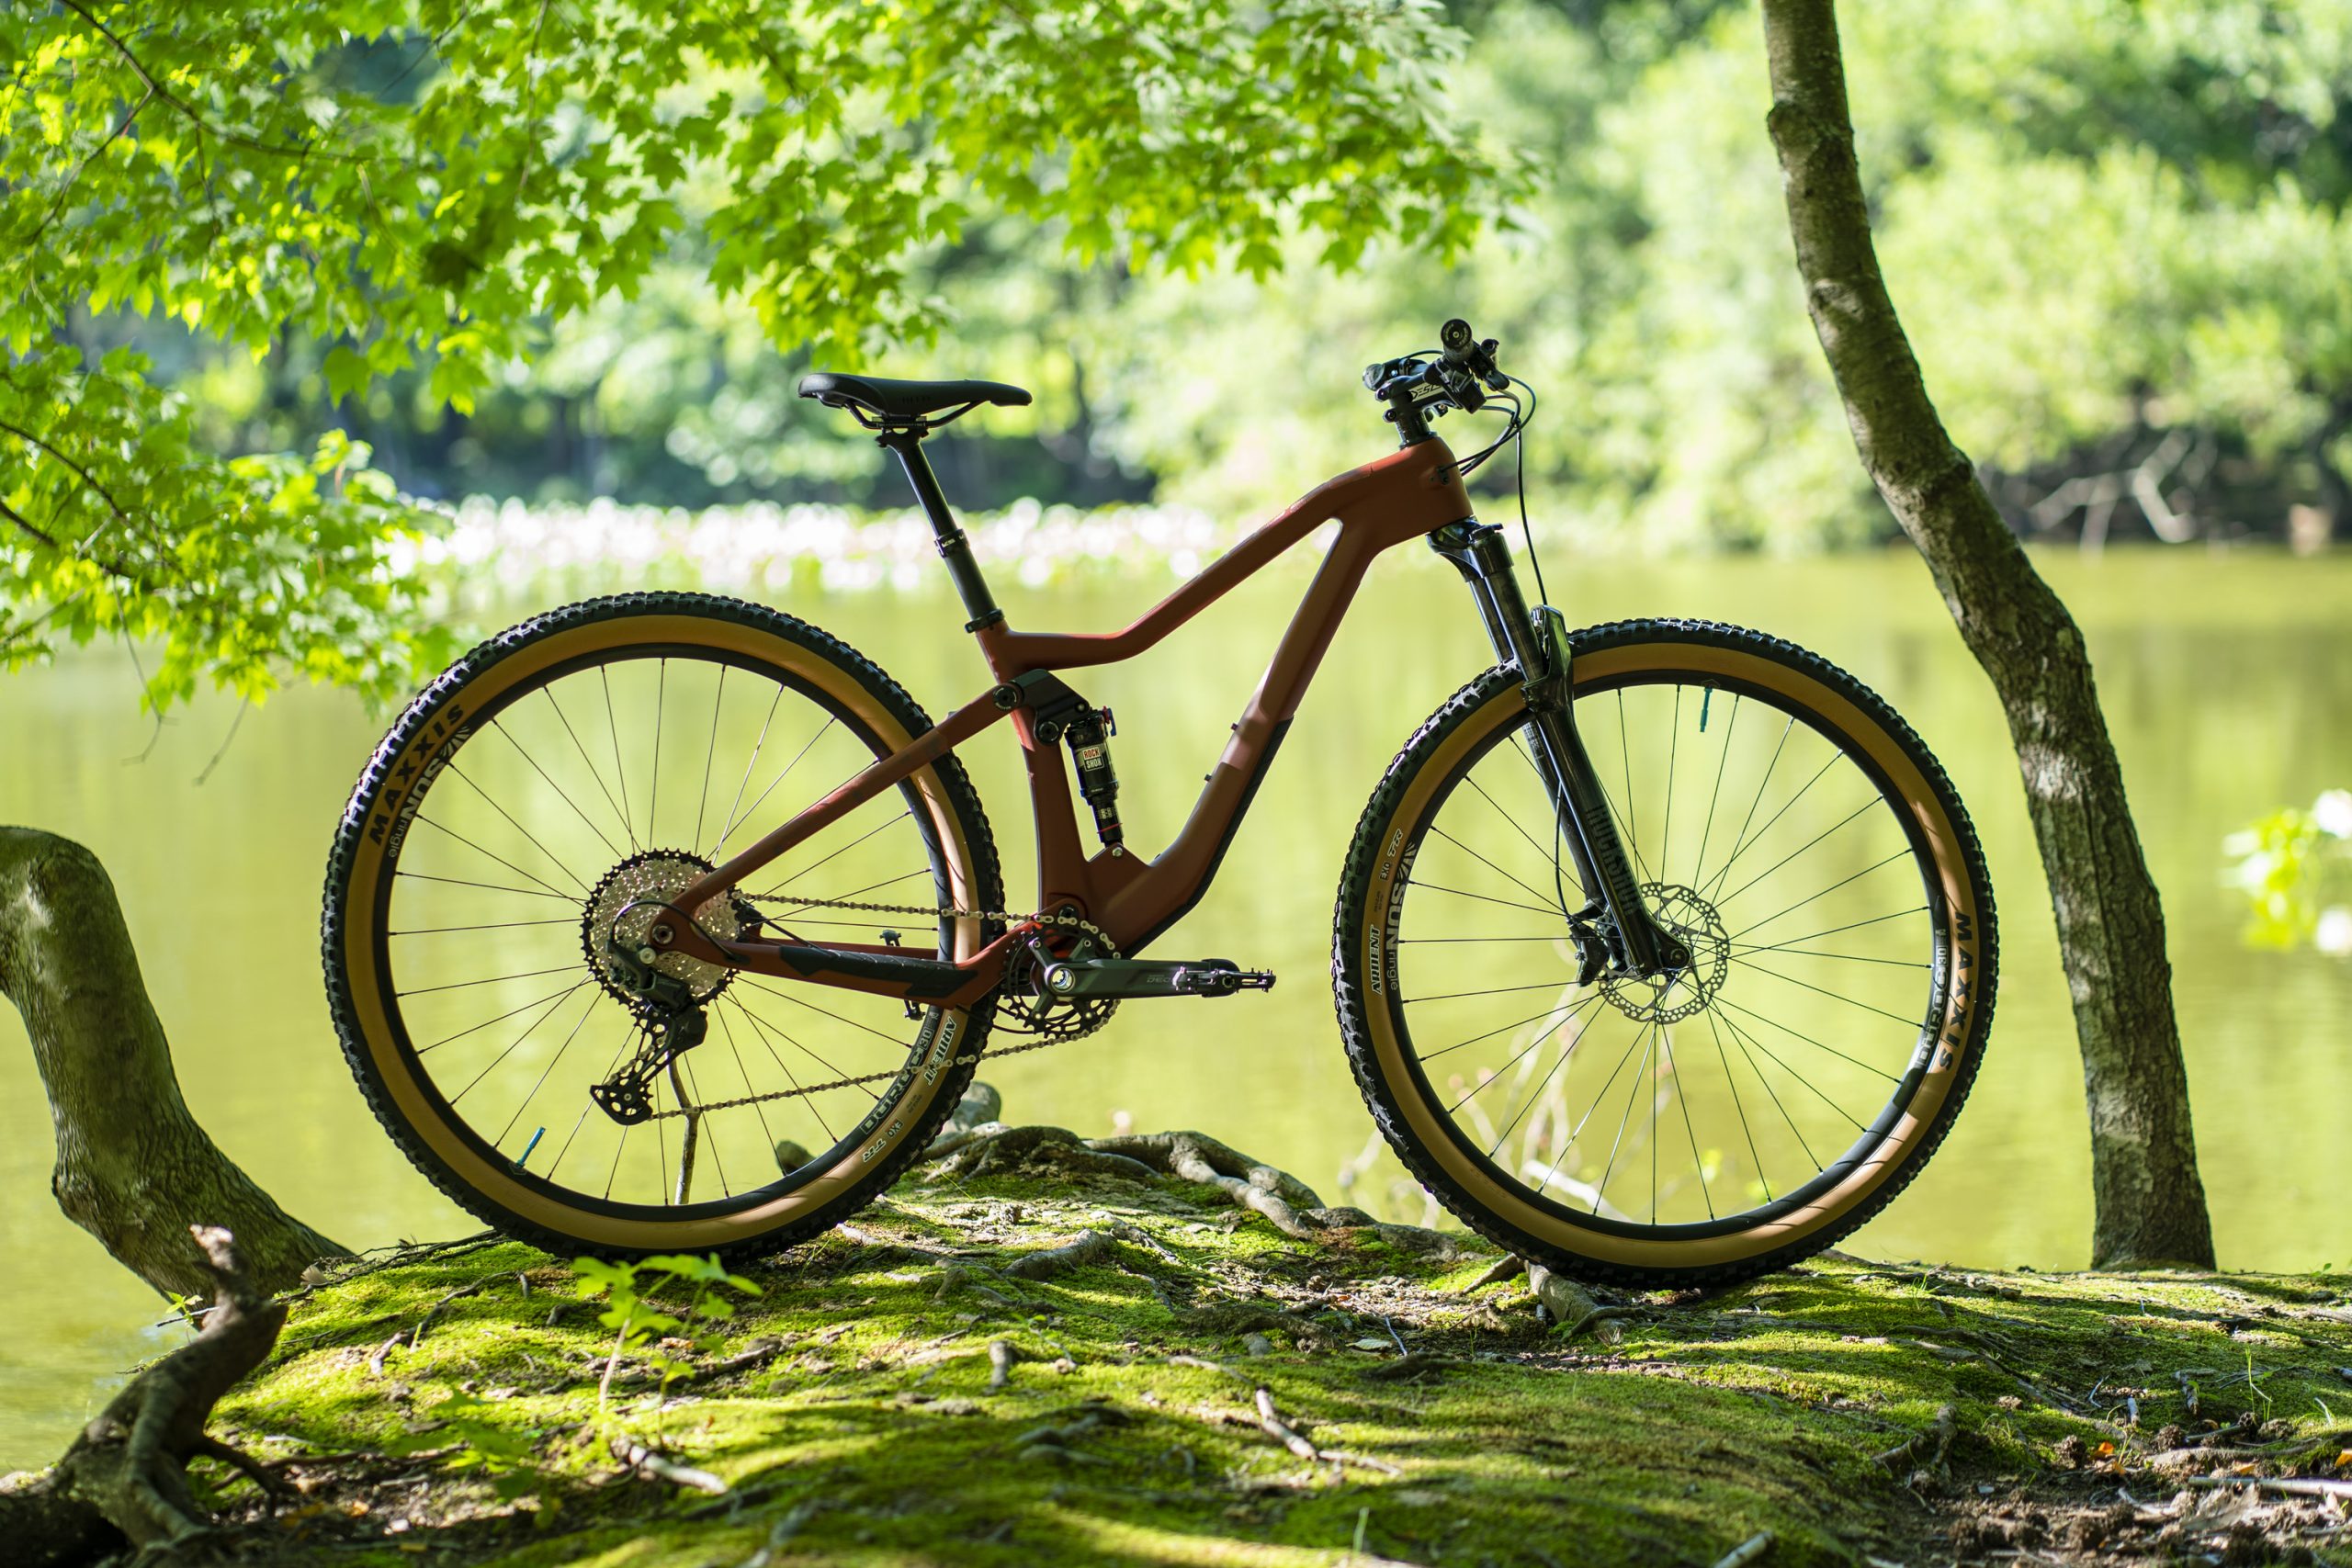
Before I slapped on all of the above parts, I did want to paint the frame so that her frame and my frame weren’t both matte black. Again, with cost savings in mind, and in lieu of buying paint or using big box rattle cans, I looked into my existing stock of paint, and the first paint that jumped out at me was the paint I had used to paint my track car. The only colors that I had on hand were red and black. Clearly, I didn’t want black and I’m not a big fan of red but when combining the two I was able to get a really nice maroon.
The paint I used is called Brightside by Interlux. It’s a polyurethane intended as a marine paint and “it’s easy to clean, resists staining, and has great abrasion resistance”. I can testify that it has held up amazingly well on the track car and I didn’t hesitate to apply it to the new bike frame. Better yet, Interlux produces an additive/flattening agent that reduces the gloss of the base paint depending on the mixture ratio which we used on the track car as well so I knew what to expect when flattening the maroon paint.


In an effort to not bore you more than I have to, I won’t go into extensive details on the painting but I can say that I had intended to only spray two coats on the frame but an error I made in the flattening agent ratio required me to spray a third coat. In the end, it was good that I did three coats because the second coat, even if it had been as matte as I had wanted, left a few areas that weren’t well covered.
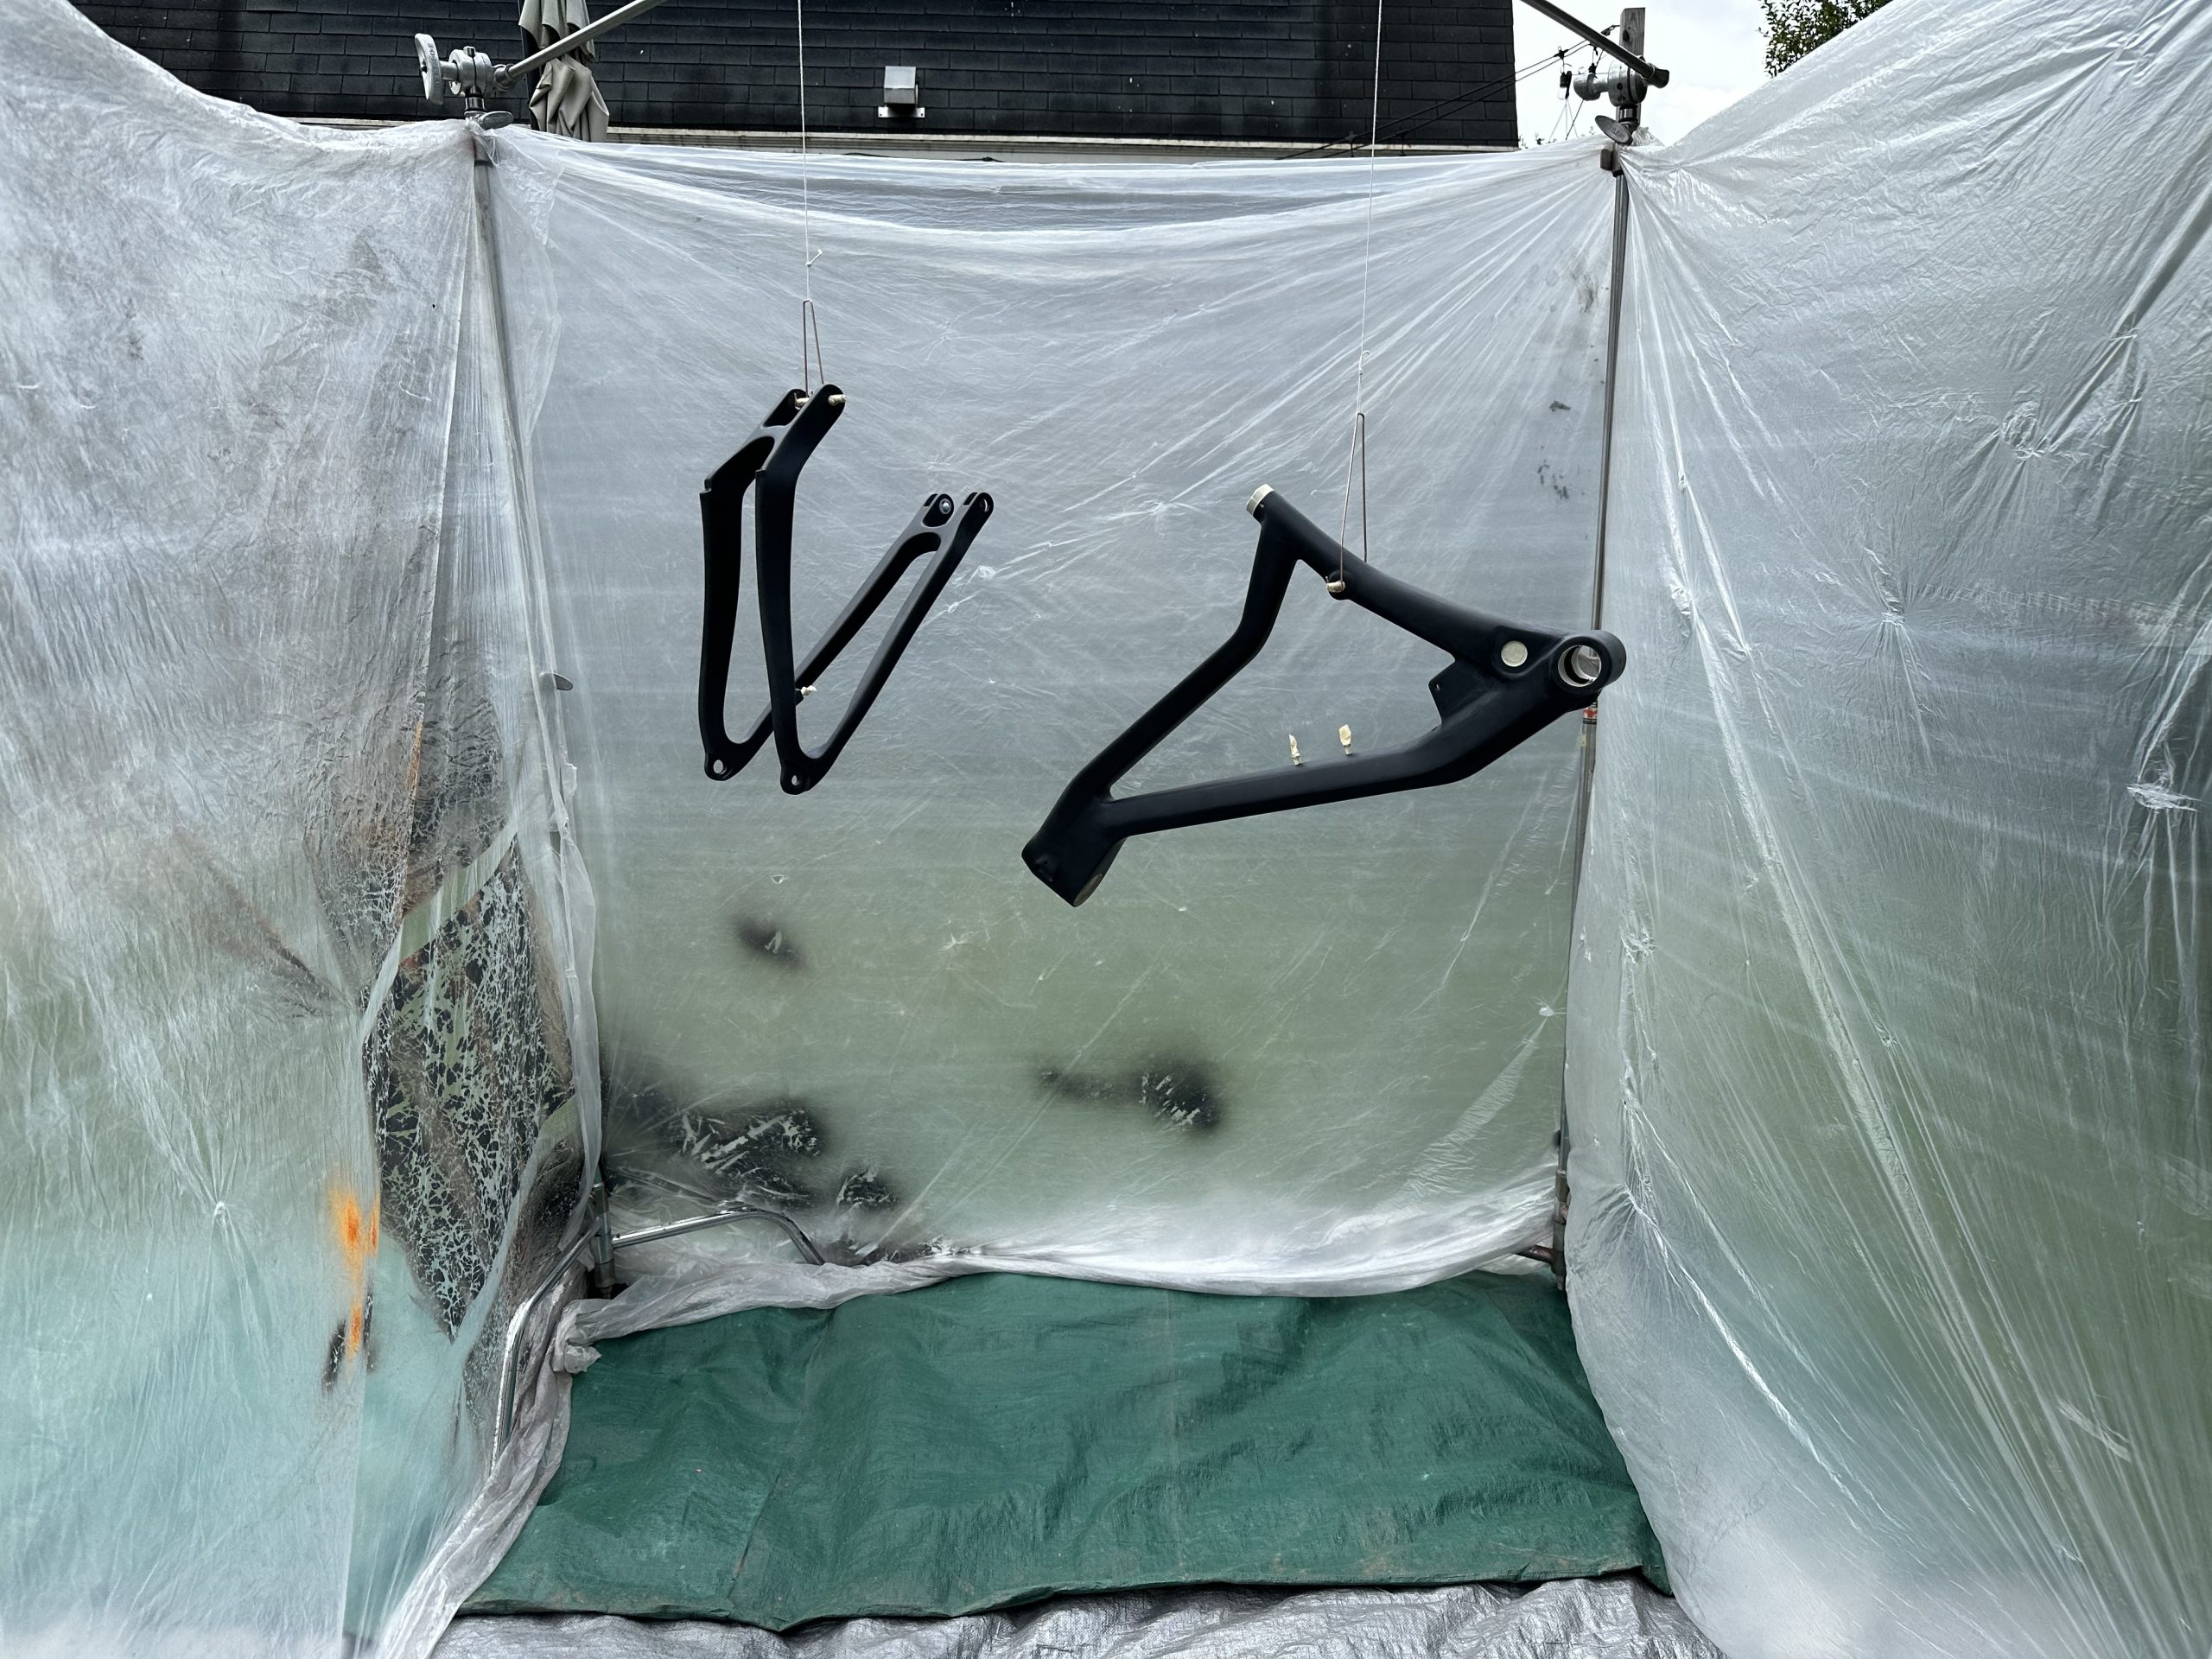
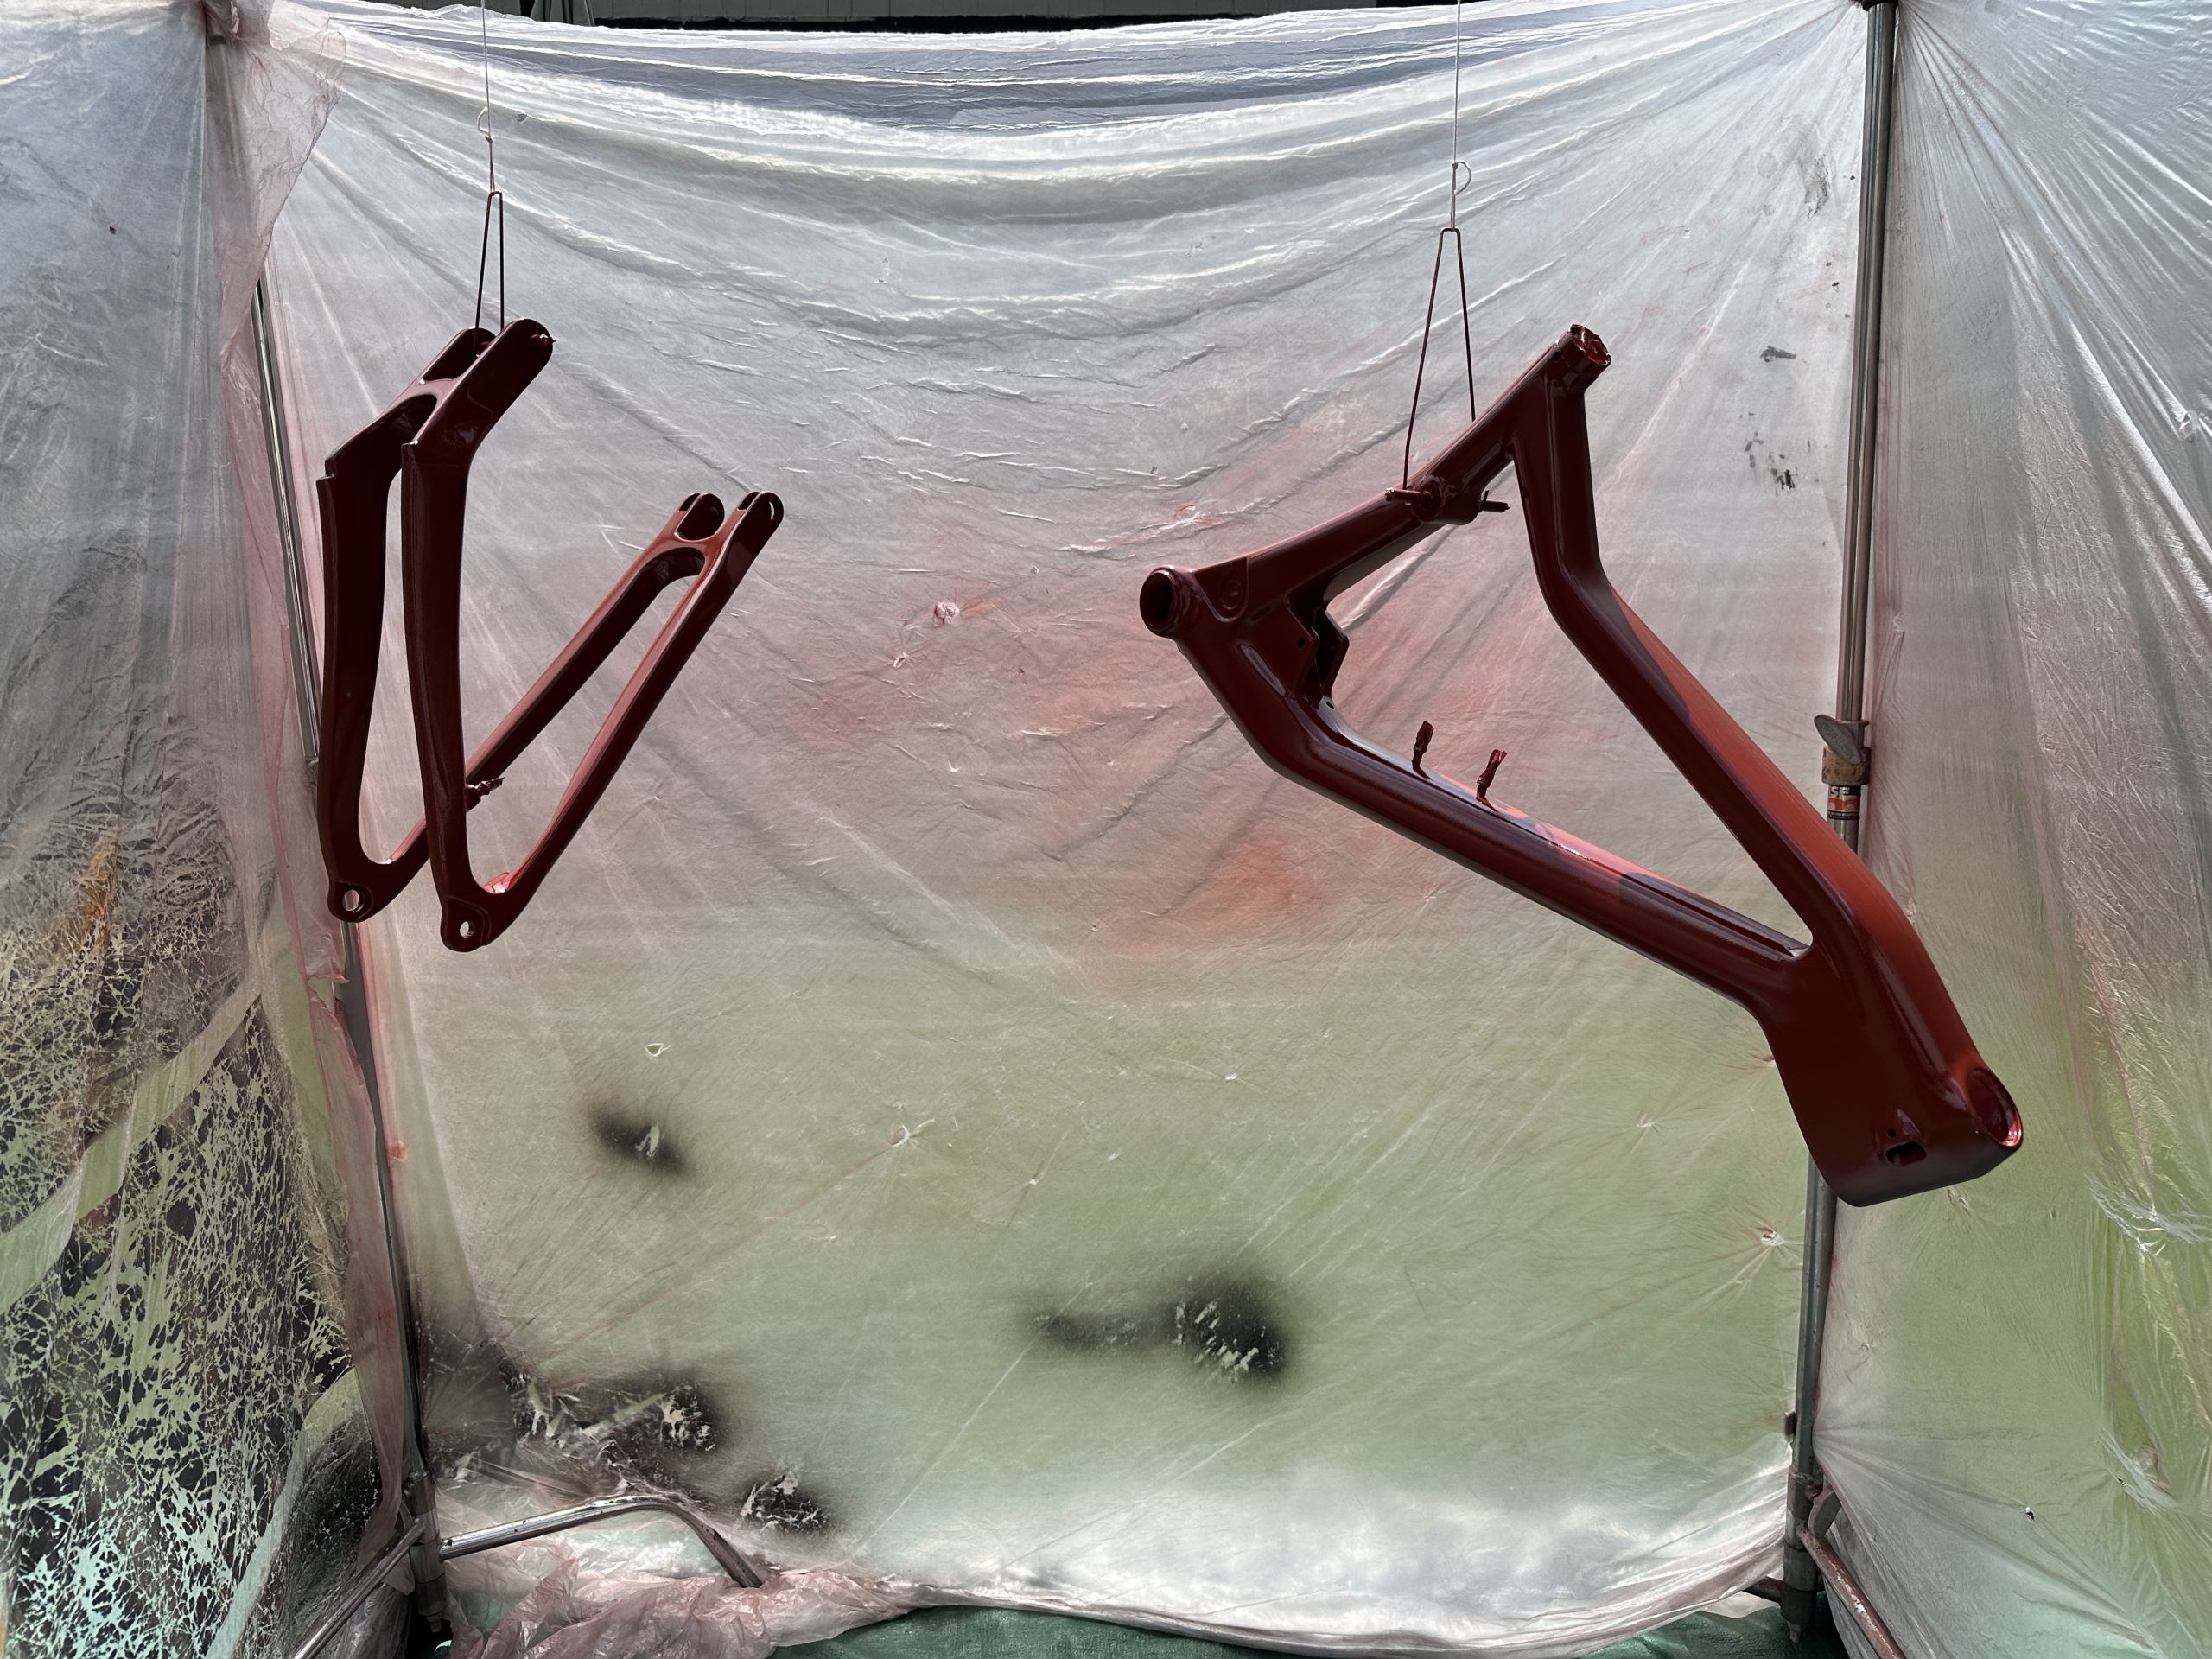
As always, when painting, I try to build a spray booth of some kind. There’s nothing worse than the wind blowing away 90% of your paint as you spray. I find that a three-sided booth works well enough to keep most of the paint on the item I am painting.
After some sanding prep to the frame and a good cleaning with rubbing alcohol, and some masking tape, it was time for a couple of coats of paint. The one important piece of information that I forgot to mention about the Brightside Interlux paint is that each coat has to dry 8-12 hours before the next coat is applied and each coat needs to be sanded before the next. Needless to say, it’s a bit of a challenge to work with this paint but it’s worth it. In general, the final third coat turned out really nice and I was super happy with the color and the finished product.
The Build:
The build of the bike was really what this post was supposed to be all about but as I began to share the story of this build with you, I realized that the build was probably the smoothest part of the process. Besides the aforementioned issue with the cable grommets, the build was incredibly easy and straightforward. Fortunately, I had purchased all the right parts and didn’t have to make any last-minute adjustments.
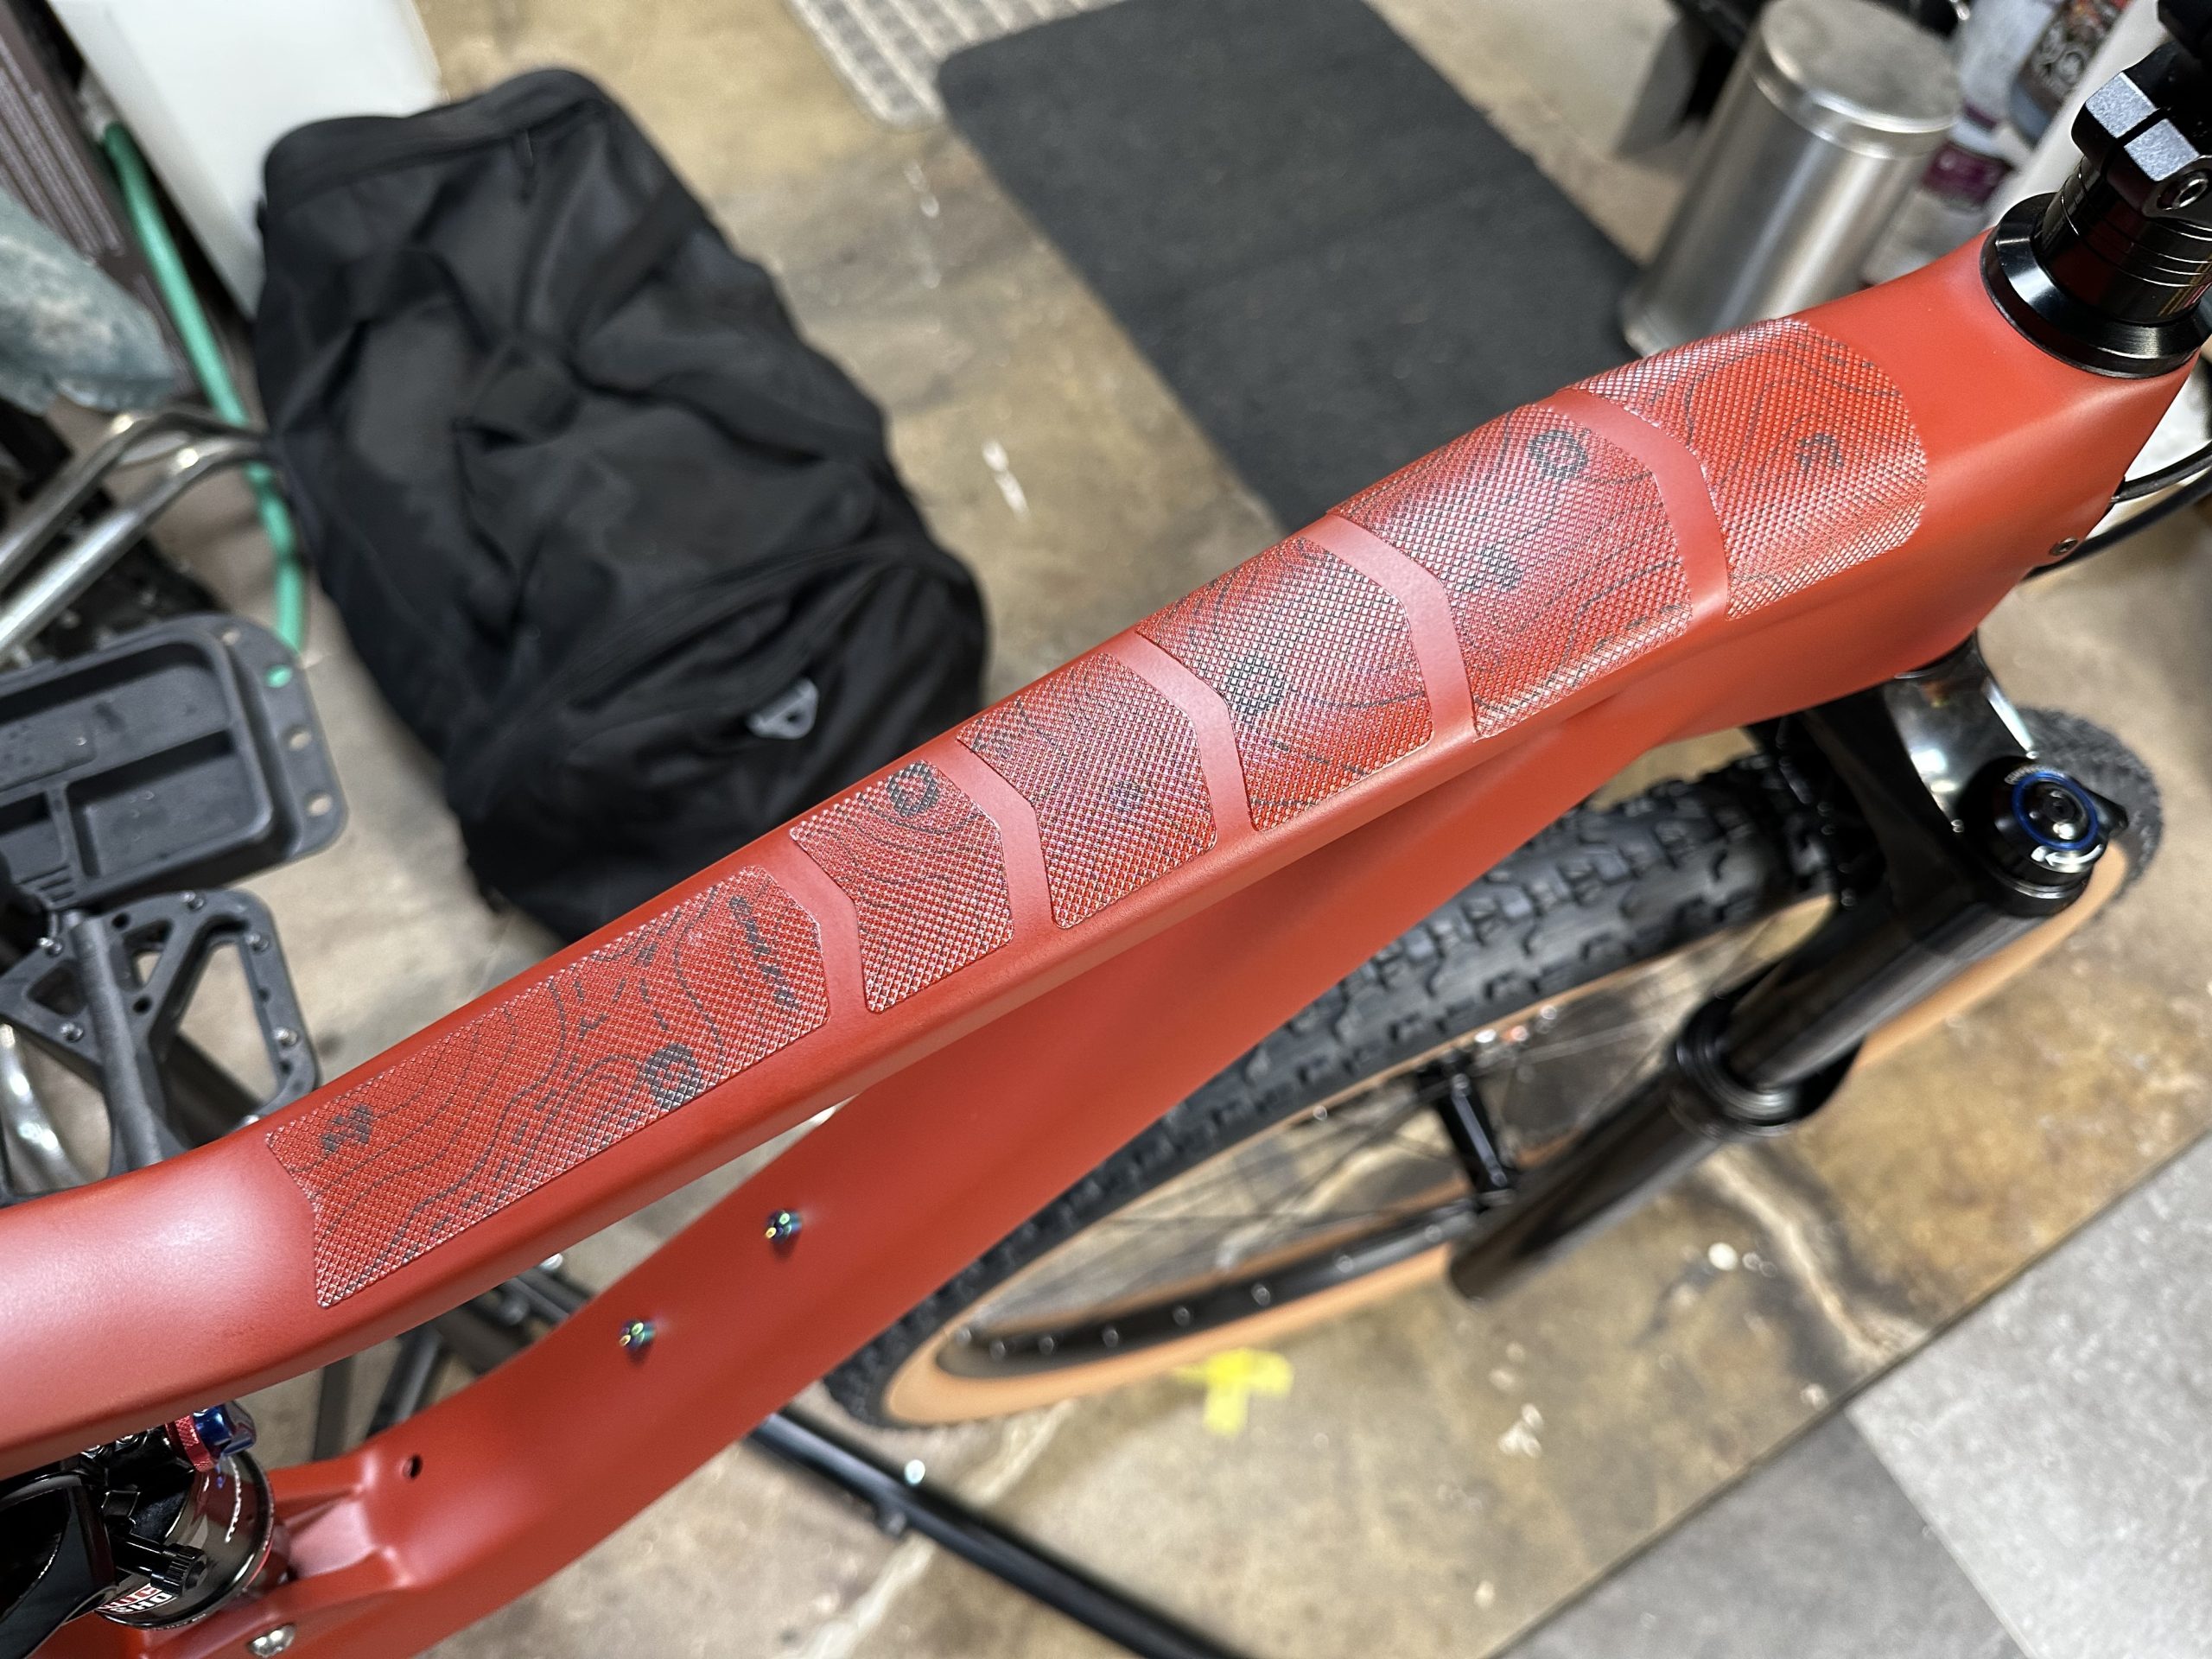
The one and only real failure on the build was the silicone frame protection pieces that I mentioned earlier. Although the rear chainstay piece looked and felt really good, the adhesion failed within a few hours after removing the painter’s tape I used to secure it to the frame overnight. Obviously, I did my best to clean the newly painted frame prior to installation and I even took the precaution of wrapping it with painter’s tape to help shape the silicone to the chainstay but it didn’t hold.
The second “failure”, which was a miscalculation on my part was the length of the dropper post. I wrongly assumed that the dropper post that fit my daughter’s height could be lowered down into the frame as required to accommodate the height of my wife but due to the way the frame is built, the dropper would only go down far enough to fit my daughter perfectly. I ended up creating a limiting strap for the dropper to prevent the seat from rising to its fullest extent when my wife is on the bike.
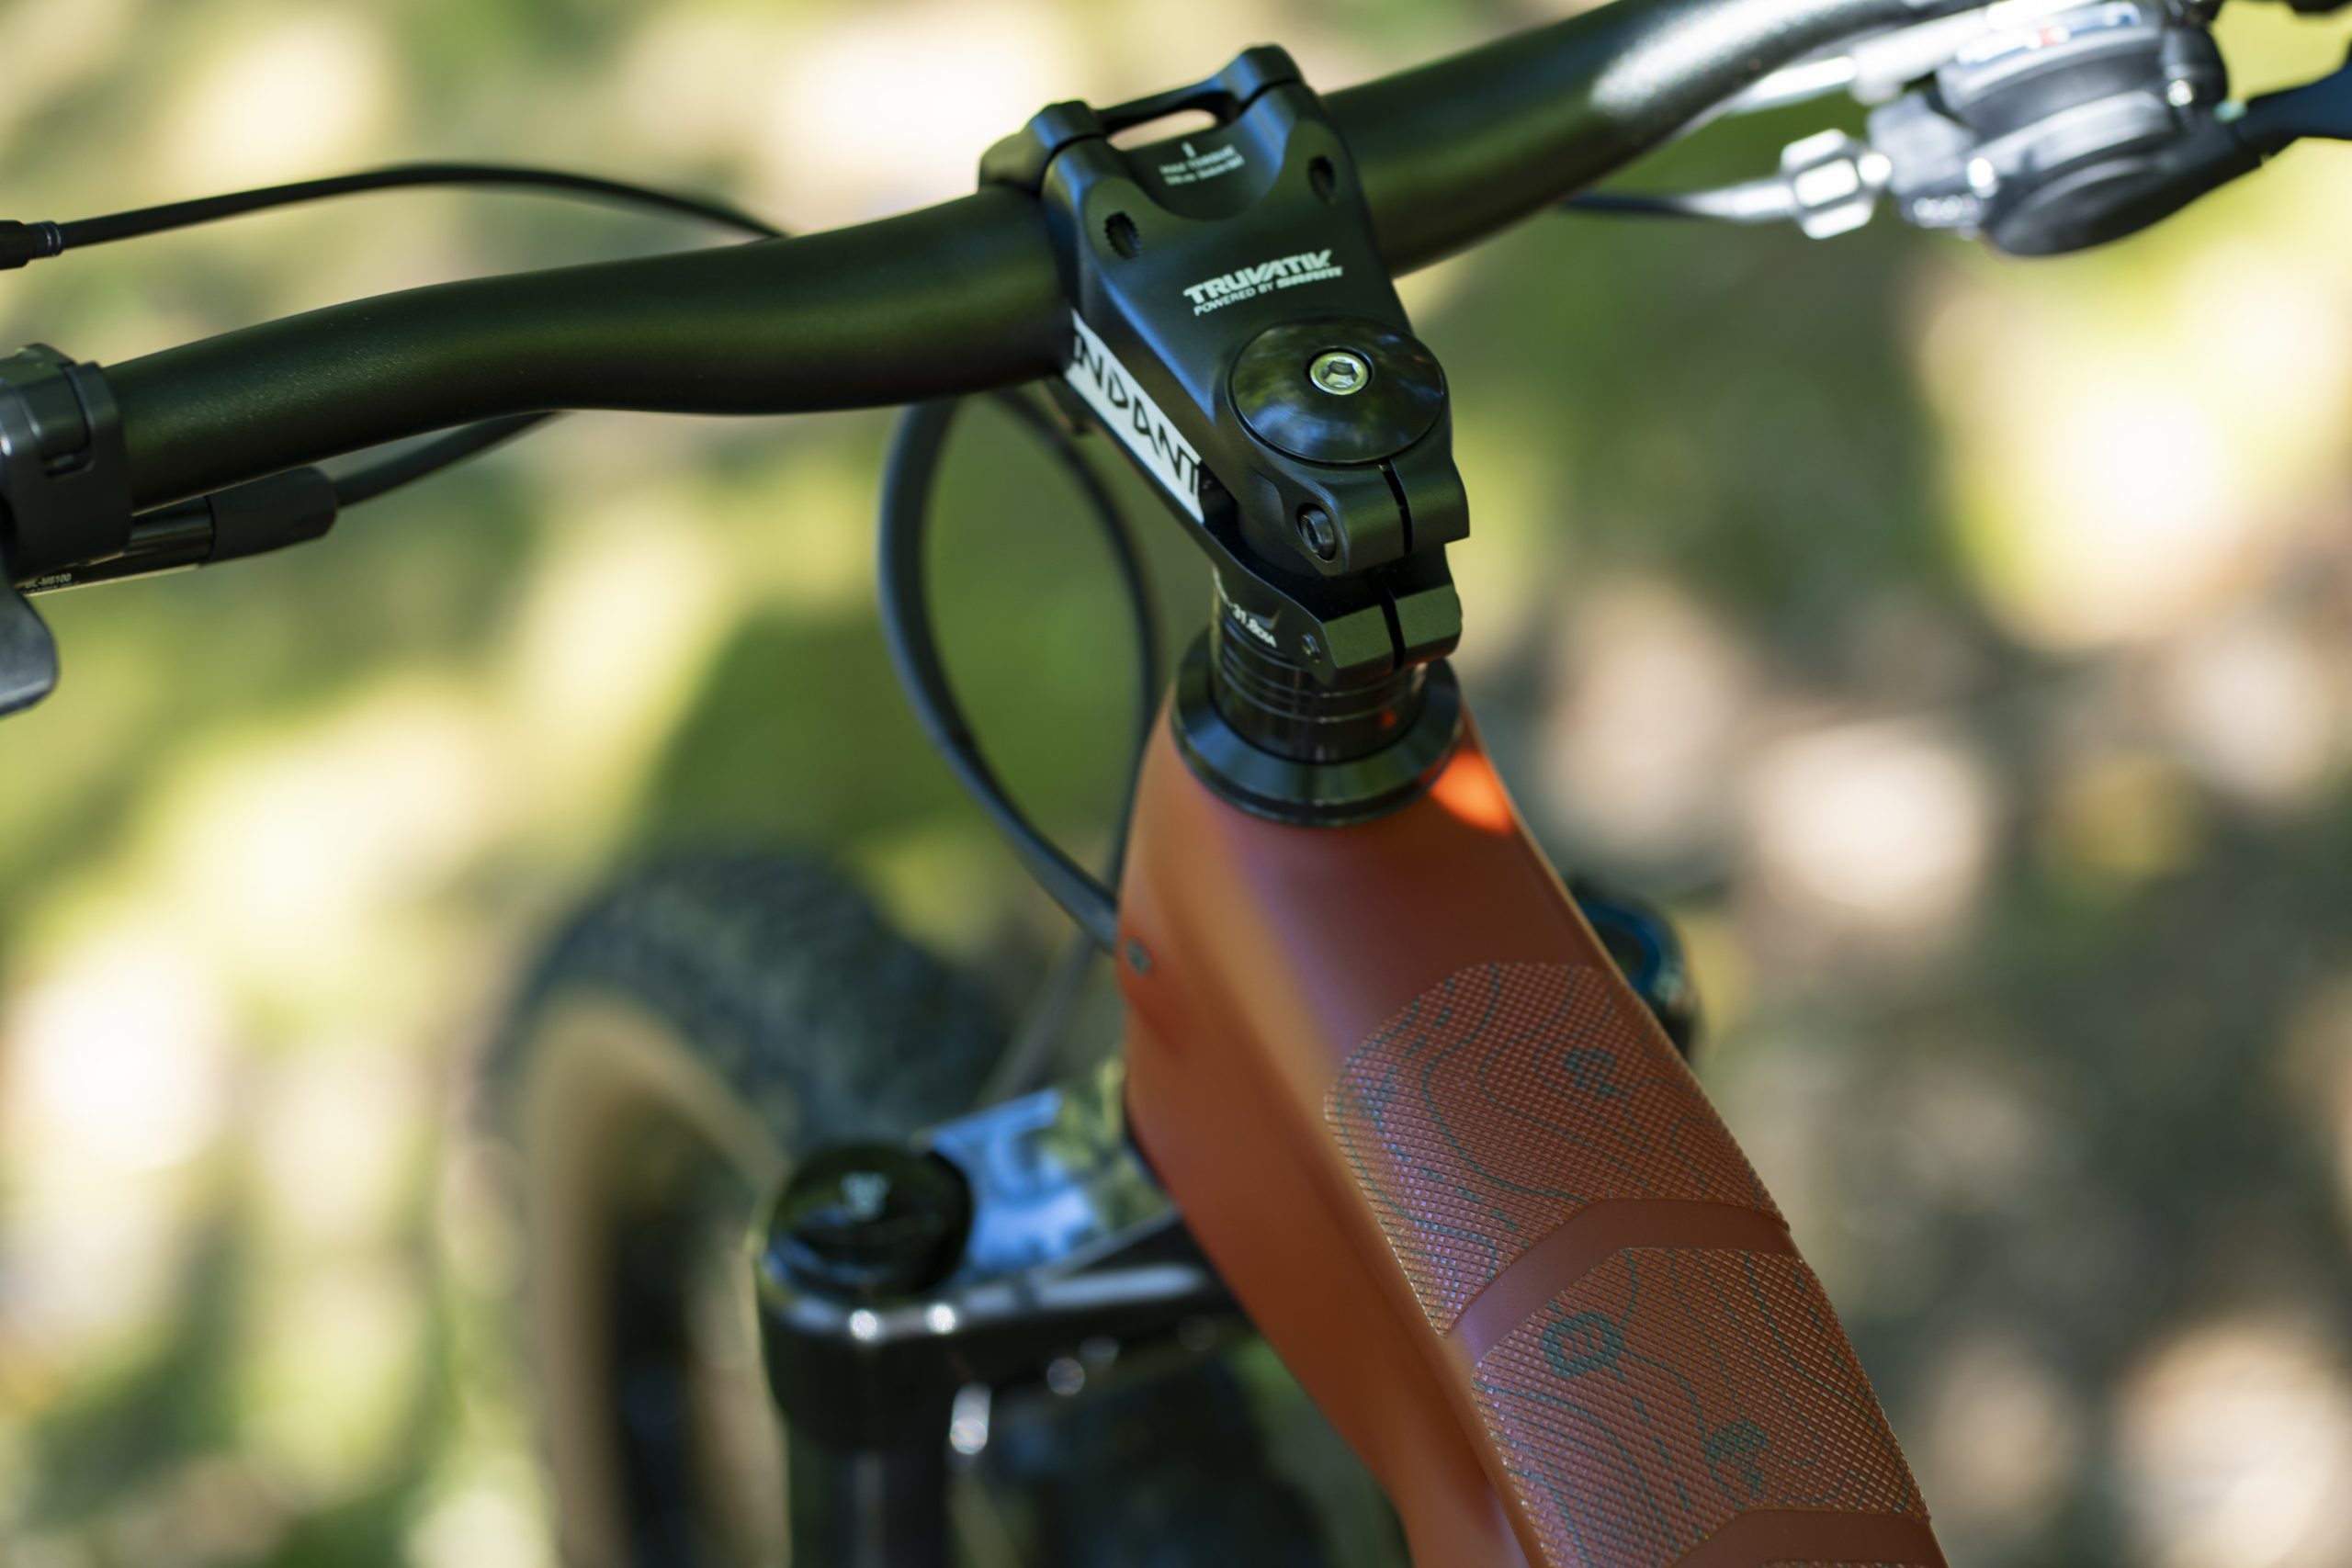
I will add that the headset that came with the bike used something other than a star-nut and I wasn’t happy with it. I had a star-nut on hand and was able to quickly swap it in. Additionally, and not that the bottom bracket was horrible, although it was sort of cheap, I did swap it for something a bit more robust – see the parts list above.
Here’s a handful of photos of the process:


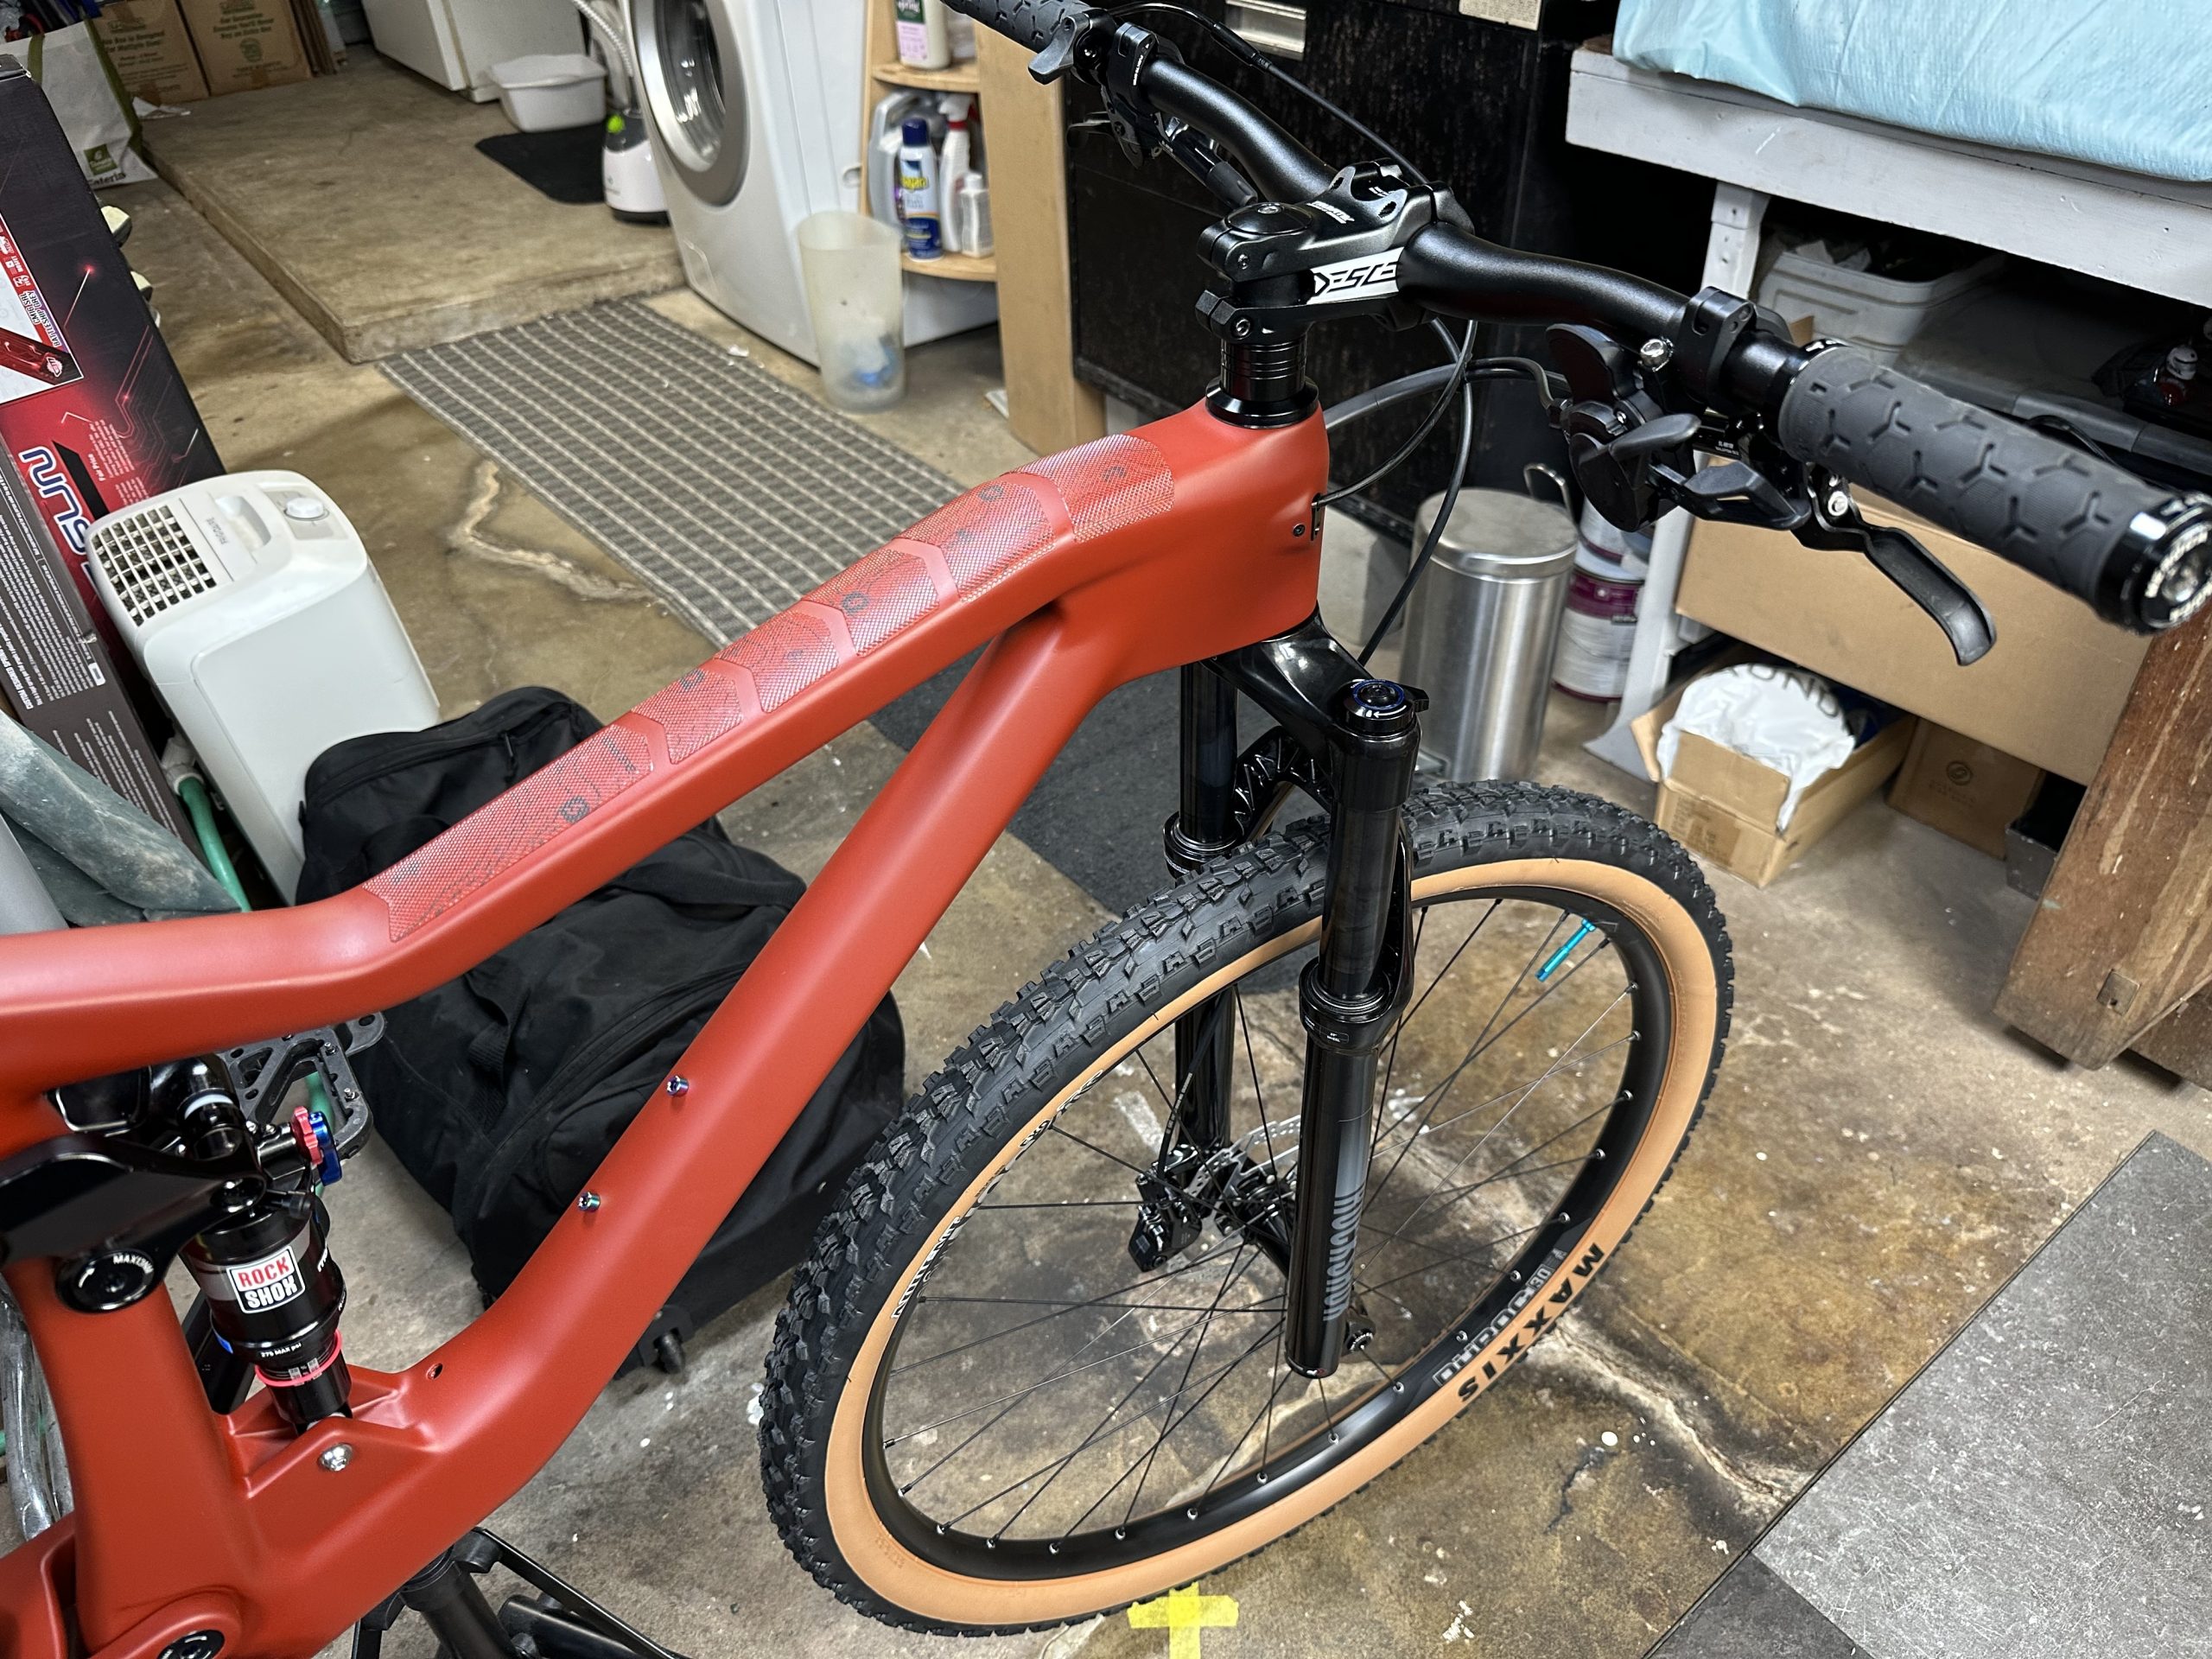
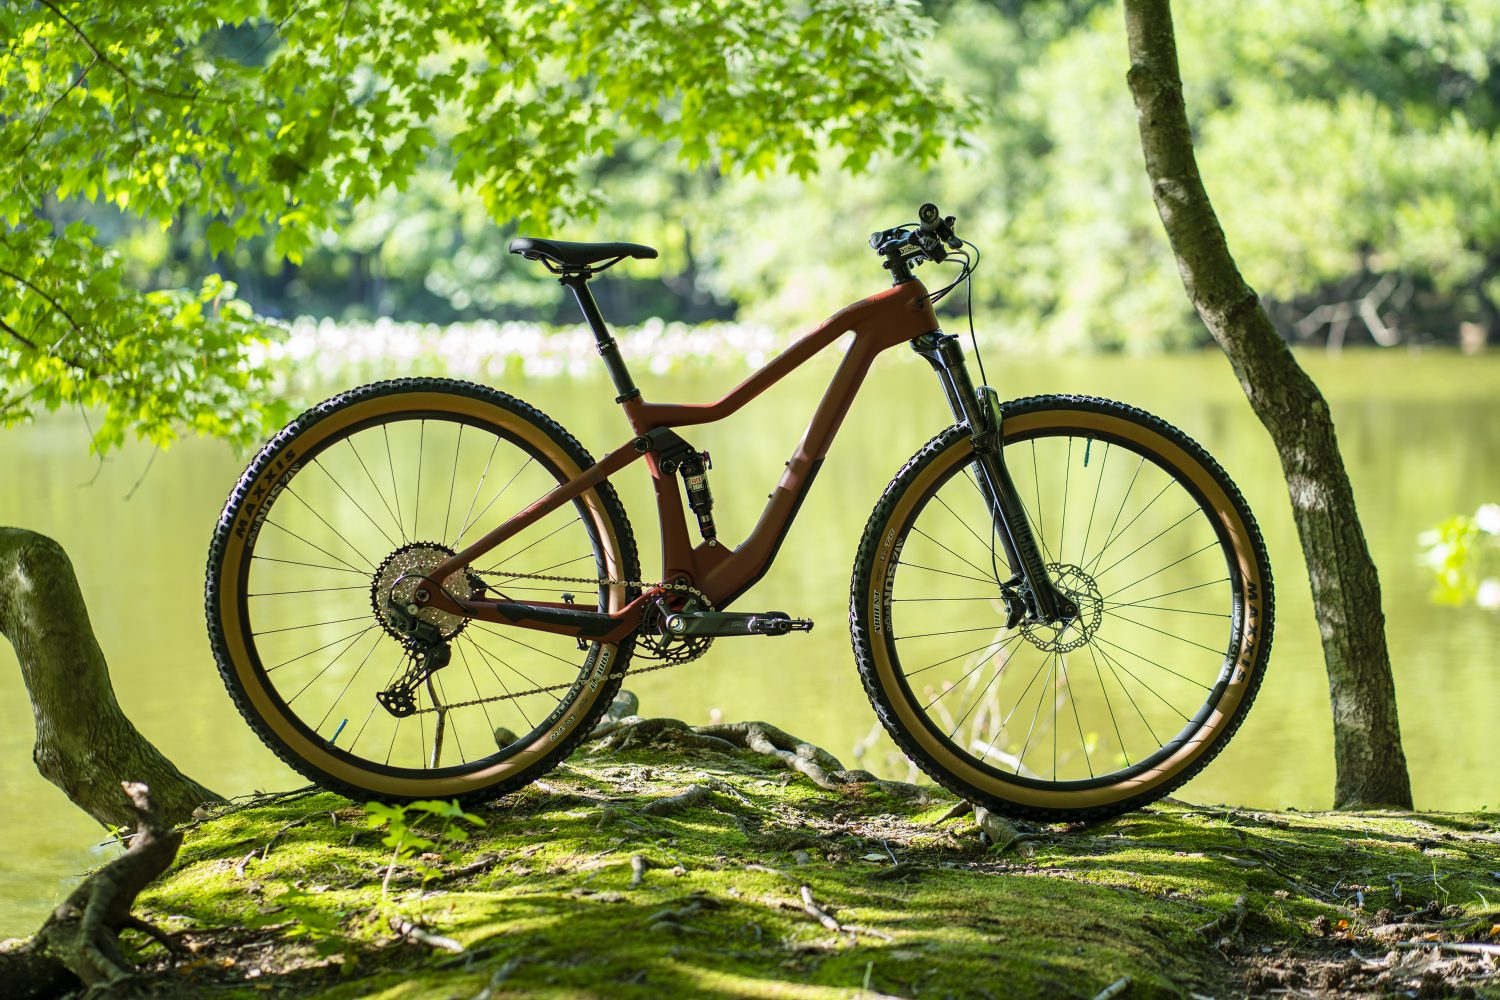
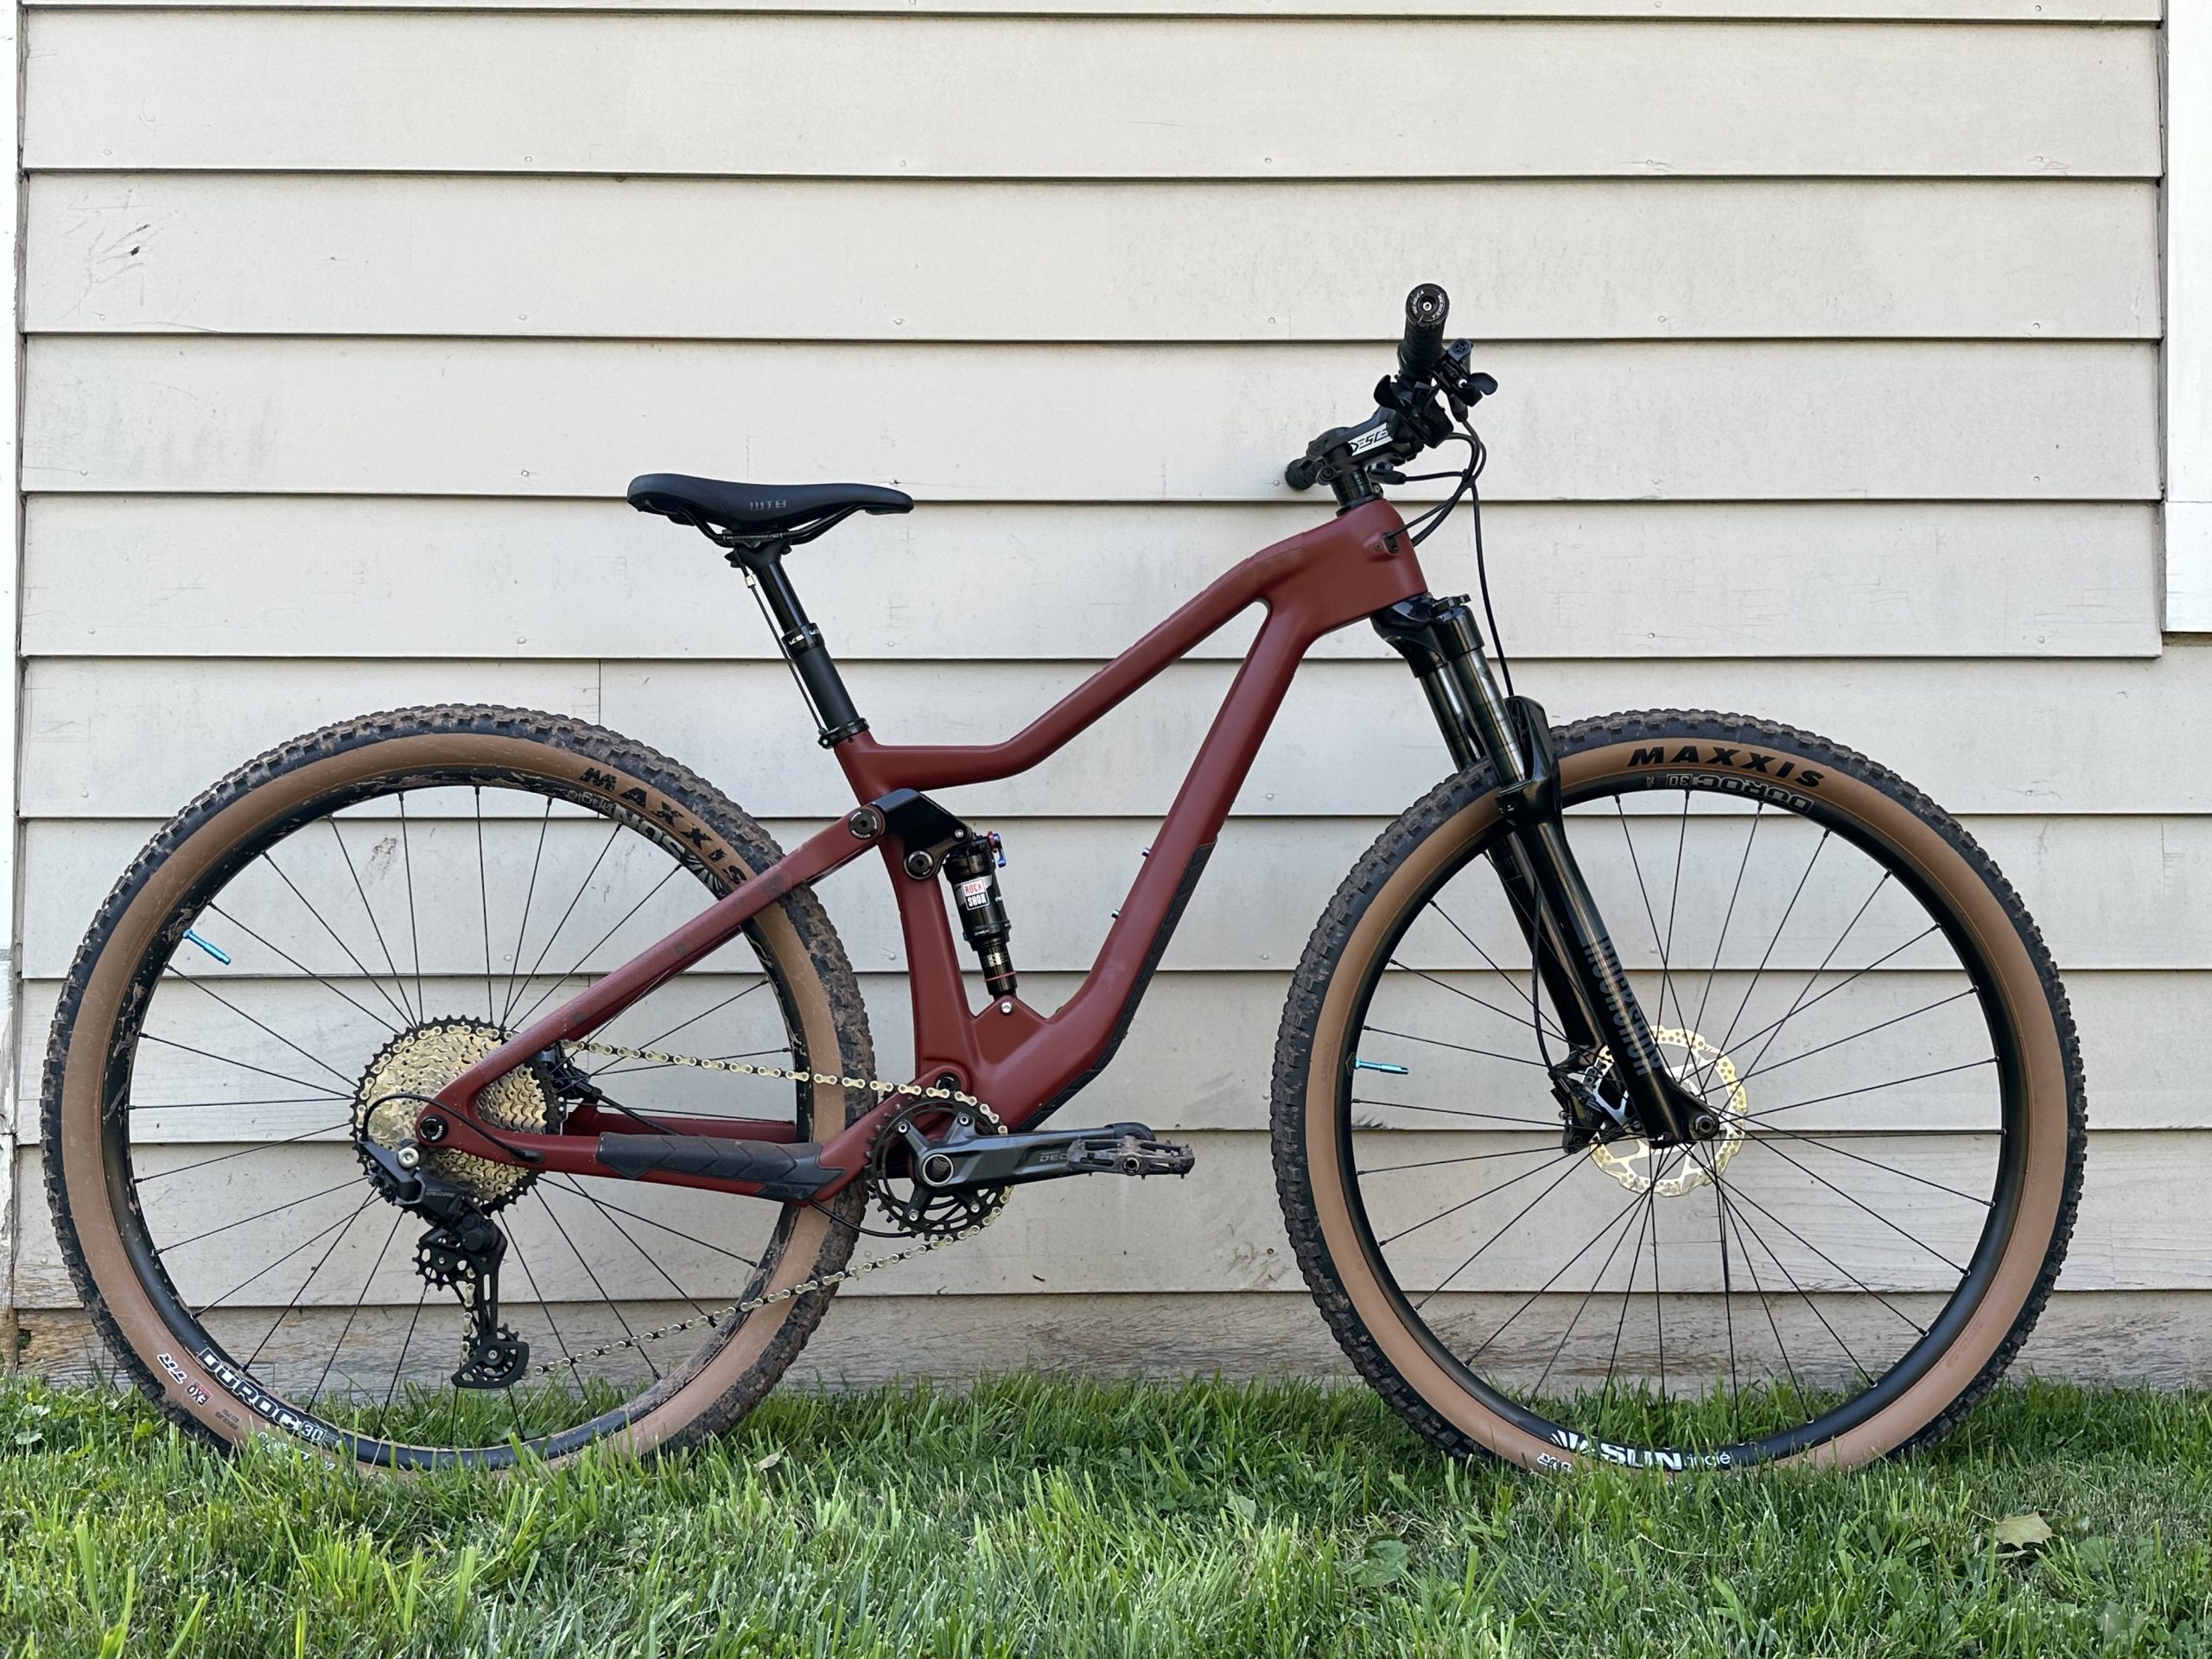
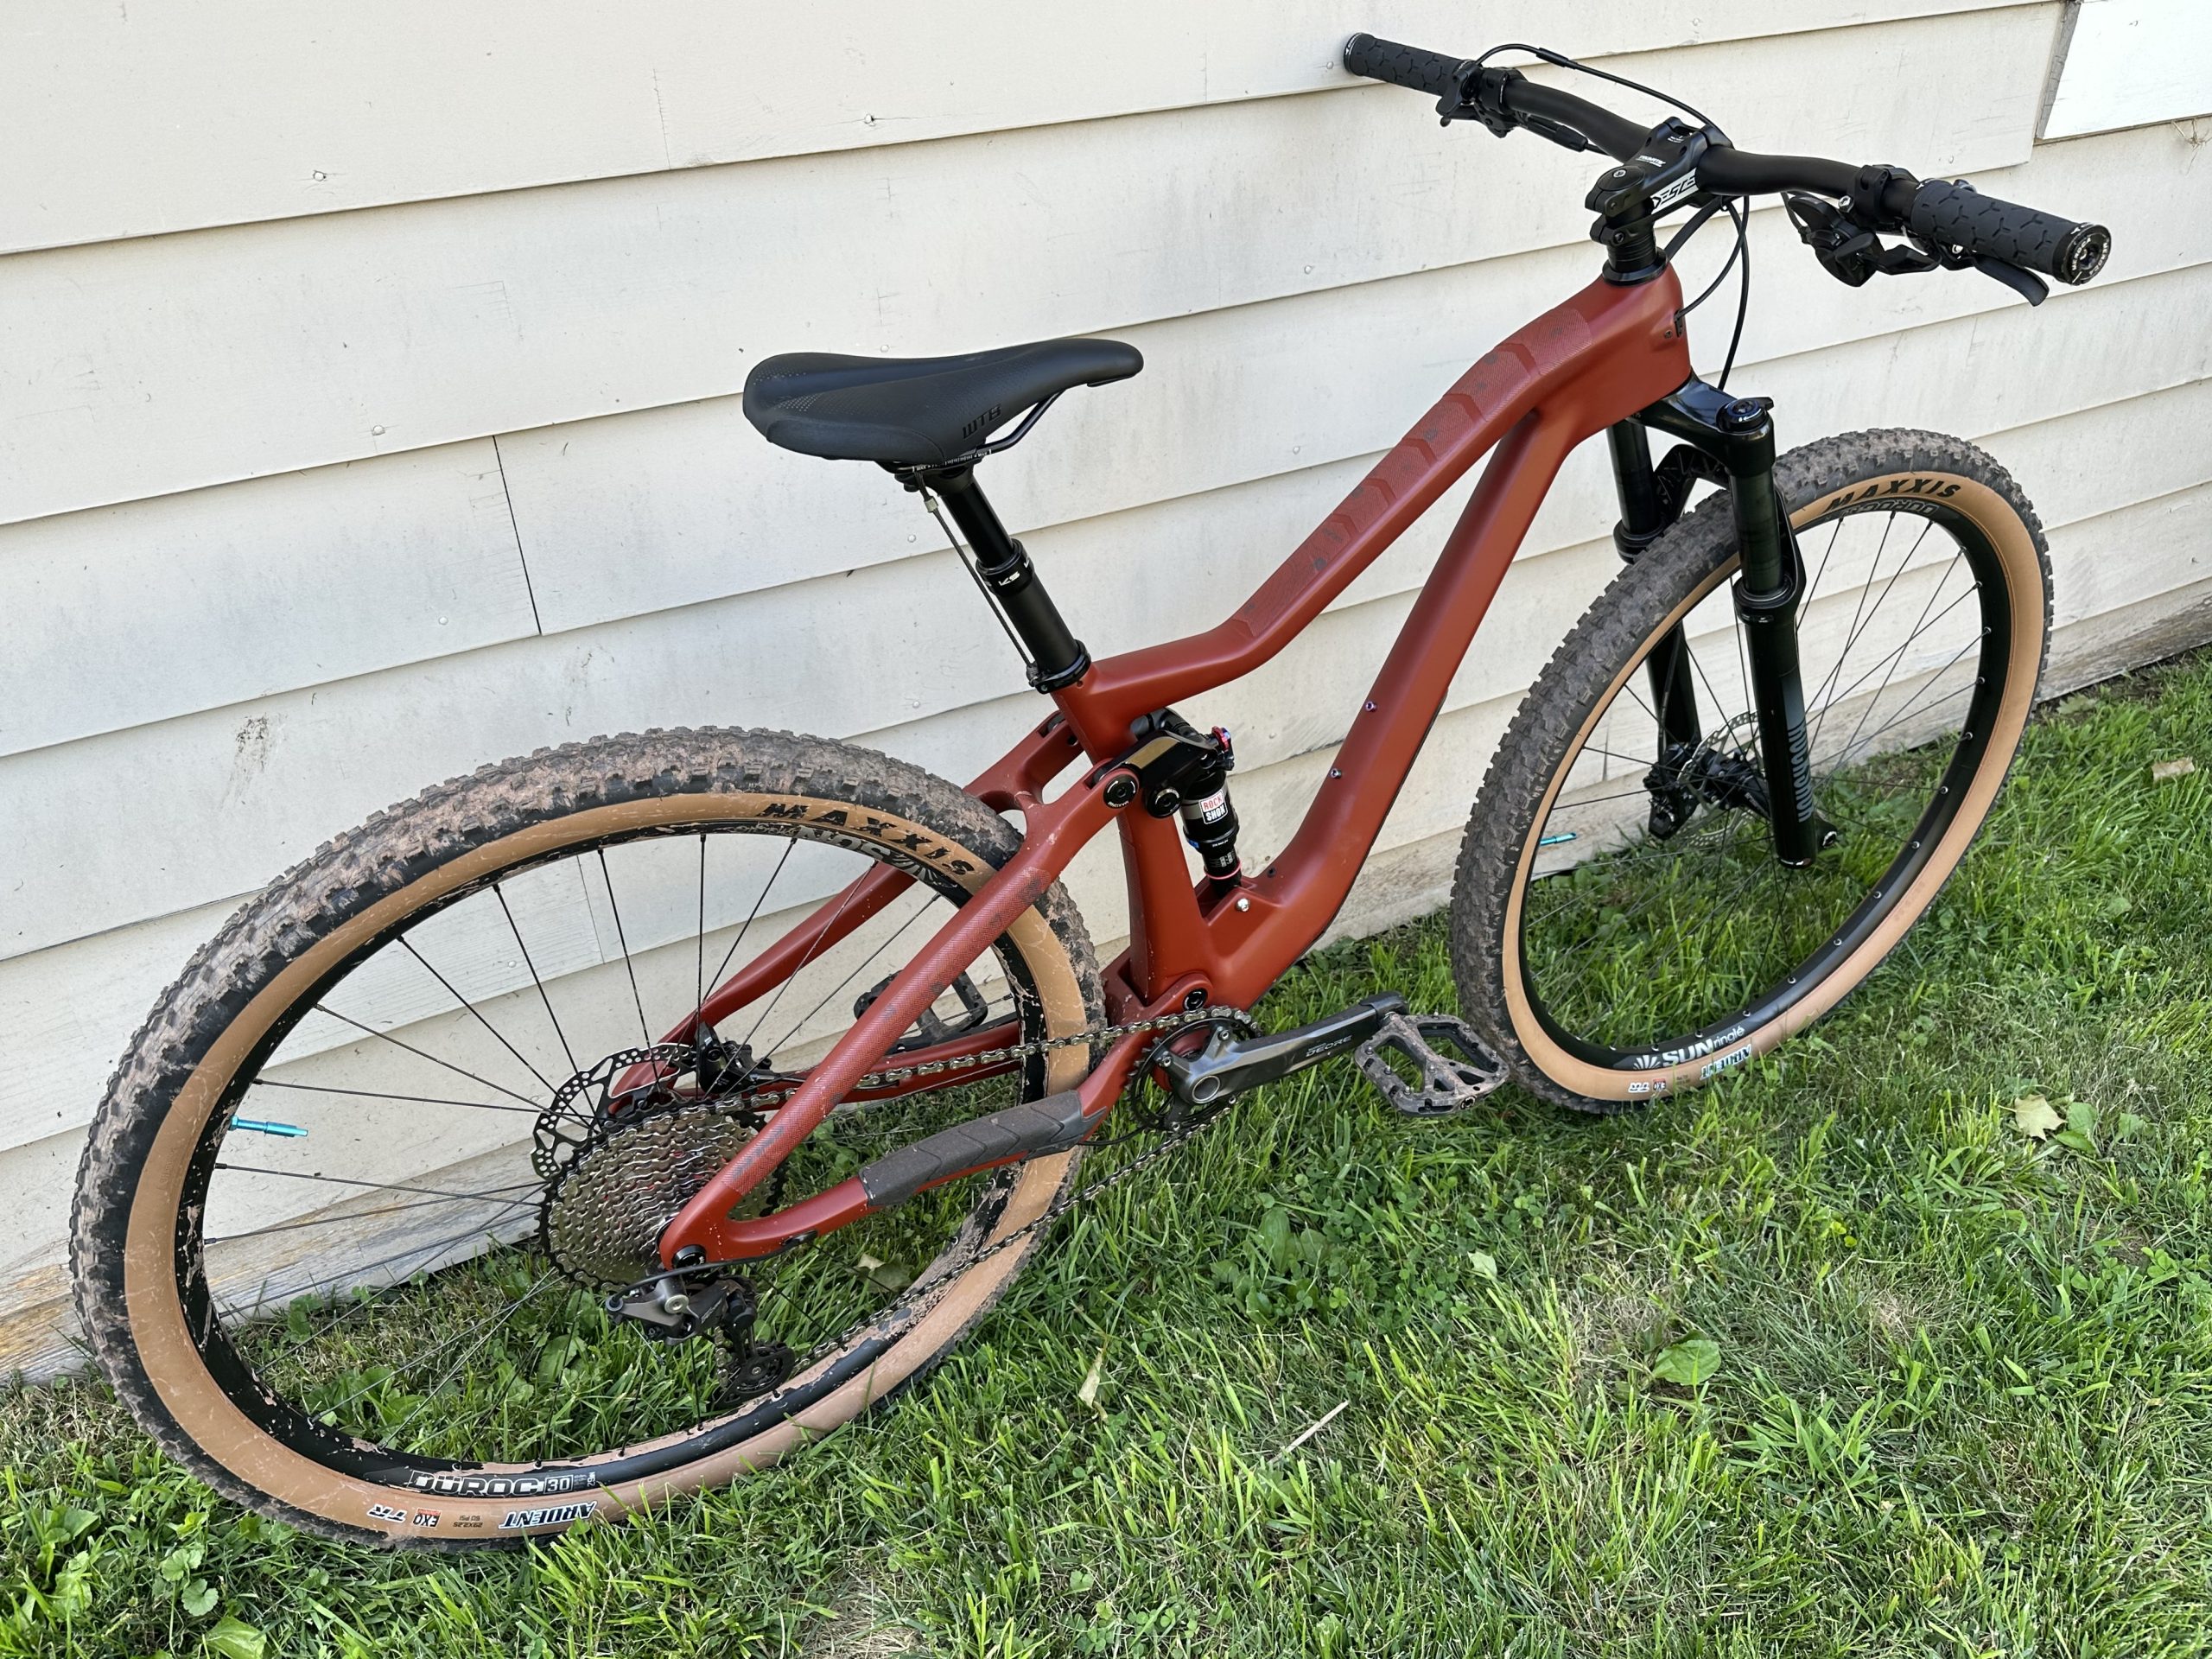
And here are a few shots I took of the finished product:
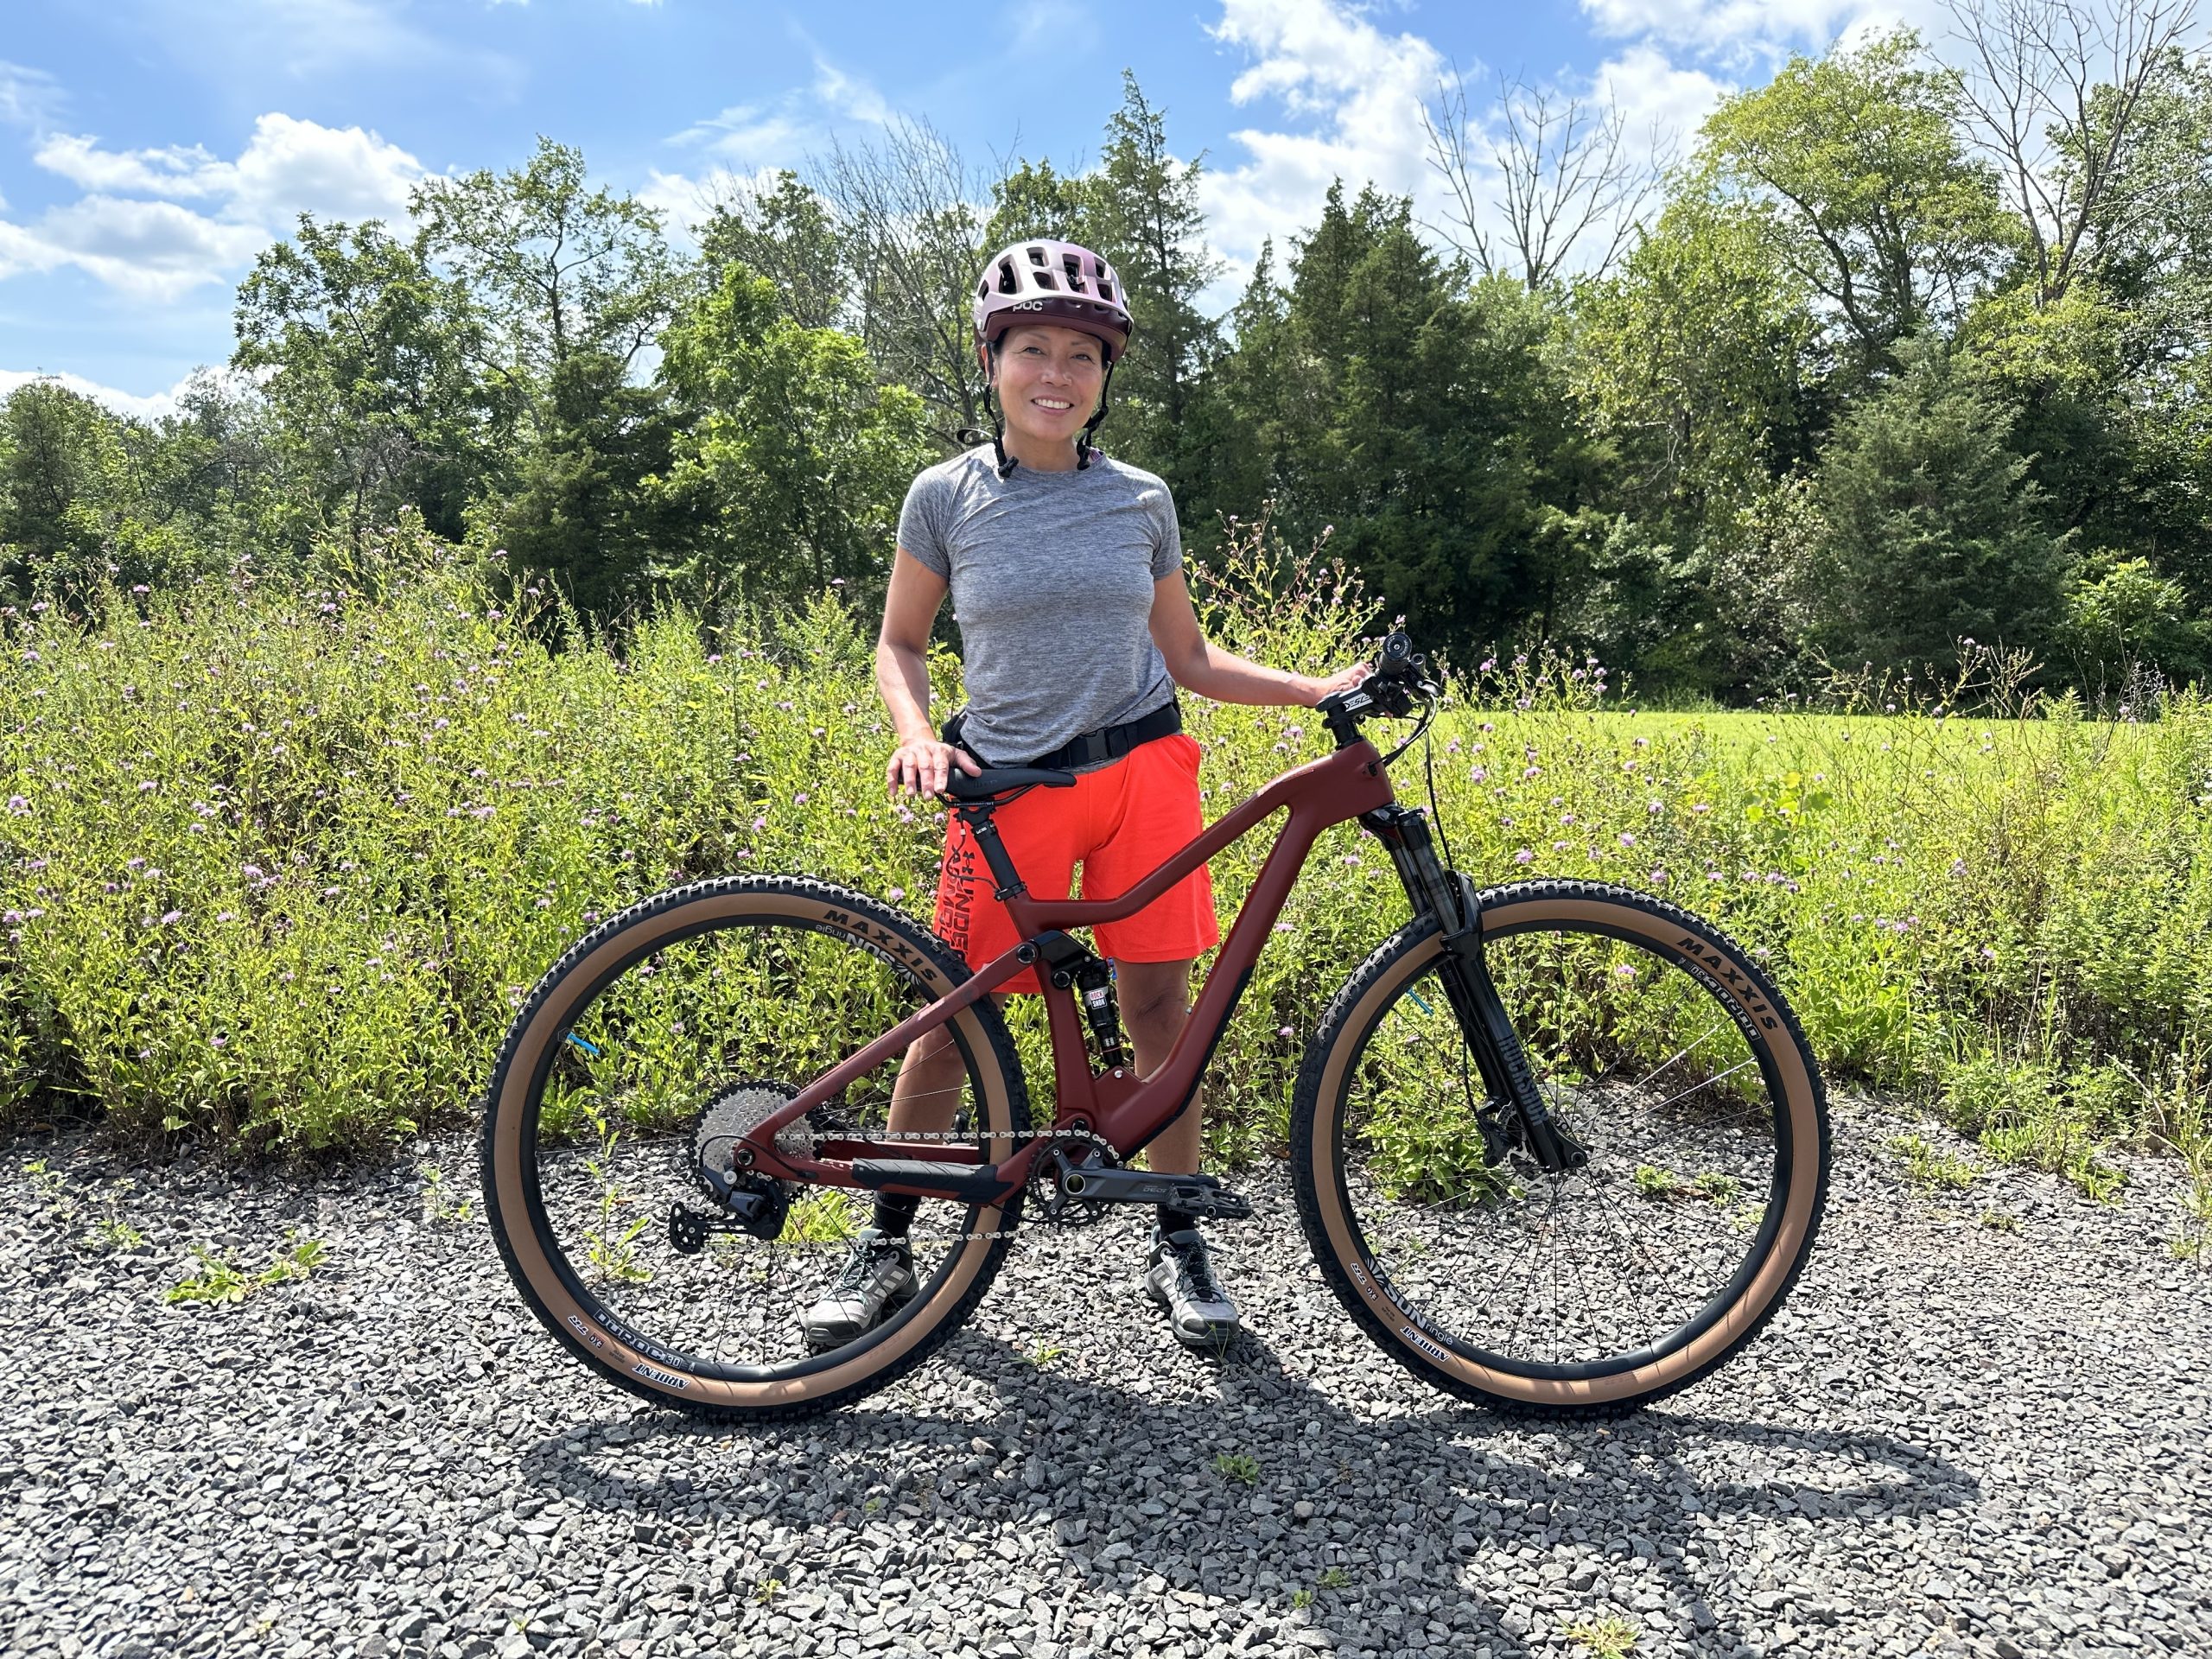
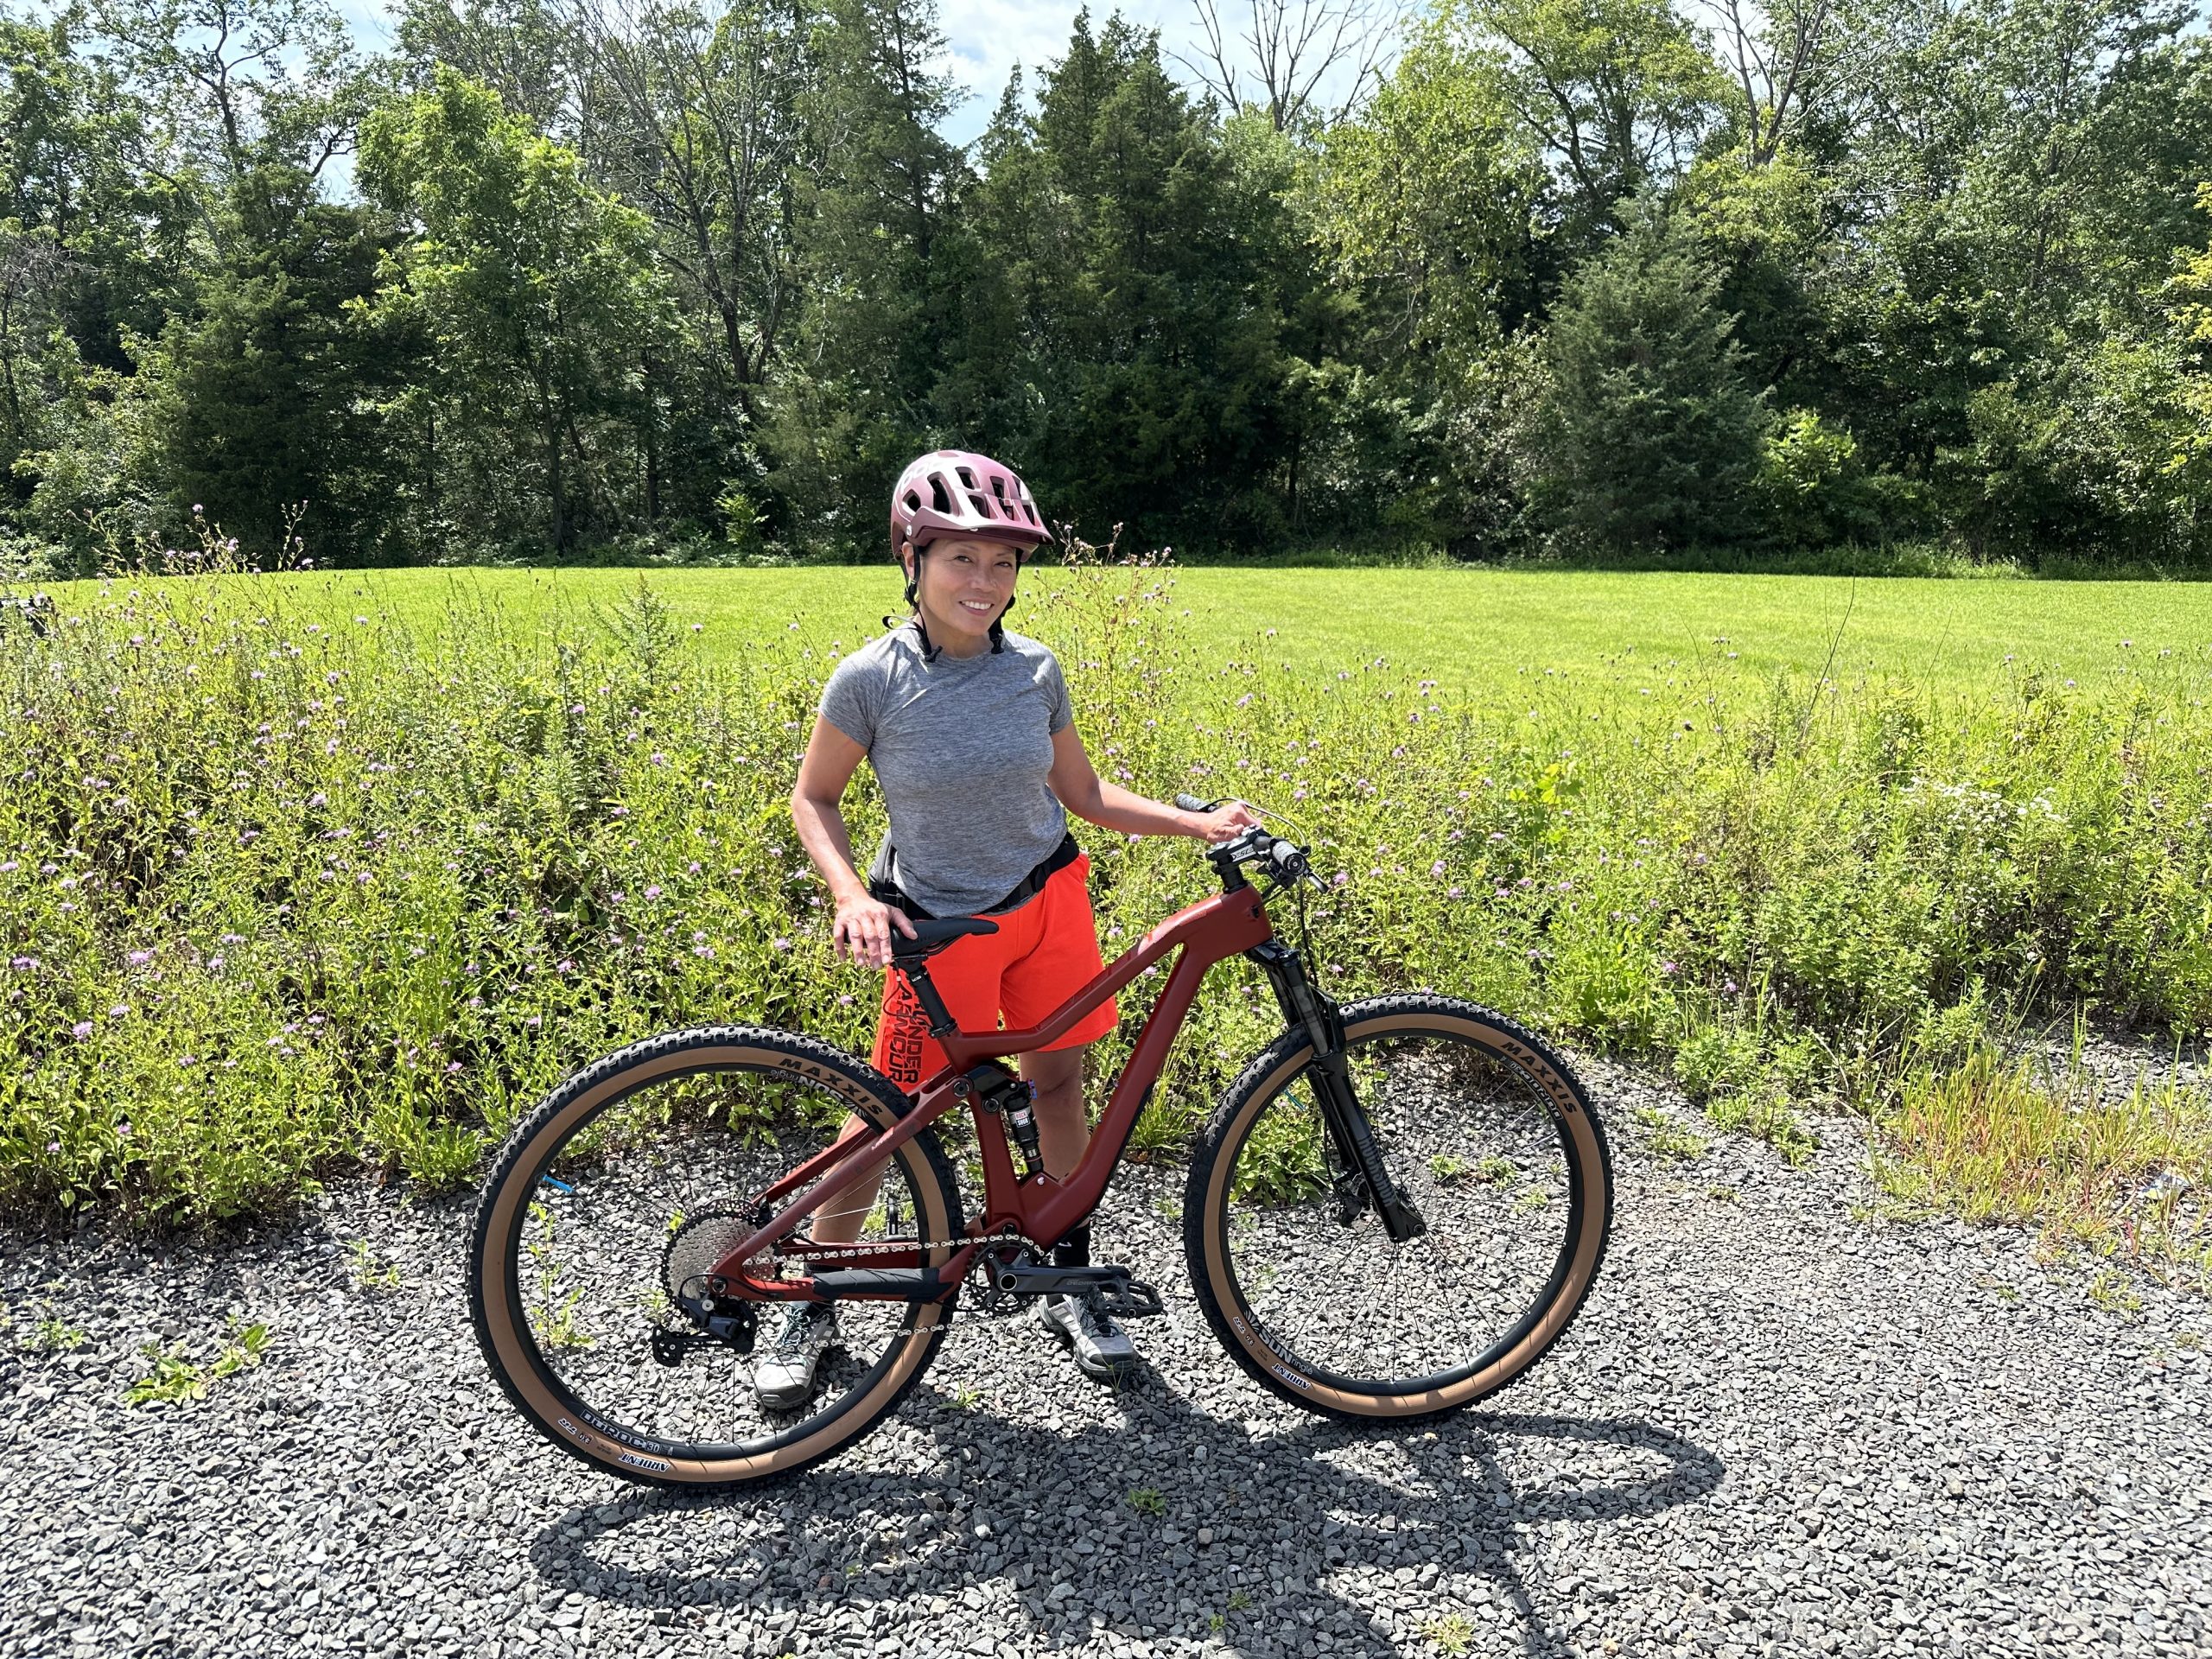
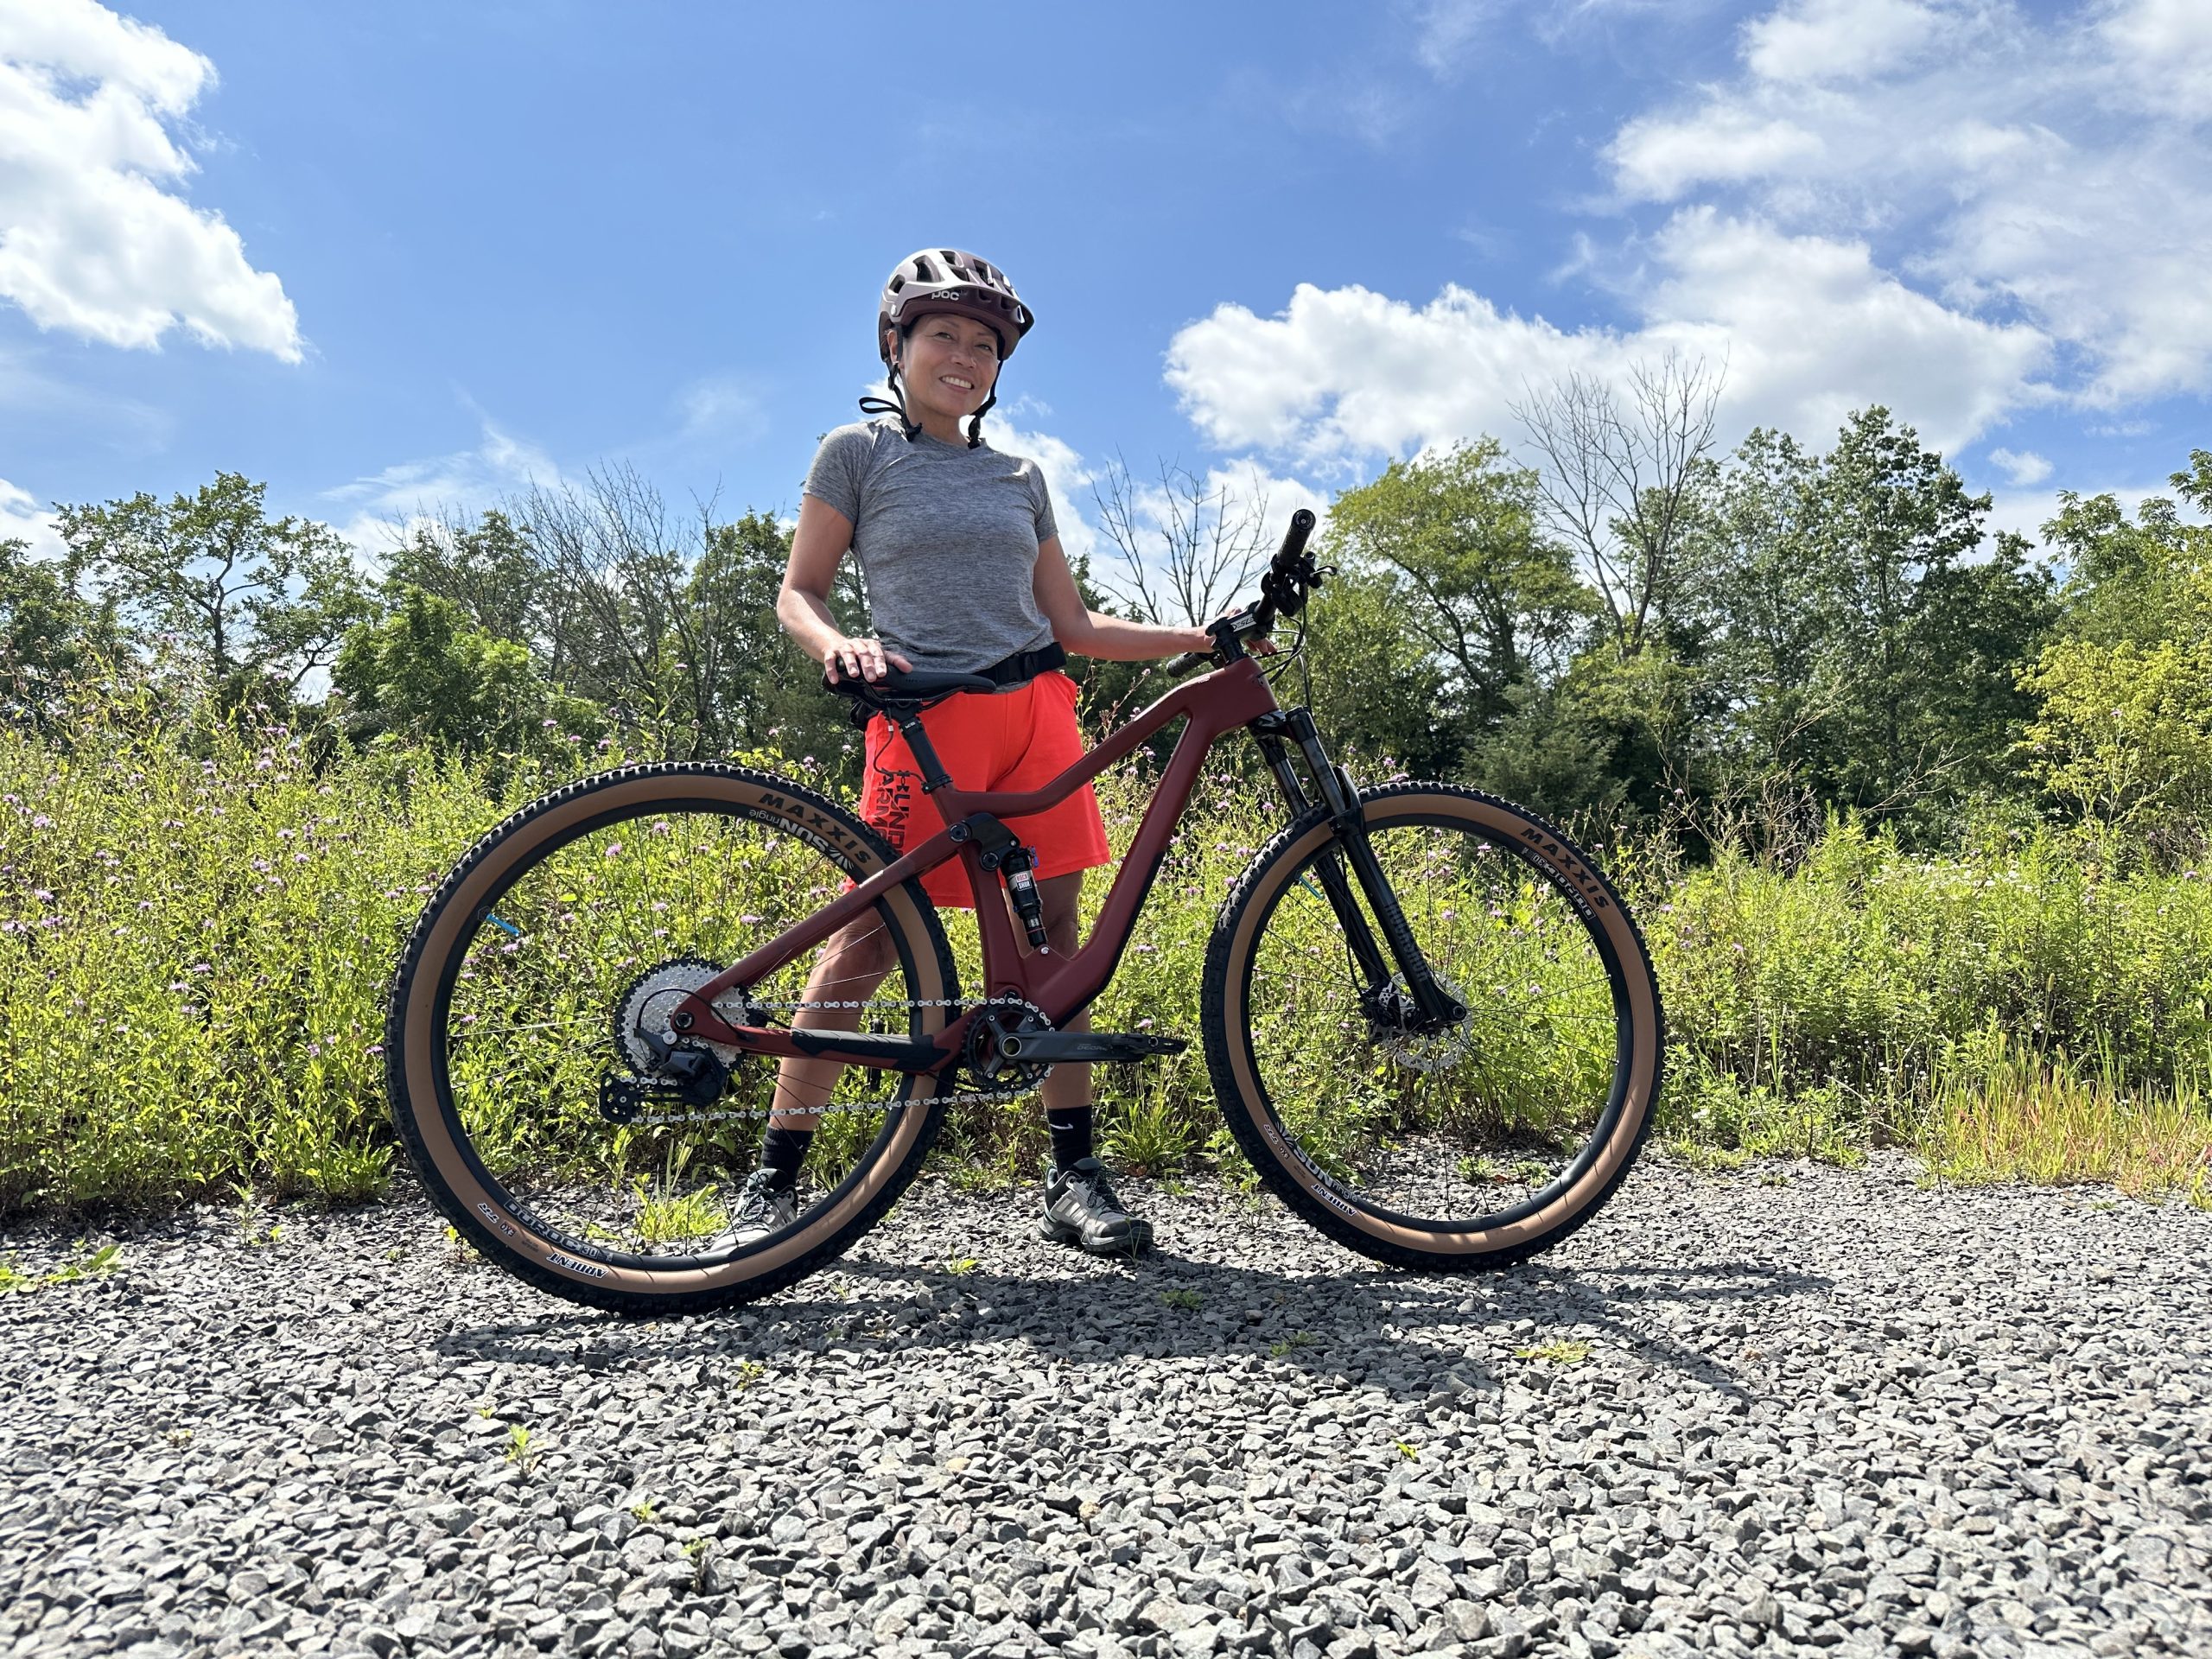
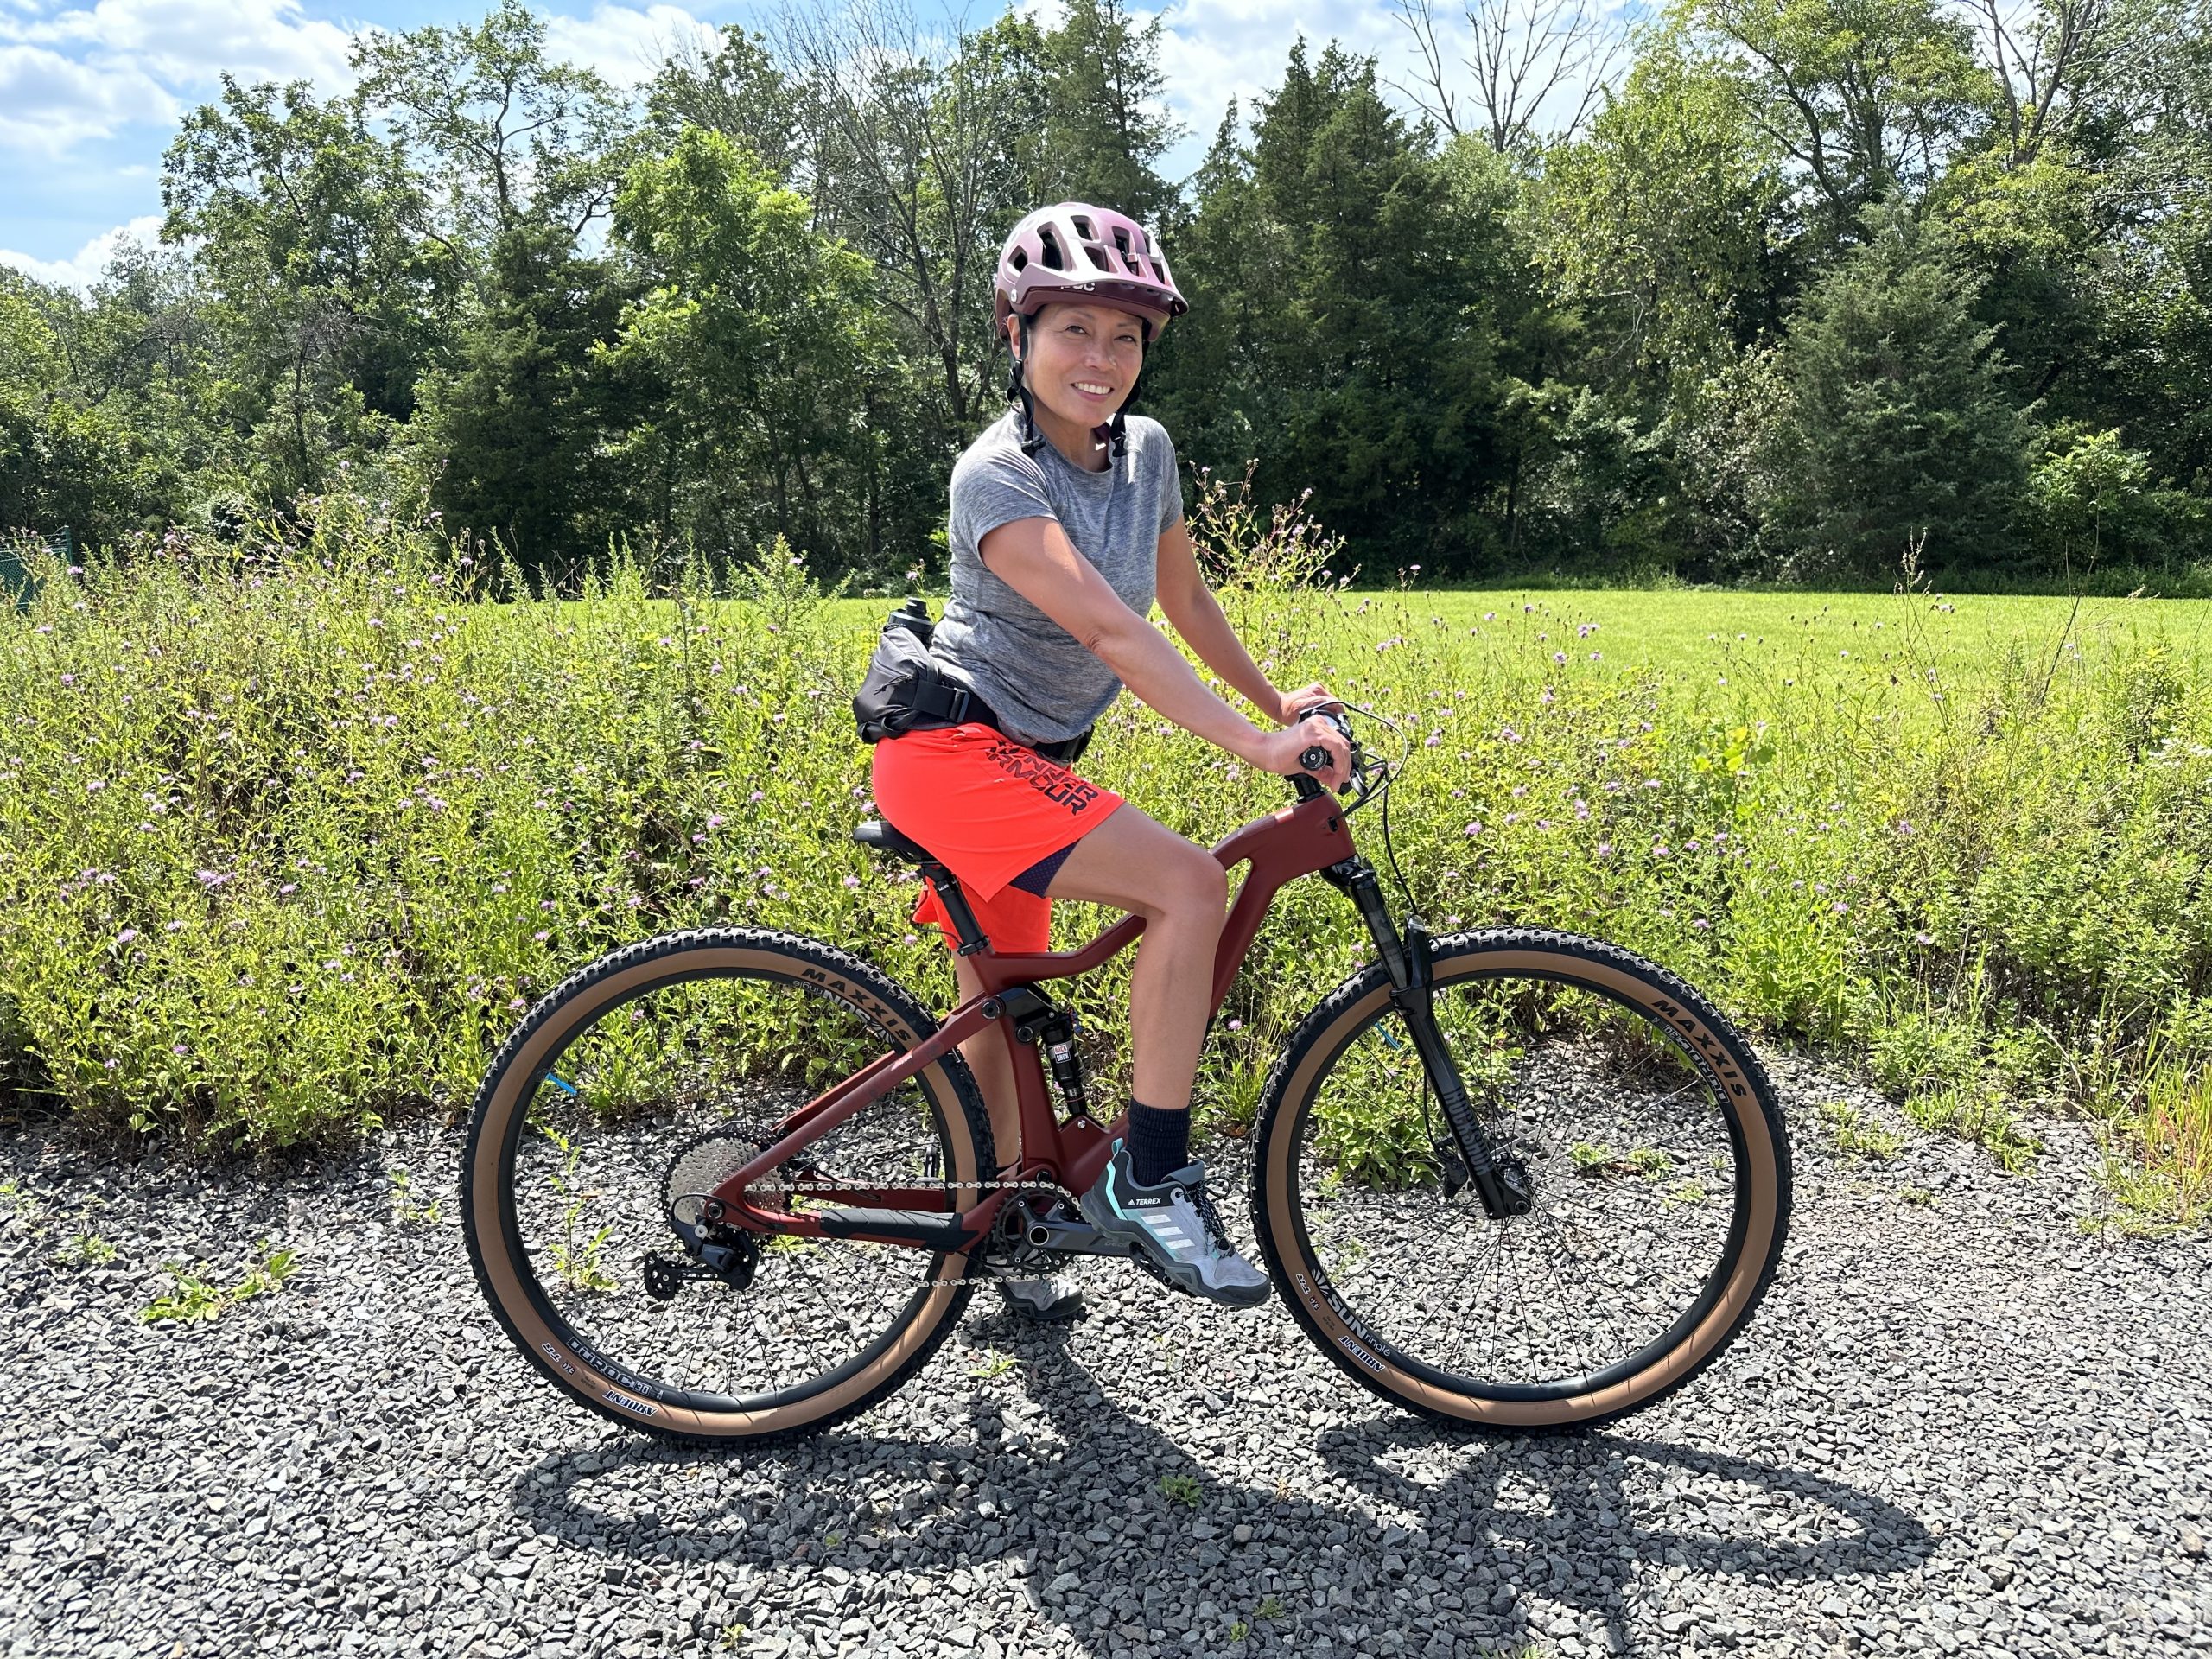
And of course the happy young lady on the bike’s debut outing (the matching helmet was a total coincidence):
Post ride condition. It’ll never be as clean as it was before the first ride.
Wrap It Up!
To be clear, the bike has only seen one 5-mile outing at the time of this write-up and it was ridden by a person who had never ridden a mountain bike or had been on a trail before. With that said, from what I saw, while we were out there, it performed perfectly. I did take the bike for a rip on and off the trail but it’s very hard for me to give any sort of feedback for a couple of reasons. First, I am way too tall for the bike so it felt really sketchy to ride. And second, I weigh about 70 pounds (31.5 Kilos) more than my wife so the suspension didn’t respond the way it should. I can tell you that mechanically, it did great. It shifted great and did what it was supposed to do. Perpahs that speaks more about the mechanic who built the bike than it does the bike itself but I don’t want to brag.
My wife is a beginner and as such, I don’t see this frame or bike being put through its paces beyond some easy trail riding a few times a year. I have yet to see my 13-year-old daughter on the bike so maybe she can give it hell one of these days.
Overall, as mentioned previously, the build was very straightforward with only minor hiccups, most notably the stripped bolt. After the first ride, I went back and checked the bolts to make sure none had loosened up and so far the Locktite is holding well. The one thing that I did have to do after the ride was to remove that grommet I mentioned earlier and redo the rear brake and shifter lines. That grommet had done quite a bit of damage in a short time so after replacing the grommet with a 3D printed version, it was important to me to flip the lines around to hide the rough spots in the frame.
Will I build another Chinese frame bike? Sure, why not? We aren’t bombing downhill parks worrying about snapping frames and as long as these Chinese manufacturers continue to offer good frames at extremely low costs, I will continue to search AliExpress first before I consider buying a complete bike. I think it’s important to note that I really enjoy sourcing the parts and building these bikes – it’s why I didn’t hesitate to build my buddy Jason’s enduro and why I am willing to maintain his bike when needed. Ever since I was a kid I have been taking bikes apart, stripping down the frames, painting them, cleaning them, and reassembling them for myself and my friends. This is just me being a 50-year-old kid but with more expensive and much cooler bikes.
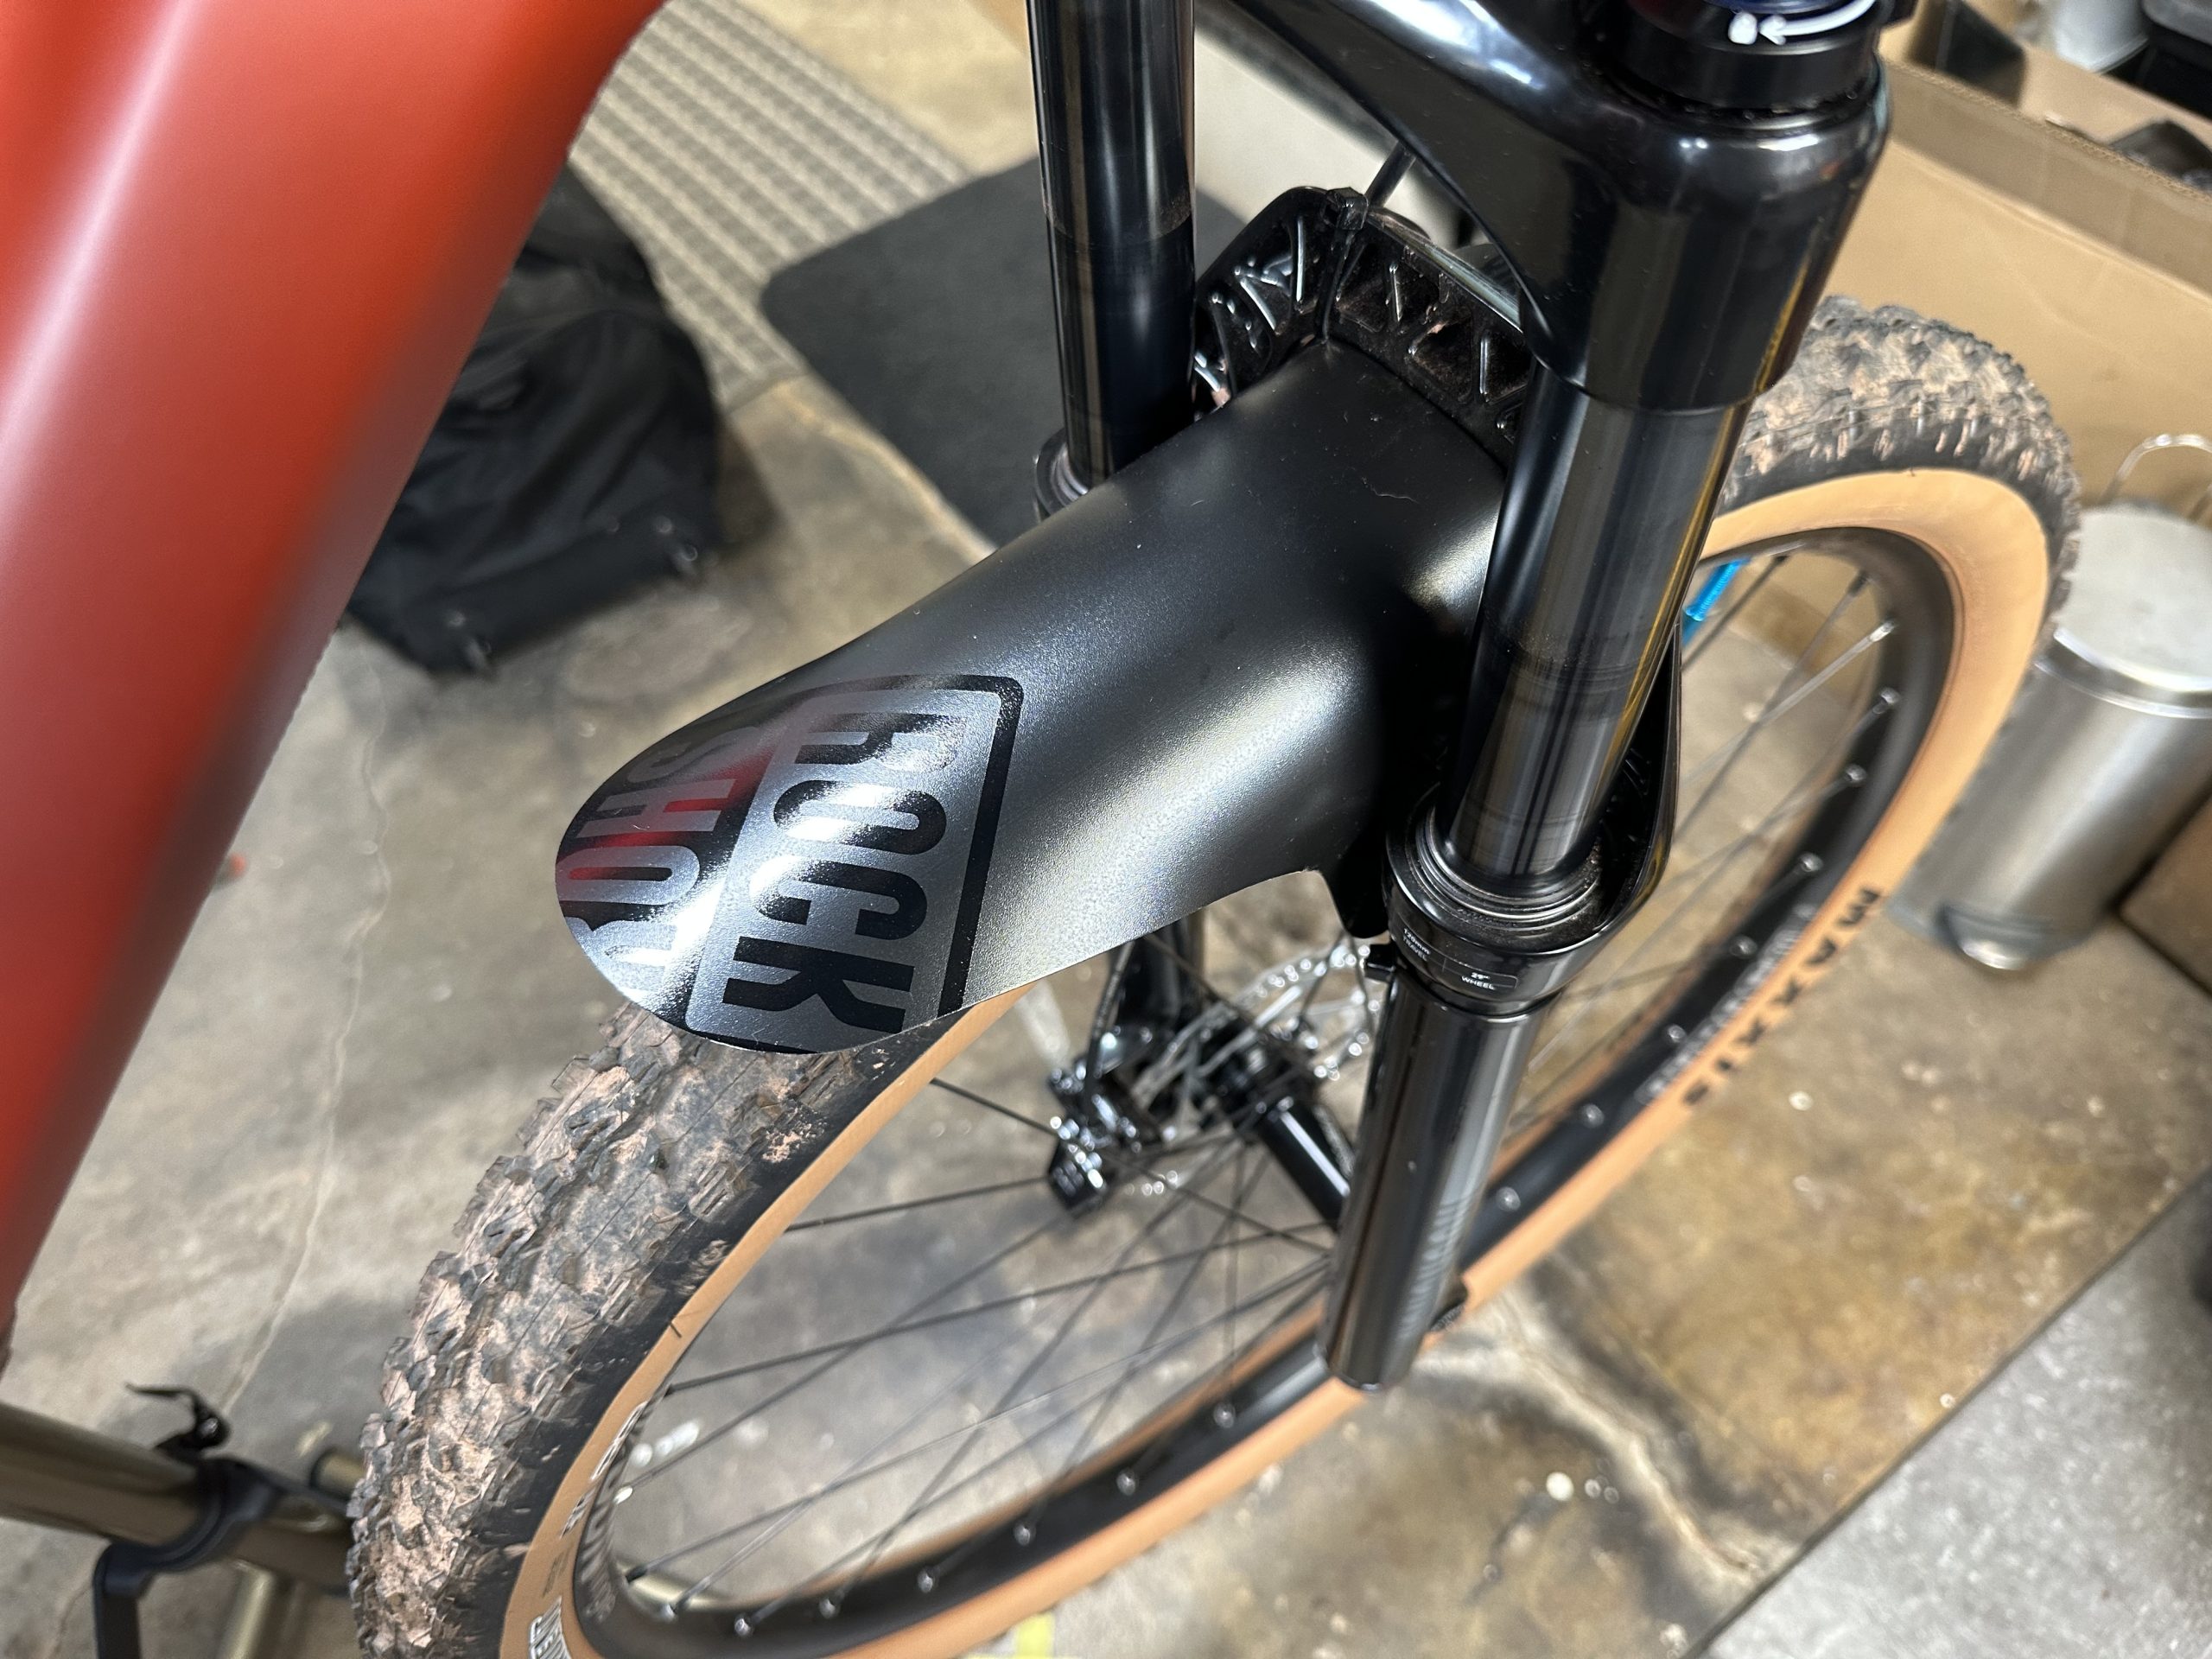
Updated: 8/25/23 – I added two new pieces to finish up the build. I looked around for an interesting fender, one with a pop of color to start adding some sort of contrast to the black and maroon but in the end, I went with a RockShox fender. Boring, I know.
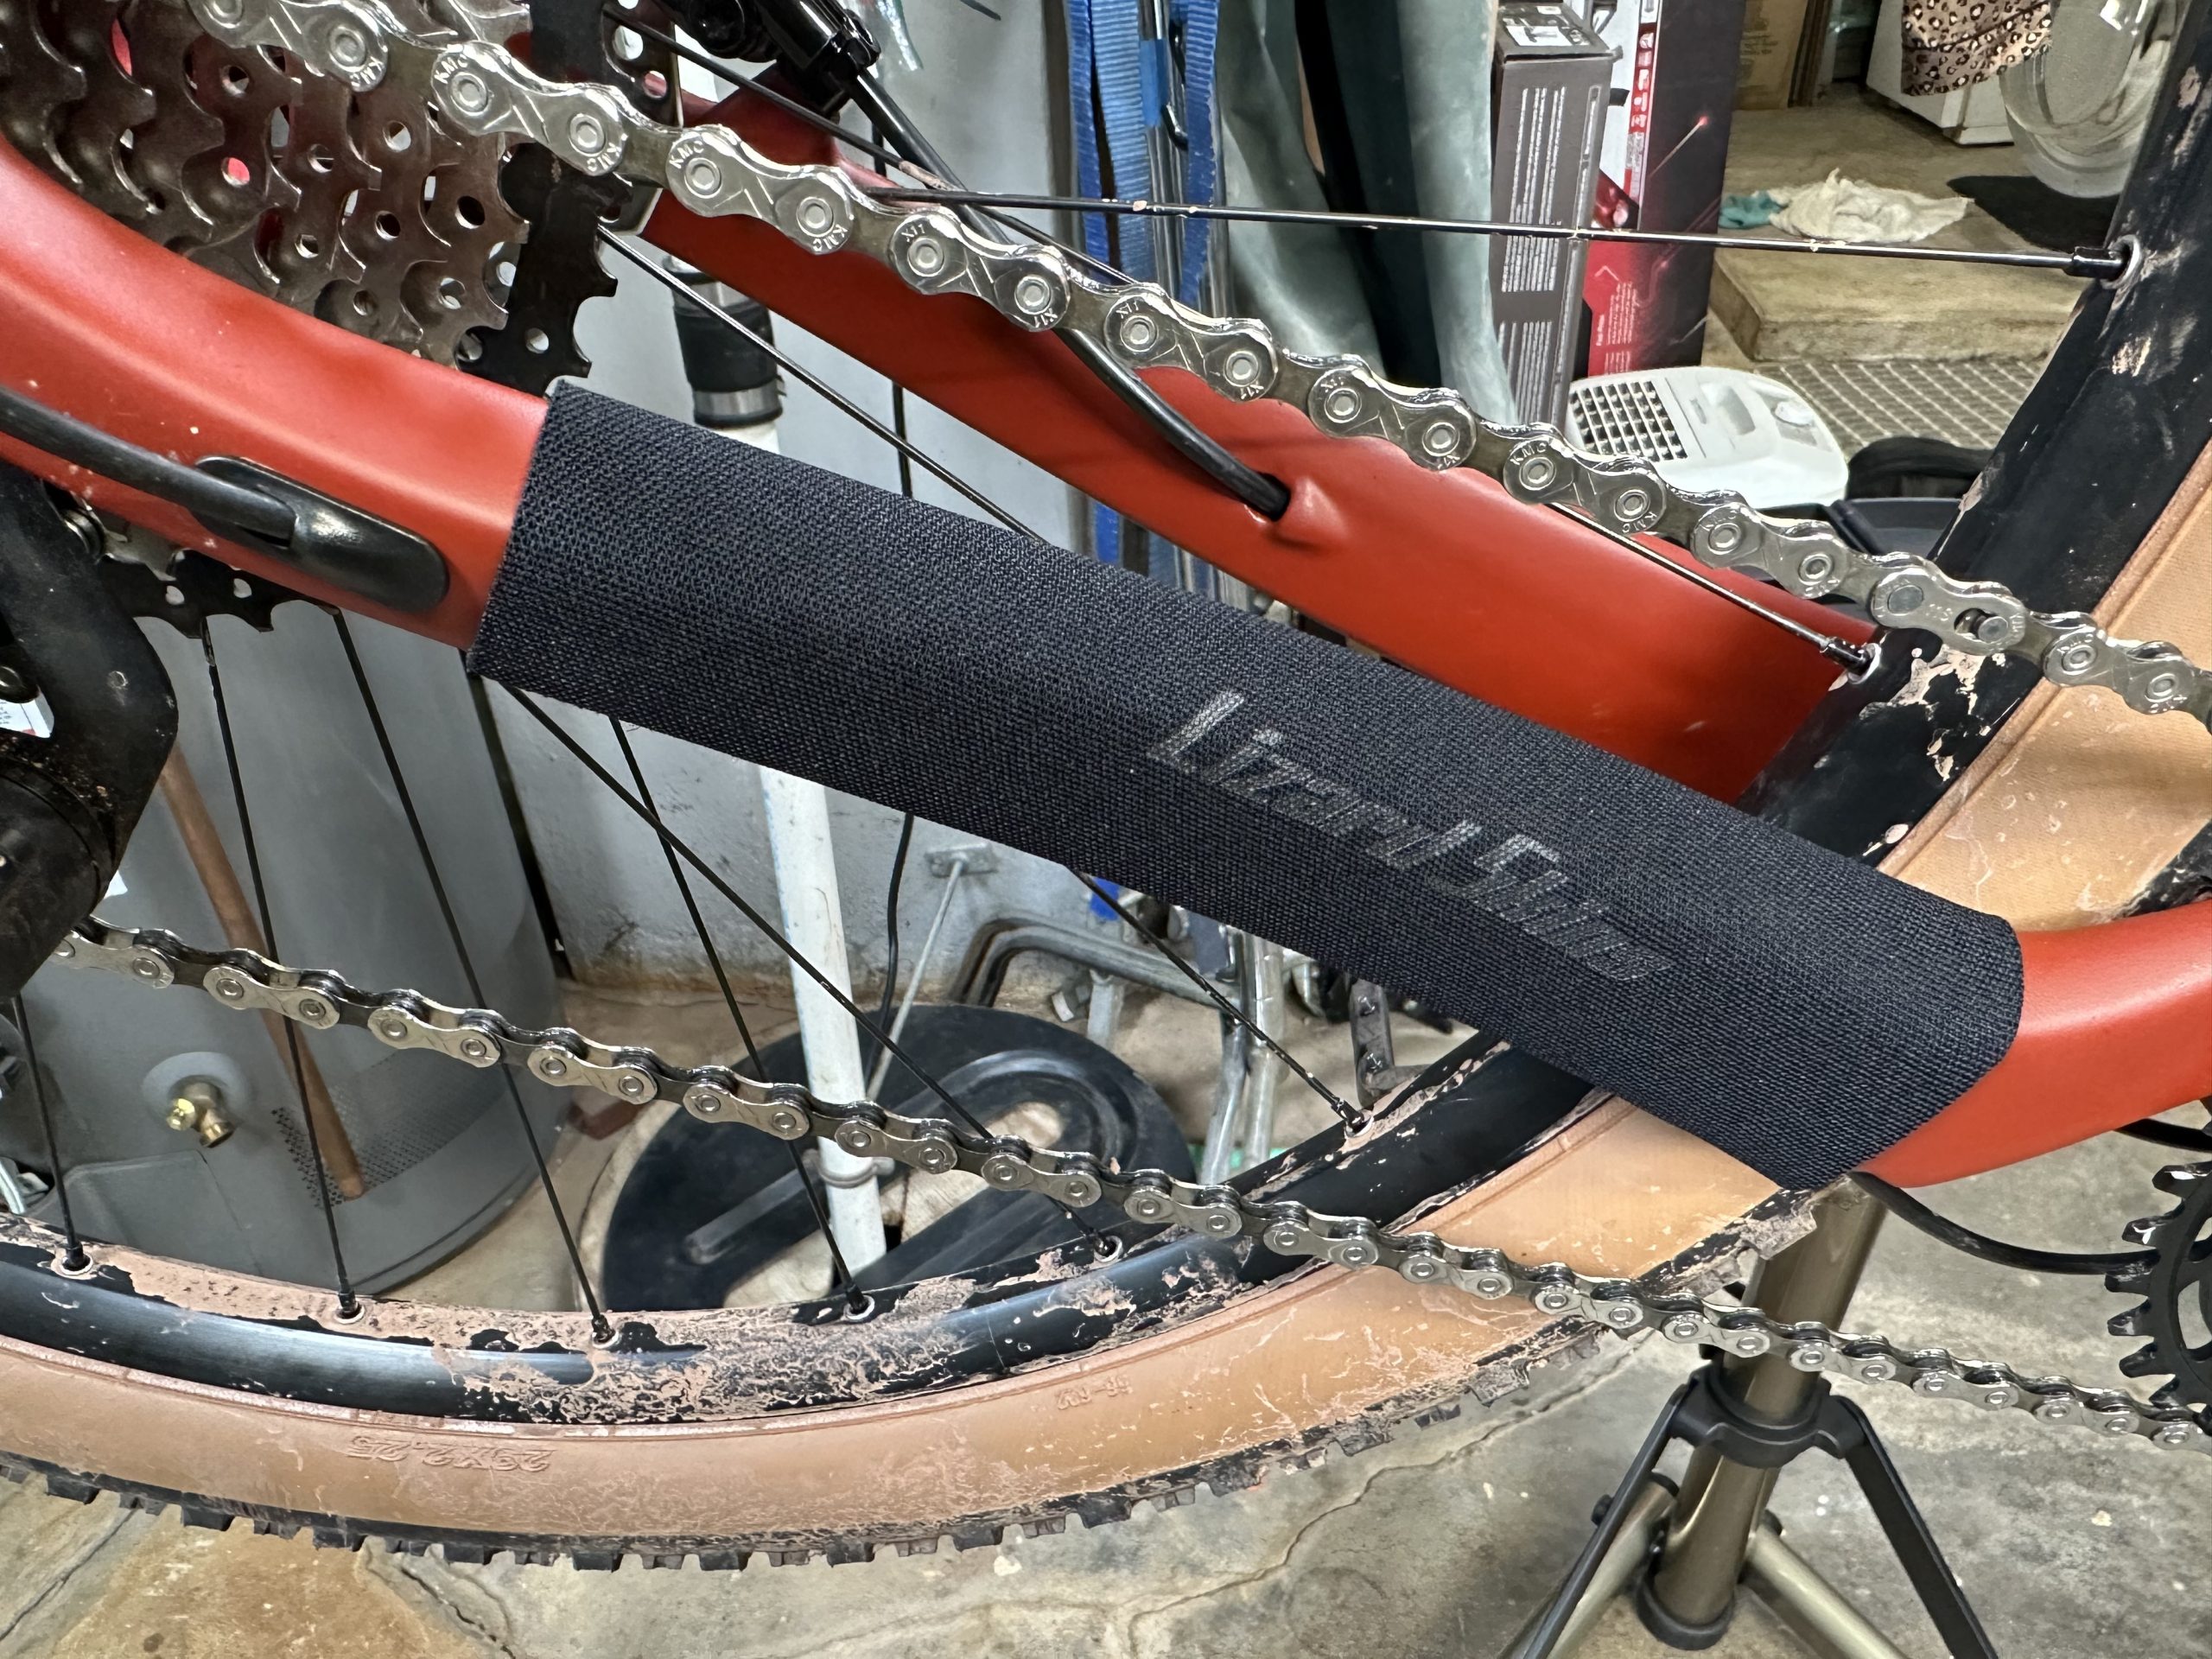
More importantly, however, I replaced that not-so-great chainstay protector that came with the frame with a Lizard Skin neoprene wrap. I wish it was a little bit thicker but I think it’ll do the job. I had asked the Amazon community if the length could be cut down since it was about 1.5 inches too long and I received three or four replies indicating that it could be cut, so I went for it. I think it fits and looks pretty good.